Linux Container (LXC) on Proxmox
Here is a quick guide to setting up a Linux Container (LXC) on Proxmox. I've opted for Ubuntu 22.04 LTS for this guide given it's a bit older but supported by a lot of software. You can use another OS if you desire, but for this quick guide, we'll stick with Ubuntu.
Introduction
Linux Containers (LXC) are lightweight, portable, and efficient. They are a great way to run multiple isolated Linux systems on a single host. LXC is a containerization technology that allows you to run multiple Linux systems on a single host. It is similar to virtualization, but it is more lightweight and efficient. LXC containers share the host's kernel and are isolated from each other. This makes them faster and more efficient than virtual machines.
Step 1. Download the Ubuntu 22.04 LTS Template
-
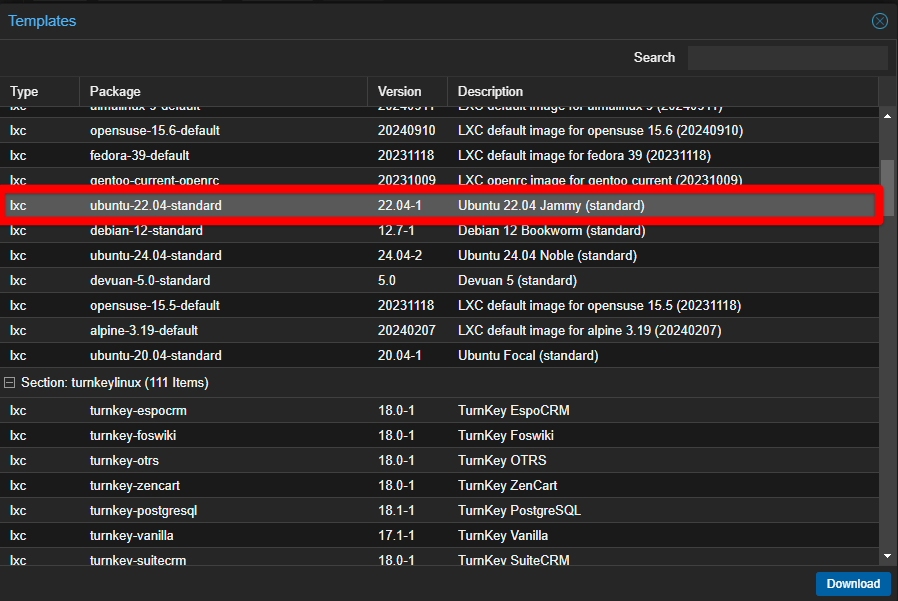
In Proxmox, navigate to the Datacenter view.
-
Click on Templates in the left-hand menu.
-
Select the template - Choose the template you want to use. In this case, we'll use Ubuntu 22.04 LTS. Click Download to download the template.
-
Configure the container - Set the hostname, root password, and other settings as needed.
The following settings may seems very specific - for example why I add a number after the host name. They are specific but not necessary. I use them to give me a quick reference to the container's IP address. Have a look at my guide on Creating a Proxmox VM for a description of how I name and label my VMs and containers.
Step 2. Set Up the LXC Container
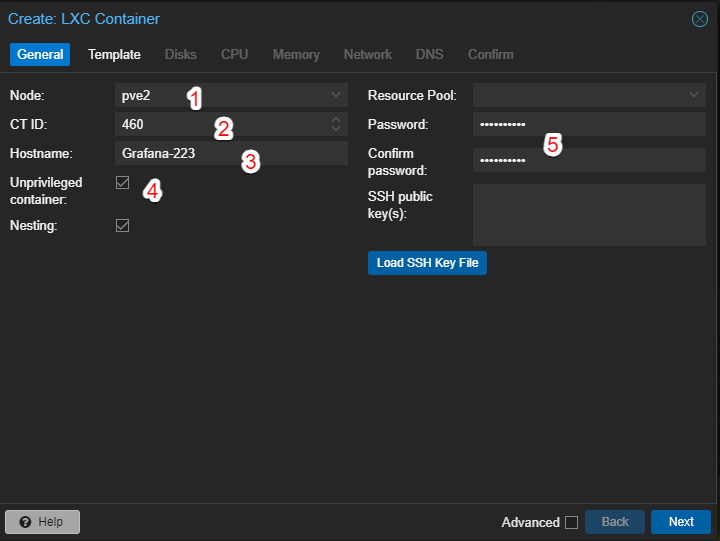
In the Proxmox web interface under Datacenter view, click on Create CT to create a new container. You'll see a pop-up window like the image above. I've listed the items I've changed and explained them below.
-
PVE Node - Choose the node you want to create the container on. You may only have a single node. No Problem. That's the only option for you!
-
CT ID - This is the ID of the container. It must be unique on the node. I have a scheme to identify types of containers or VMs. See the note above for more information.
-
Hostname - This is the hostname of the container. I've added a number to the end of the hostname to give me a quick reference to the container's IP address.
-
Unprivileged container - Keep this checked. I note it here becuase there may be instances where you want to run a privileged container. For example
tipUse privileged containers when you need direct access to system resources, devices, or kernel features that require elevated permissions, such as hardware passthrough or low-level system administration tasks. Avoid privileged containers in most scenarios, especially for web apps, databases, or services that don't require root privileges, as it increases security risks by reducing isolation between the container and host.
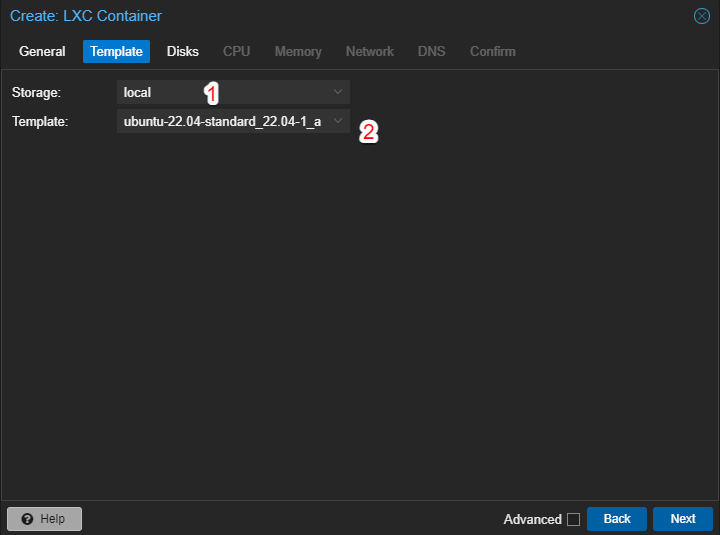
Click Next to continue. The next Tab is the Template tab.
-
Storage - Choose the storage location for the container. You'll likely only have one storage location. But if you have others, choose the one you want to use.
-
Template - Choose the template you downloaded in Step 1. In this case, we're using Ubuntu 22.04 LTS.
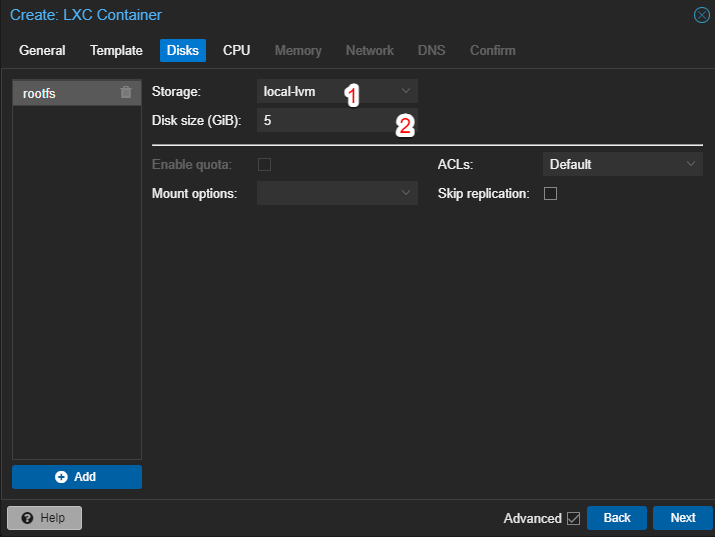
Click Next to continue. The next Tab is the Disk tab.
-
Storage - I don't have any added disks on that I want to use for this container so I am given a singular option.
-
Disk size (GB) - Set the size of the disk for the container. I've set mine to 5GB.
Click Next to continue. The next Tab is the CPU tab.

- Cores - Set the number of cores for the container. I've set mine to 2.
Click Next to continue. The next Tab is the Memory tab.
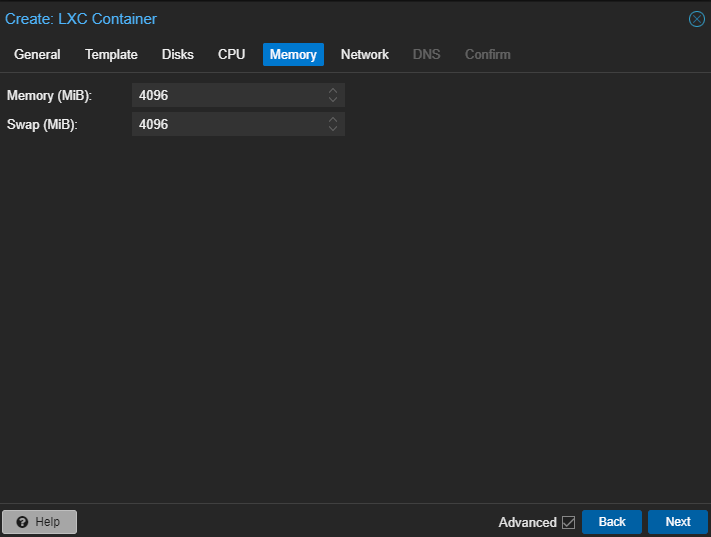
- Memory (MB) - Set the amount of memory for the container. I've set mine to 4096MB.
-
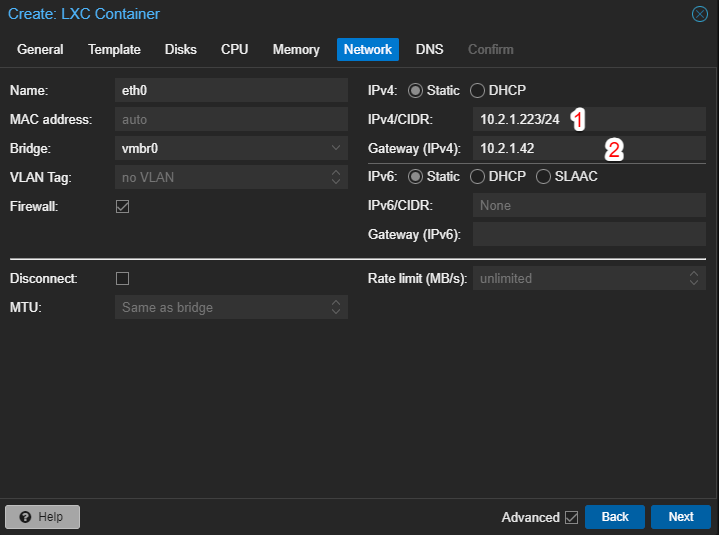
Network - Set the network settings for the container.
-
Bridge - Choose the bridge you want to use. I've chosen the default bridge.
-
IP Address - Set the IP address for the container. This will look different depending on your network setup and what IP is being used for your network gateway. When I set mine up I used a class B network and set the gatewya address on my Unifi Dream Machine Pro to 10.2.1.42 on a subnet of 10.2.1.0. I reserved the first few addresses in the range, so I can use addresses from 10.2.1.6 through 10.2.1.254. If you are assigning static IPs to all your Proxmox containers and don't have a DHCP server running, you need to ensure you aren't assigning the same IP to multiple containers.
Click Next to continue. You can skip the DNS tab as it's not necessary for this setup. Then click next to continue to the confirmation tab and, if all looks well, click Finish to create the container.
Your cotainer should spin up with Ubuntu 22.04 LTS installed. You can access it via the Proxmox web interface or via SSH.
Step 3. Access the Container via SSH
While it certainly is possible to access the container via the Proxmox web interface, I prefer to use SSH. This will allow you to copy and paste. Yes, you'll certainly want that when your are walking through docs with a long list of complex commands.
-
If you didn't check the box to "start the container after creation" you'll need to start it now.
-
Open a terminal and do a quick
pingto the IP address of the container to ensure it's up and running.ping 10.2.1.223If all is well, you should see a response from the container. If not it will say something like "Destination Host Unreachable" or "Request Timed Out".
-
SSH into the container.
ssh root@10.2.1.223You'll be prompted for the password you set during the container creation process.
If you aren't able to SSH into the container, you may need to check the SSH configuration file on the container to ensure that SSH passwords are allowed. You can find it at /etc/ssh/sshd_config. Review my guide on Enabling SSH on a Proxmox LXC for more information.
And that's it! You've set up a Linux Container (LXC) on Proxmox. You can now install any software you need on the container and start using it for your projects.
Post Installation Steps
It's usually a good idea to update the system after installation since the LXC template may be a bit out of date.
apt update && apt upgrade -y
You can also install any software you need for your project. For example, if you are setting up a web server, you may want to install Nginx or Apache. The world is your oyster!
Conclusion
Linux Containers (LXC) are a great way to run multiple isolated Linux systems on a single host. They are lightweight, portable, and efficient. In this guide, we've covered how to set up a Linux Container (LXC) on Proxmox. I hope you found this guide helpful. If you have any questions or feedback, please let me know.
Happy containerizing! 🐳 (yes I know that is a whale emoji, but it's close enough to a container for me!)