Proxmox Cluster
If that was your first install of Proxmox, congrats! Your journey is just beginning and there are endless opportunities for creating projects and labs and production apps and more. If you have node already functioning and are looking to add a secondary node, then follow me.
Steps to Create a Cluster and Add a Node
-
Log into your main Proxmox server and then click on Datacenter
-
In the menu Datacenter menu, click Cluster
-
Now, in the Cluster menu, click Create Cluster and give your Cluster a Name and choose the network. I'll call mine
BG-Laband Link it to the network I created when I installed my original PVE -10.2.1.101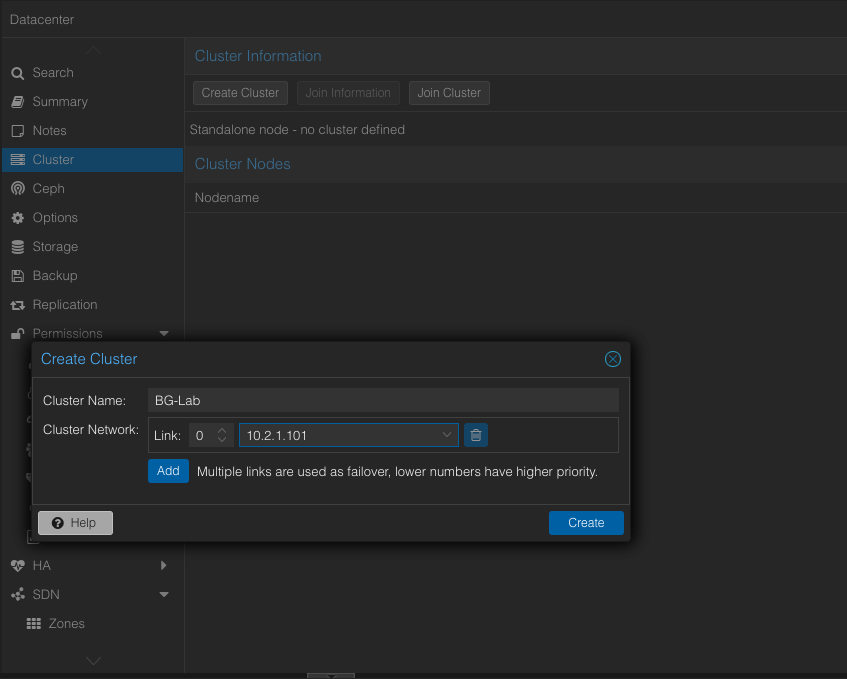
-
Let the process run and wait for the "TASK OK" message
-
Close the window and then click on Join information in the top of the Cluster info window
-
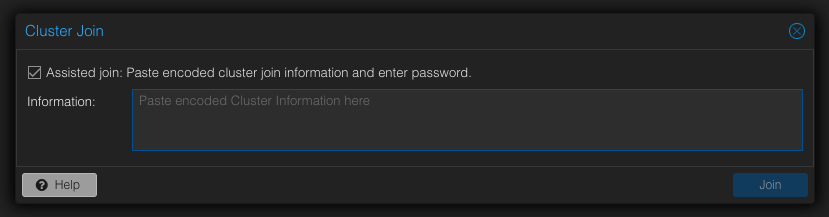
In the Cluster Join Information window you'll see three items: IP Address, Fingerprint and Join Information. Copy the long string in the Join Information field by clicking the Copy Information button. Navigate to the Proxmox server you want to join to the newly created cluster and click Datacenter > Cluster > Join Cluster. You'll see a popup where you can paste the info copied from the main machine where the cluster was created:
-
Navigate to the Proxmox server you want to join to the newly created cluster and click Datacenter > Cluster > Join Cluster. You'll see a popup where you can paste the info copied from the main machine where the cluster was created:
-
Where it says Paste encoded Cluster Information here ... do as it says. You will see a few new fields pop up: Information, Peer Address, Password, Fingerprint, Cluster Network and peer's link address
-
The only bit of info you'll need to enter here is your password. Enter it and then click to Join
-
Now navigate back to your original Proxmox sever and you should see a second node:
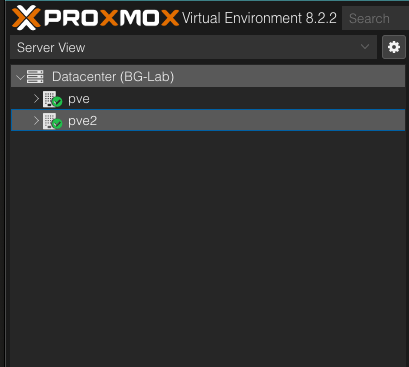
That's it. You now have a Cluster with more than one Proxmox node.