Track Crypto Profit/Loss with Grafana, InfluxDB, and Bitstamp API
Introduction
This is a rough draft of a guide I'm working on to track my crypto portfolio using Grafana, InfluxDB, and the Bitstamp API. I'm using this as a learning experience to get more familiar with Grafana and InfluxDB. I'm also using this as an opportunity to learn more about Python and interacting with APIs. I'll be using the Bitstamp API to pull real-time data for the cryptocurrency pairs I'm interested in tracking.
Future Plans
This guide will be overhauled and streamlined to ensure it is easily reproducible. In its current state, it serves largely as my electronic memory for what was built. The next version of this guide will retain the Bitstamp API as the source for websockets real-time data, but will shift to using the CoinGecko API for historical data. This will allow for the additional tracking of a few coins that are not available on Bitstamp.
In addition to supporting more coins via the CoinGecko API I will build functionality that will allow users to add or remove coins without needing to modify the code.
Prerequisites
- A Proxmox server running Ubuntu with Docker installed - This will be used to host our python script to pull data from the Bitstamp API.
- A rudimentary understanding of Python - I, myself, am not a Python developer. I've written a few scripts here and there, but I'm by no means an expert. I've also never used Python to interact with a Websocket API. This will be a learning experience for me as well. The documentation coupled with GPT have worked well to get a basic websocket event listener up and running.
- Basic knowledge of Grafana - We'll be using Grafana to visualize our data. If you're not familiar with Grafana, don't worry. I'll walk you through the basics.
- Basic knowledge of InfluxDB - We'll be using InfluxDB to store our data. If you're not familiar with InfluxDB, don't worry. I'll walk you through the basics.
Overview of What We'll Cover
Here's a quick overview of what we'll cover in this guide:
- Setting up a Python script to pull data from the Bitstamp API
- Storing the data in InfluxDB
- Creating a Grafana dashboard to visualize the data
Connect to the Bitstamp API
The first step is to connect to the Bitstamp API and pull data for the cryptocurrency pairs we want to track. We'll use the Bitstamp Websocket API to get real-time data for the selected currency pairs.
This python script will be completely revamped in a later step. This script simply spits out trades as they happen, printing them to the console. We'll be updating this script to store the data in InfluxDB with additional data and backfilling historical data with the HTTP API.
Setting up the Python Script
First, we need to set up a Python script to pull data from the Bitstamp API. We'll use the websockets library to interact with the Bitstamp Websocket API. Take a look at the Bitstamp Websockets API documentation here.
import asyncio
import websockets
import json


CURRENCY_PAIRS = ["btcusd",
                  "xrpusd", "xlmusd", "hbarusd", "vetusd", "csprusd"]
# Bitstamp websocket API URL
WS_URL = "wss://ws.bitstamp.net"

# Store latest price
latest_price = {}


async def process_message(message):
    """
    Process a Websocket message and update the latest price
    """
    global latest_price

    message_data = json.loads(message)
    event = message_data.get("event")
    data = message_data.get("data")

    if event == "trade":
        currency_pair = message_data["channel"].split("_")[2]
        price = float(data["price"])

        # Update in memory latest price
        latest_price[currency_pair] = price

        print(f"[{currency_pair}] Spot Price: = {price} USD")


async def subscribe_to_pairs(websocket, pairs):
    """
    Subscribe to the 'live_trades' channel for each currency pair
    """
    for pair in pairs:
        subscription_message = {
            "event": "bts:subscribe",
            "data": {
                "channel": f"live_trades_{pair}"
            }
        }
        await websocket.send(json.dumps(subscription_message))
        print(f"Subscribed to live_trades_{pair} channel")


async def main():
    """
    Main Websocket connection handler for subscribing to Bitstamp API currency pairs and processing messages
    """
    async with websockets.connect(WS_URL) as websocket:
        # Subscribe to currency pairs
        await subscribe_to_pairs(websocket, CURRENCY_PAIRS)

        # Listen to Websocket messages continuously
        while True:
            message = await websocket.recv()
            await process_message(message)

if __name__ == "__main__":
    asyncio.run(main())
Explanation of the Python Script
- We import the necessary libraries -
asyncio,websockets, andjson. - We define the currency pairs we want to track. You can add or remove currency pairs as needed. There is a list of published currency pairs on the Bitstamp API documentation. We also define the Bitstamp Websocket API URL.
- We define a global variable
latest_priceto store the latest price of each currency pair. - We define two asynchronous functions -
process_messageandsubscribe_to_pairs.process_messageprocesses the incoming Websocket message and updates the latest price for the corresponding currency pair.subscribe_to_pairssubscribes to thelive_tradeschannel for each currency pair.
- We define the main asynchronous function
mainthat handles the Websocket connection, subscribes to the currency pairs, and processes incoming messages. - Finally, we run the
mainfunction usingasyncio.run(main()).- asyncio is a library to write concurrent code using the async/await syntax. It allows you to write code that performs multiple tasks concurrently.
Influx DB Setup
Next, we need to store the data we receive from the Bitstamp API in InfluxDB. InfluxDB is a time-series database that is commonly used for storing and querying time-series data. Translation into no-nerd terms: it's a database that is optimized for storing data that changes over time ... sometime very quickly.
Preliminary Setup
First, we need to set up InfluxDB on our server. We'll use Docker to run InfluxDB in a container. This can be done in a variety of ways from using your local machine to a cloud provider. I'll be using a Docker container running on a Ubuntu VM on my Proxmox server.
I opted to install the InfluxDB instandce on my Proxmox server as it will allow the DB to run 24/7 and not be dependent on my local machine. This will allow me to access the data from anywhere and not have to worry about my local machine being on or off or avoiding upgrades that may require a reboot.
I may also work towards accessing the data through a proxy server to allow for remote access to the data so I can brag to my friends about how much money I'm making (or losing) in real-time.
These steps assume you've got all the prerequisites installed and are running a Ubuntu VM with Docker installed, or whatever your setup is, and you are ready to Install InfluxDB.
For Docker Installation on Ubuntu
The following are steps to install InfluxDB using Docker -- for some reason, possibly the version of Ubuntu I was working with or some other issue with my Dcoker setup, the container would not persist. You may not have this issue and can follow these steps. I have opted here instead to install the InfluxDB as a service directly on an Ubuntu Server VM. Follow the main steps below to install InfluxDB on via Linux using systemd.
Install InfluxDB
If you're running your Docker container remotely, the best method will be to SSH into your server so you can take full advantage of the 'ol copy and paste. In the case of using a Proxmox server, you can use the built-in console to access the terminal, but the copy and paste functionality is a bit wonky (non existant)
-
Make sure you've SSH'd into your host where you've installed Docker, then download the InfluxDB Docker image from the official InfluxDB docs.
-
With the image downloaded, we can now run the InfluxDB container. In this instance, we'll follow the official documentation and run the container with the following command which configures some setup options. These can be set up manually in the UI later, but I will do it in the CLI:
sudo docker run \
 --name influxdb2 \
 --publish 8086:8086 \
 --mount type=volume,source=influxdb2-data,target=/var/lib/influxdb2 \
 --mount type=volume,source=influxdb2-config,target=/etc/influxdb2 \
 --env DOCKER_INFLUXDB_INIT_MODE=setup \
 --env DOCKER_INFLUXDB_INIT_USERNAME=<enter_your_username> \
 --env DOCKER_INFLUXDB_INIT_PASSWORD=<enter_you_password> \
 --env DOCKER_INFLUXDB_INIT_ORG=<name_your_organization> \
 --env DOCKER_INFLUXDB_INIT_BUCKET=CRYPTO-TRACKER \
 influxdb:2
Make sure to replace <enter_your_username>, <enter_your_password>, and <name_your_organization> with your desired values. These will be used to set up the initial InfluxDB configuration.
-
Persist Data --> We want to ensure that our data is persisted even if the container is stopped or removed.
- In your SSH terminal run
sudo docker volume lsThis will check that the volumes were created. In the list you should see: -
influxdb2-data-influxdb2-config. -
Ensure cotainer starts on reboot - If you experience a power outage or need to reboot your server, you'll want to ensure that the InfluxDB container starts automatically. To do this, you can use the
--restartflag when running the container. Here's an example:sudo docker update --restart unless-stopped influxdb2Verify the restart policy:
sudo docker inspect influxdb2 | grep RestartPolicyYou should see the following output:
"RestartPolicy": {
// The rest is not shown using the grep command. Seeing the RestartPolicy is enough to know it's set. -
Once the container is running, you can access the InfluxDB UI by navigating to
http://<your-server-ip>:8086in your web browser. You'll be prompted to log in with the username and password you set up in the previous step.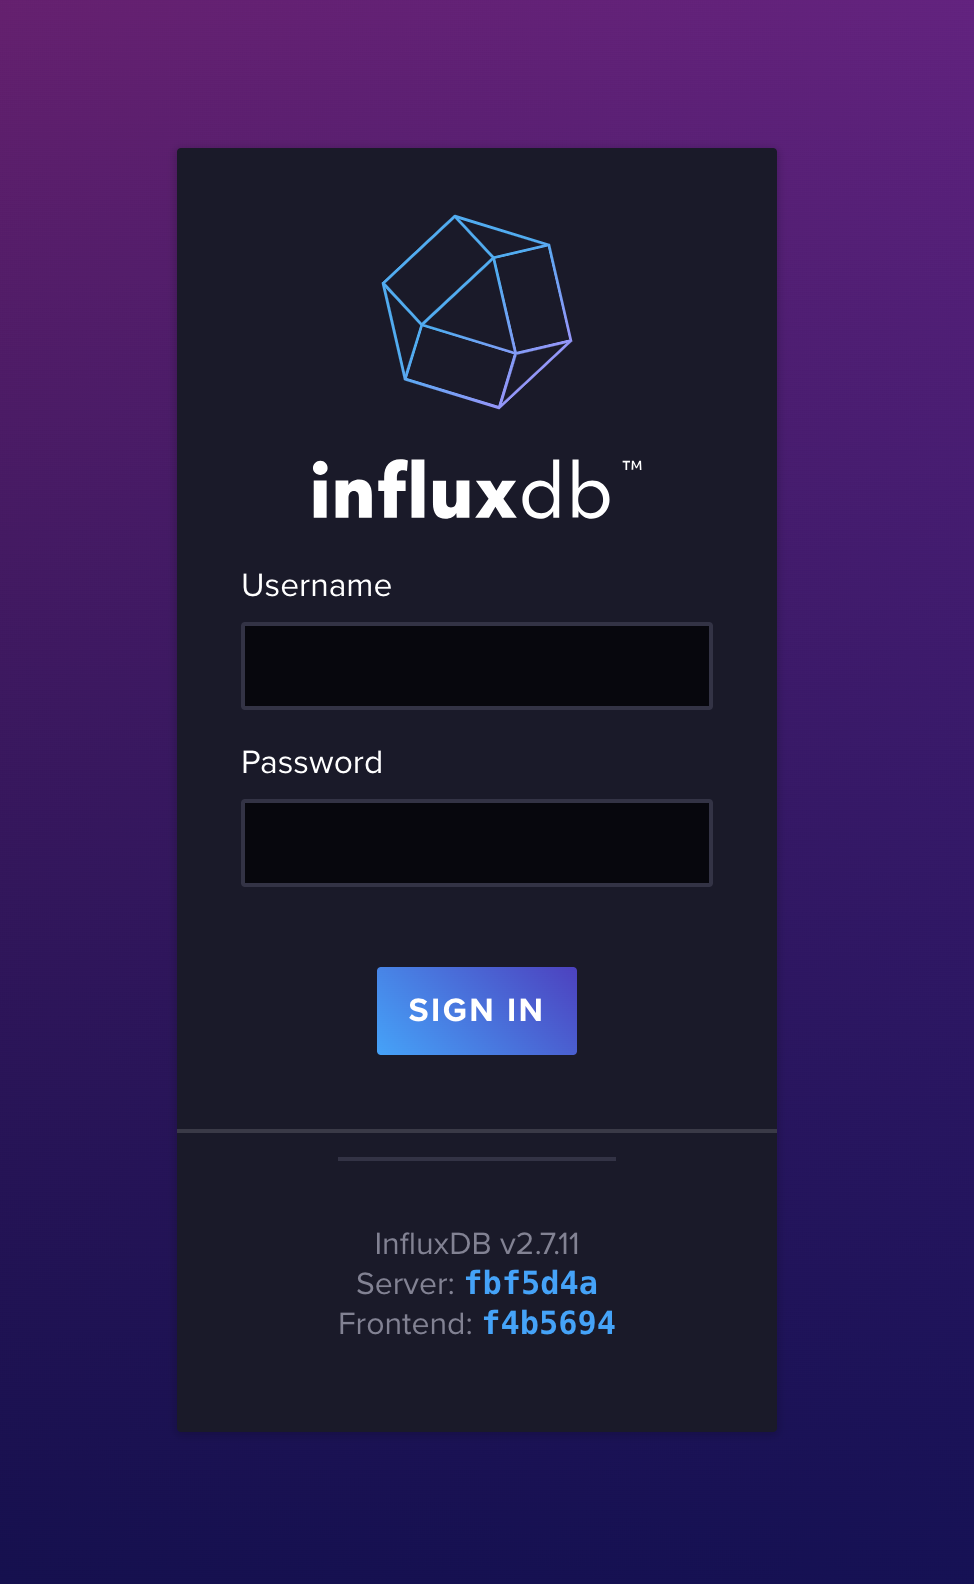
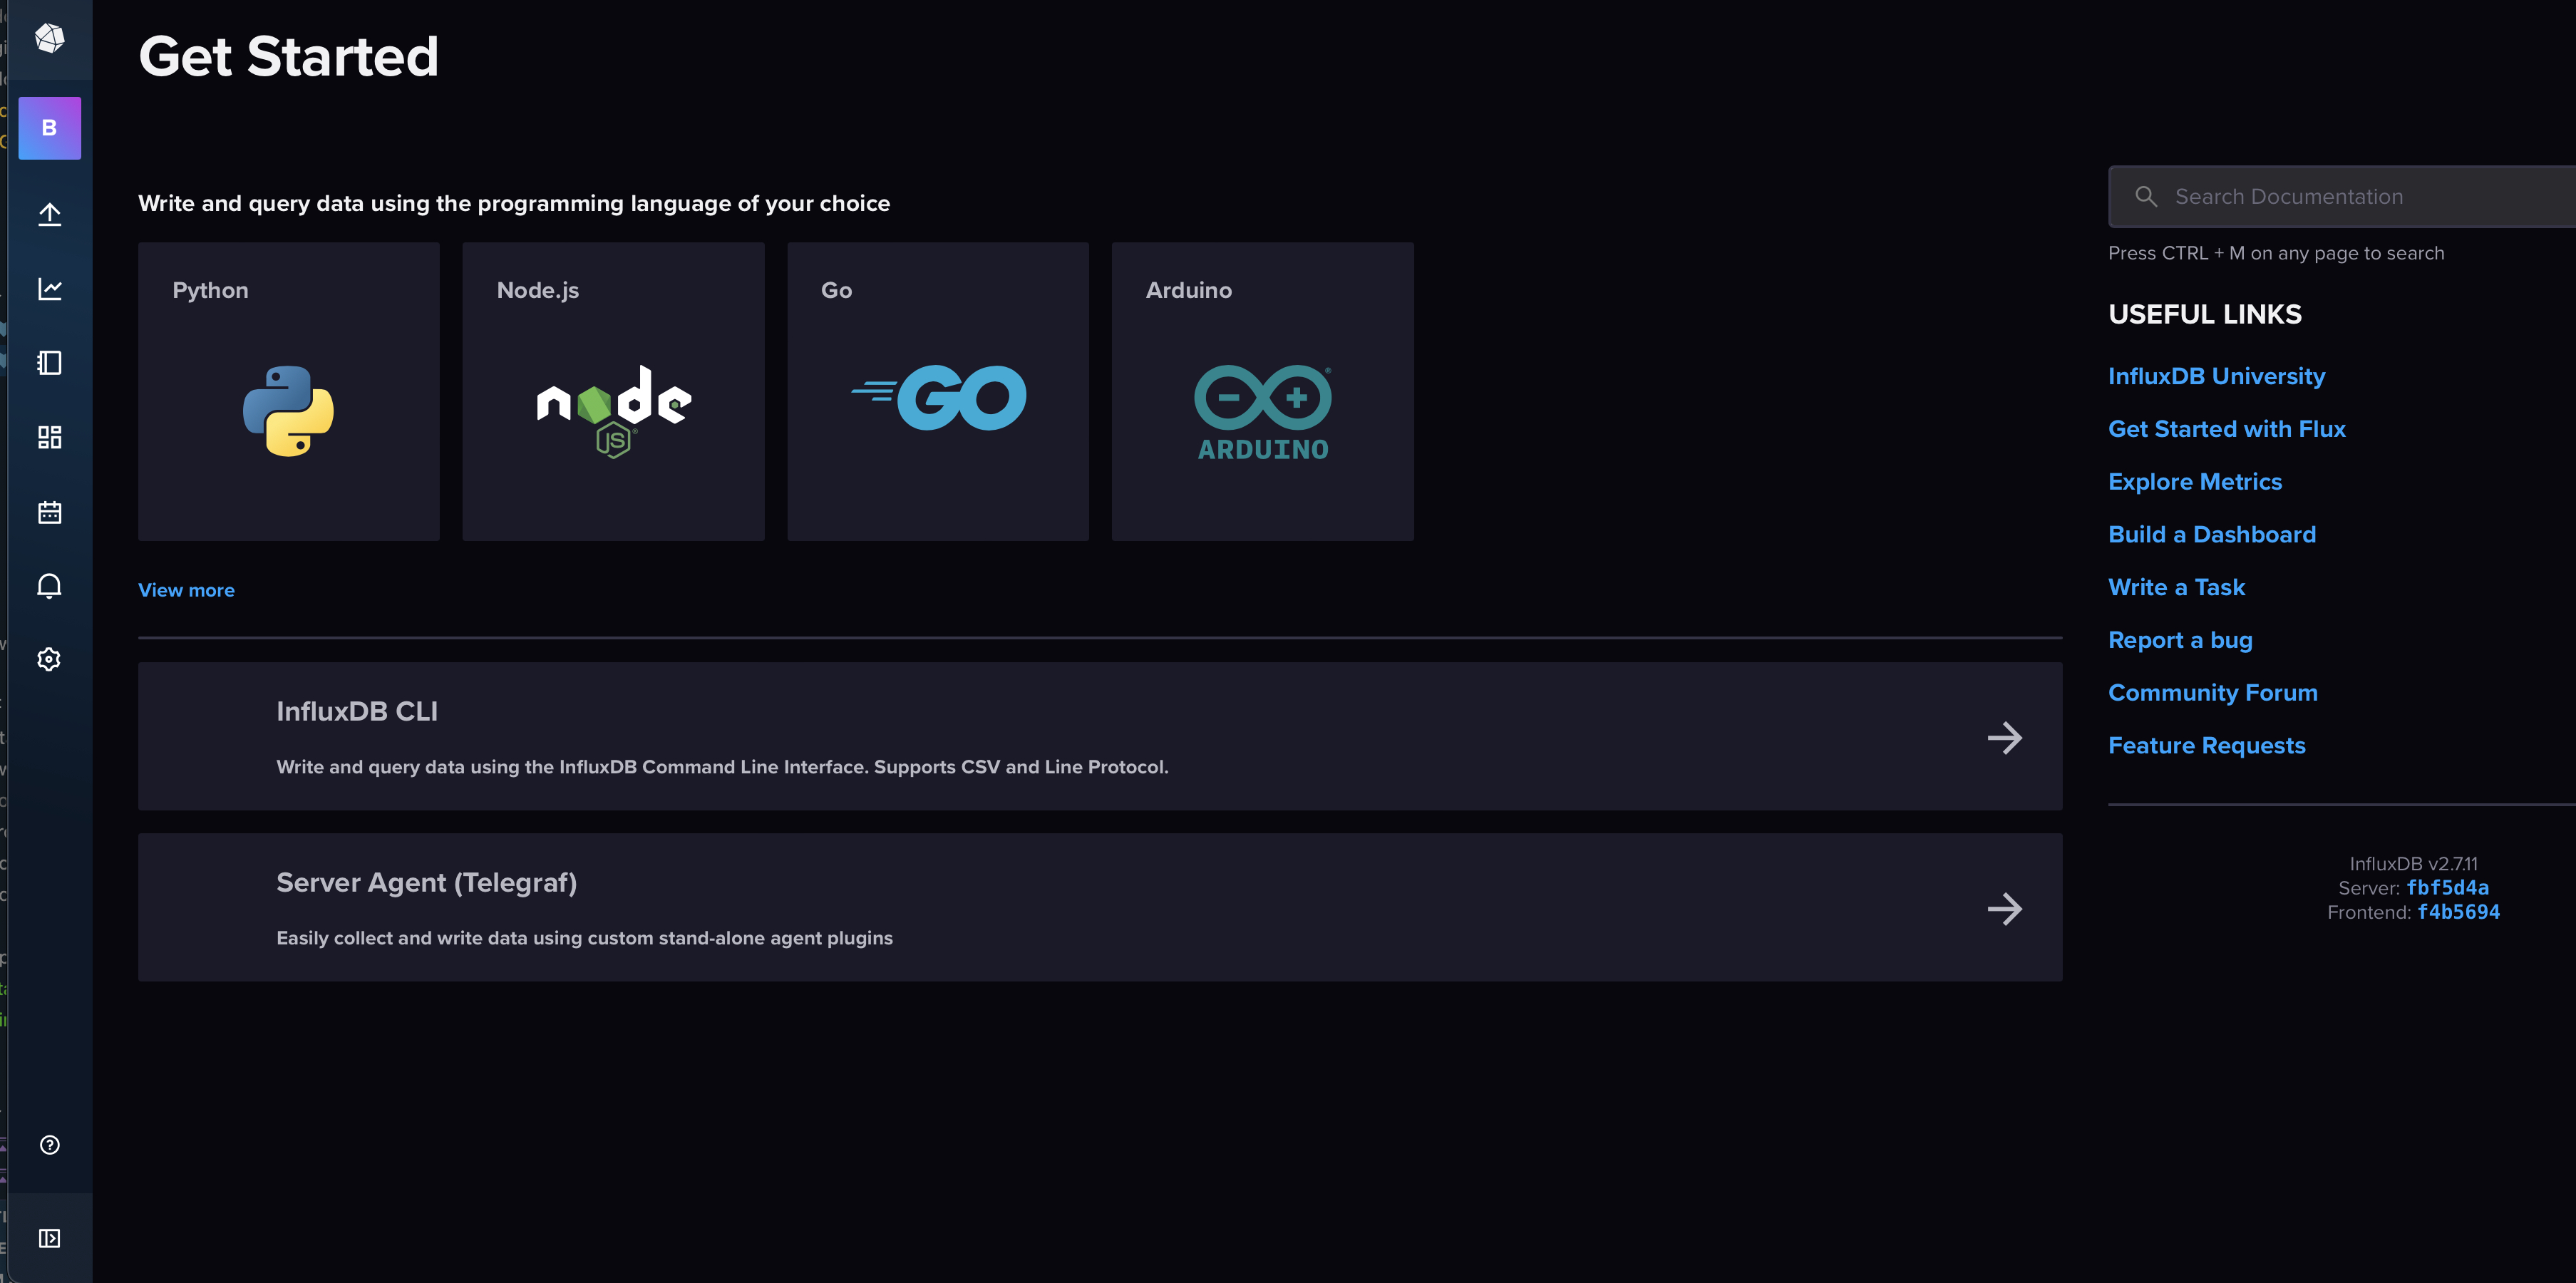
-
After logging in, you'll be taken to the InfluxDB UI. You should land on the "Get Started" page where you'll see a list of a few language options to write you query to fetch data. Of course, we've already written our working query in Python, so we'll select "Python".
TroubleshootingAre you being logged out of InfluxDB and the container is stopping?
If you are able to login without issues, and then are alter logged out and unable to login again and a refresh seems to indicate the container has stopped, there may be an issue with the initial setup and passing the line
DOCKER_INFLUXDB_INIT_MODE=setupin the command. If this is the case, you can remove the container and run the command again without theDOCKER_INFLUXDB_INIT_MODE=setupflag. This will allow you to set up the container manually in the UI.If you are still in the setup stages, remove the existing container (nothing valuable is being stored since the volume is effectively empty):
docker rm influxdb2Start a new container in standard server mode:
sudo docker run \
--name influxdb2 \
--publish 8086:8086 \
--mount type=volume,source=influxdb2-data,target=/var/lib/influxdb2 \
--mount type=volume,source=influxdb2-config,target=/etc/influxdb2 \
influxdb:2-
This will start the influxd process and use your existing volume data. If the previous setup correctly initialized your database, it will resume from where it left off.
-
Because we're not passing DOCKER_INFLUXDB_INIT_MODE=setup, the container won’t shut down after completing initialization.
Check your container status:
docker ps -aLogin to the InfluxDB UI again. You should be able to login without issue and see the InfluxDB UI.
-
Install InfluxDB on Ubuntu Server
This section assumes you have a linux machine up and running. I'll be walking through a Debian/Ubuntu based setup. If you're using a different distro (RedHat, Centos etc), you may need to adjust the commands accordingly. My particular setup is a Ubuntu Server VM running on a Proxmox host, but you can run this on any Ubuntu machine. These steps are based on the official InfluxDB documentation using the service with systemd approach.
Add InfluxDB Repository
-
The official docs reference a key-pair to add to your system. This is the key for the InfluxDB repository. This command is hefty, so it's nice to ensure you can copy + pate into you terminal:
sudo curl --silent --location -O \
https://repos.influxdata.com/influxdata-archive.key && \
echo "943666881a1b8d9b849b74caebf02d3465d6beb716510d86a39f6c8e8dac7515  influxdata-archive.key" \
| sha256sum --check - && \
cat influxdata-archive.key \
| gpg --dearmor \
| sudo tee /etc/apt/trusted.gpg.d/influxdata-archive.gpg > /dev/null && \
echo 'deb [signed-by=/etc/apt/trusted.gpg.d/influxdata-archive.gpg] https://repos.influxdata.com/debian stable main' \
| sudo tee /etc/apt/sources.list.d/influxdata.list -
With the repository added, update your package list and install InfluxDB:
sudo apt-get update && sudo apt-get install influxdb2 -
Start the InfluxDB service:
sudo systemctl start influxdb -
Check the status of the InfluxDB service:
sudo systemctl status influxdbLook for the
Active:line to ensure the service is running.Active: active (running) since...
Set up InfluxDB
-
If all goes well with your installation, you should be able to navigate to your InfluxDB instance by visiting
http://<your-server-ip>:8086in your web browser, where you'll be greeted with this nice looking login screen:
-
Click the "Get Started" button and you'll be presented with a form to set up your username, password, organization, and bucket. Fill in the details and click "Continue". You can call your organization and bucket whatever you like, but I've named mine "Crypto-Portfolio".
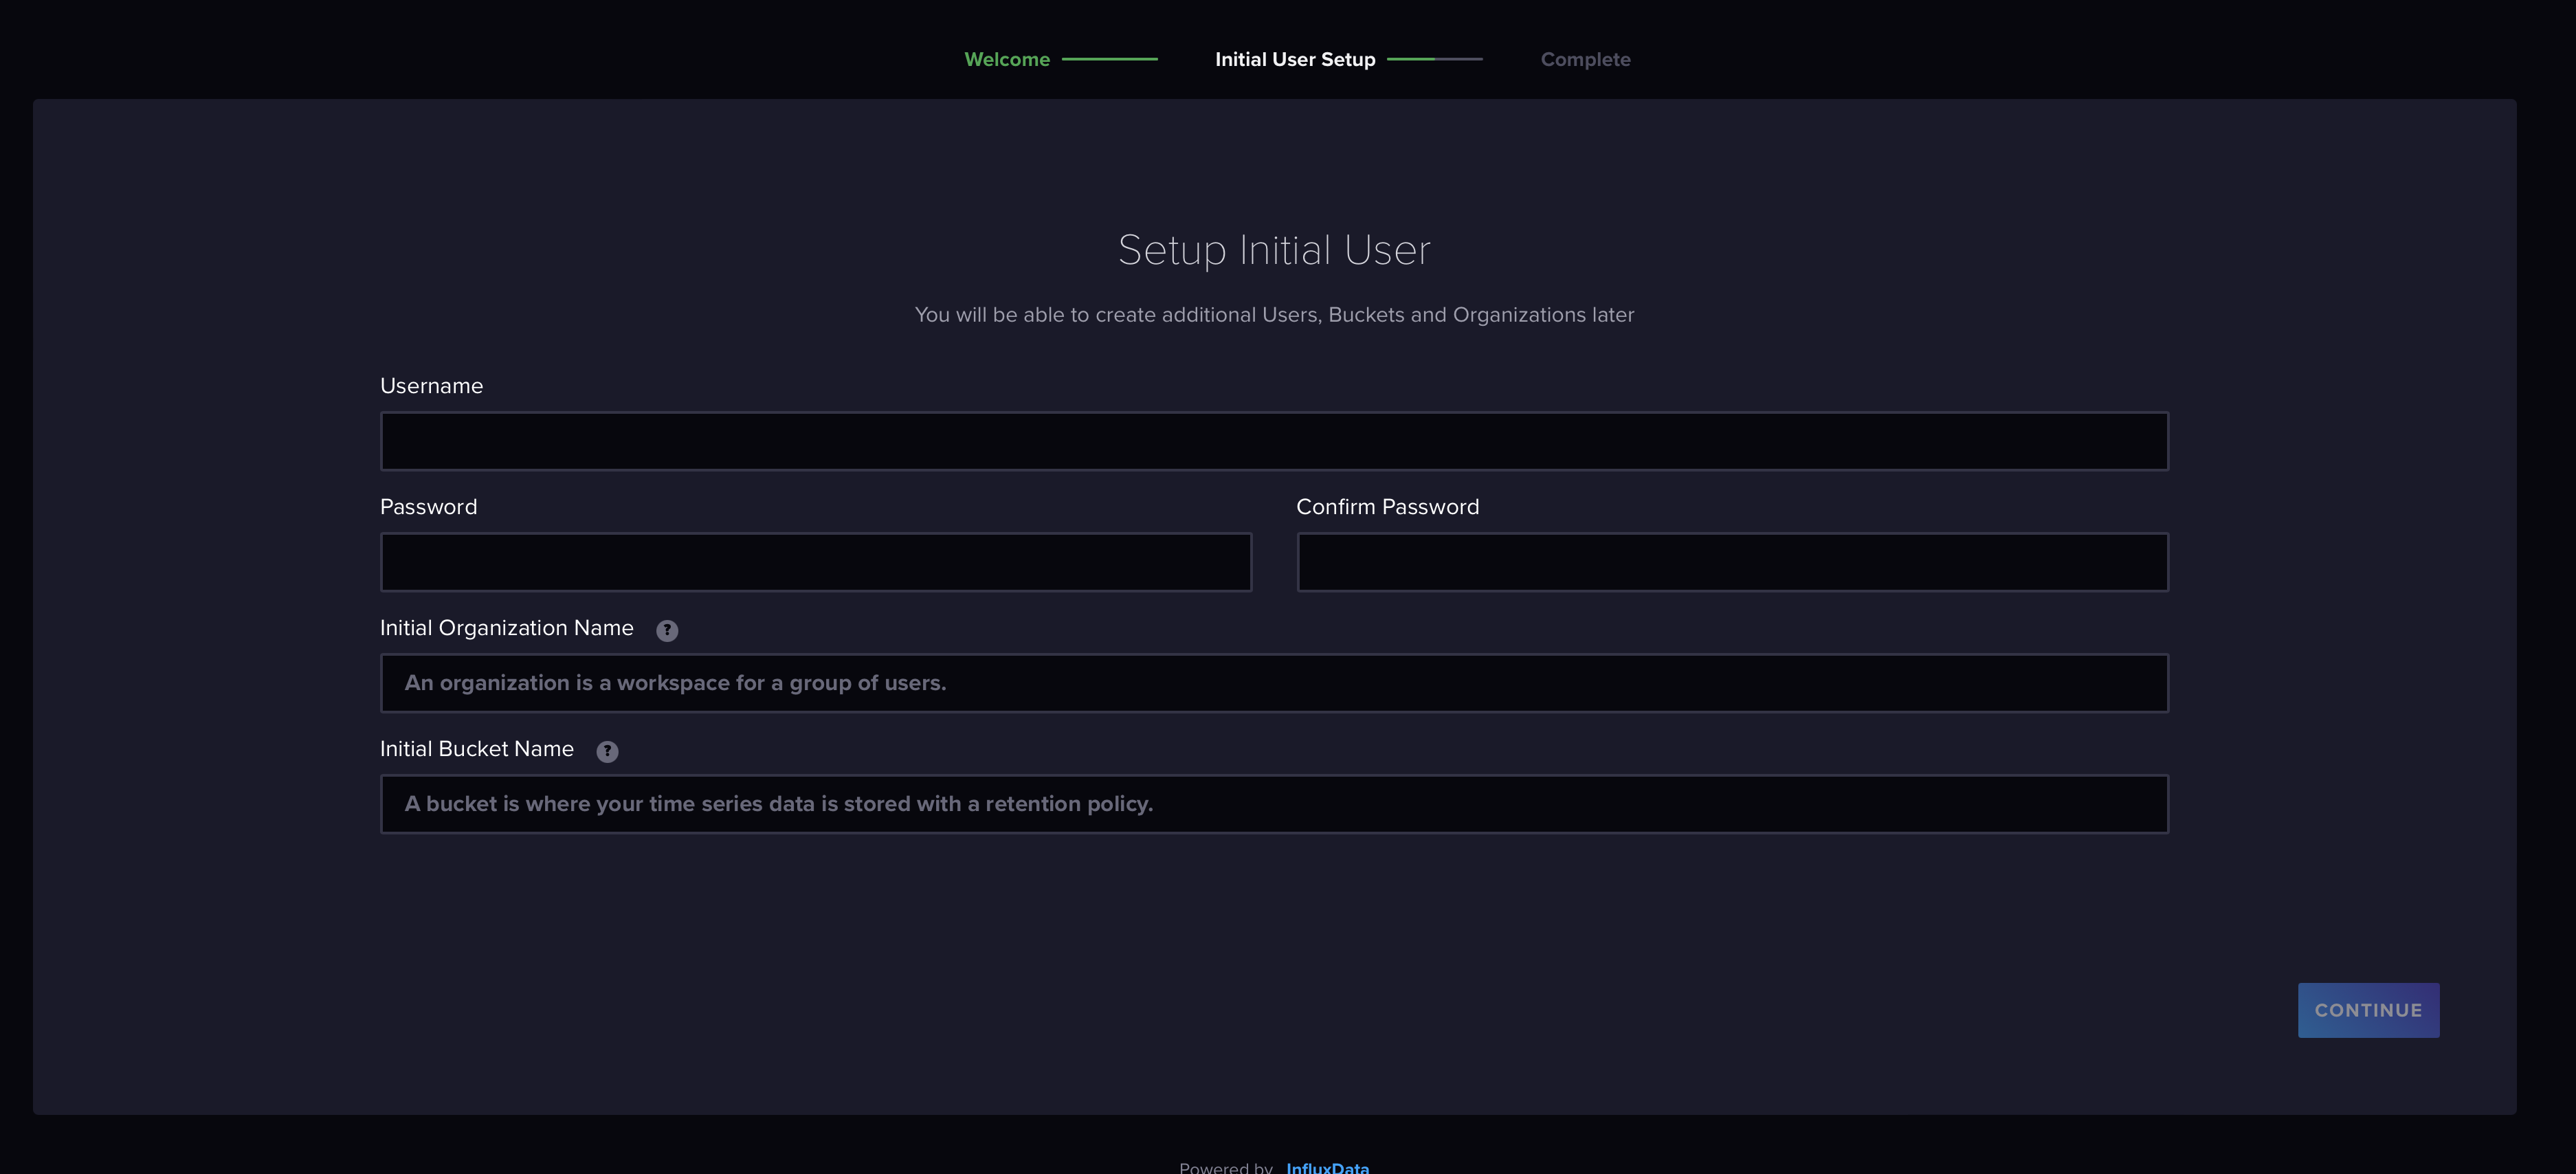
-
The next screen presents you with your API Token. You'll only see this once and are prompted to store it somewhere secure.
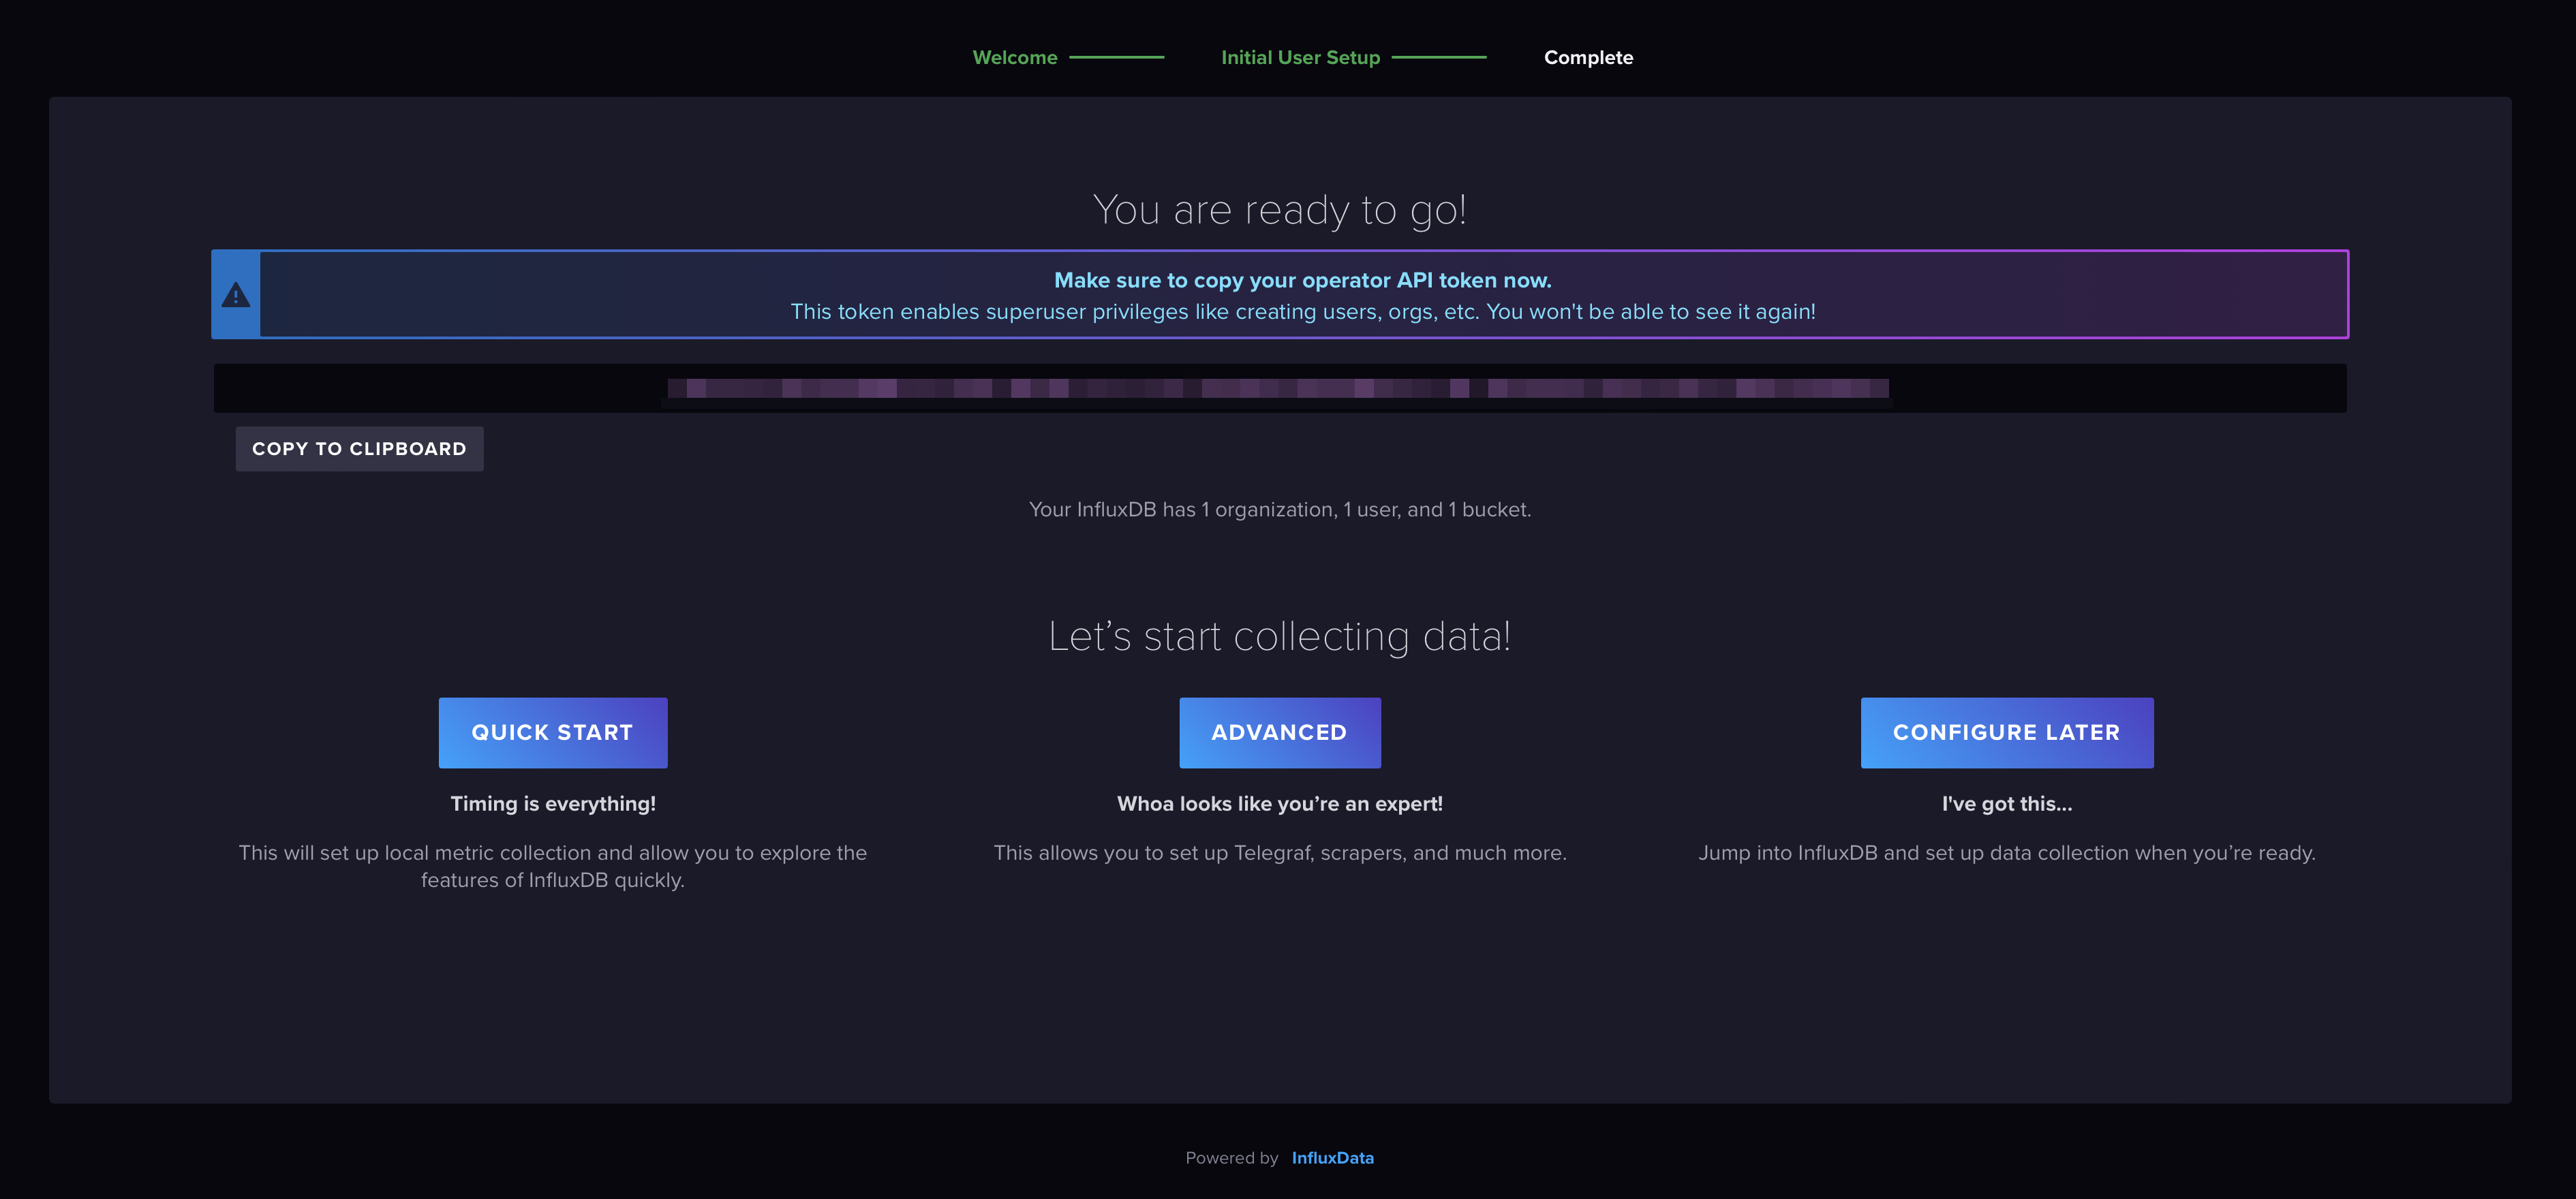
-
Click the Quick Start button to be taken to the InfluxDB UI. You'll be presented with a list of languages to write your query in. We'll be using Python, so select Python.
Set up Python in an LXC Container (Optional)
For this project, I want my python app to be running 24/7. I could run it on my local machine, but I'd like to have it running on a server that's always on. I'll be using an LXC container on my Proxmox server to run the Python script. This is optional as you could certainly run the Python app on your local machine, for example, but I'll walk you through the steps to set up an LXC container and install Python.
Create an Alpine LXC Container
The purpose of this container is to run a Python script and so we don't want anything too bulky. We want to preserve resources for the other VMs running on the server. We'll use Alpine Linux as the base image for our container.
Download the Alpine Linux Image
-
Navigate to your Proxmox UI, and click on the
localstorage for your desired node (if you have more than one). -
In the
Contenttab, click theTemplatessub-tab. -
In the search bar, type
alpineand hit enter. You should see thealpine-3.20-default...image, or some variation. Click theDownloadbutton to download the image. It may be a good idea to cross-reference the image with the Alpine Linux website to ensure you're grabbing a stable release. -
Once the image is downloaded, click the
Create CTbutton to create a new container.
Create the Alpine Container
-
In the
Generaltab:- Set the
Nodeto the desired node. - Set the
VM IDto a unique number. If you use a naming convention, you can use that here. - Set the
Hostnameto a unique name. This can be anything you like, but my convention is to append the name with the IP address host bits (e.g.alpine-170for an IP address of10.2.1.170). - Set the
Passwordto a secure password. This will be the root password for the container. - Set the
SSH Keysif you have any. This is optional. - Set the
Unprivileged containertotrue. This is optional, but it's a good practice to use unprivileged containers when possible.
- Set the
-
In the
Templatetab:- Choose the storage where your downloaded template is stored from the dropdown.
- Set the
Templatetoalpine-3.20-default_<...>.tar.xzor whatever the version you downloaded.
-
In the
Diskstab:- Select the storage you'd like to use for the container. This is where the container's disk will be stored. You can use the default storage or create a new storage if you'd like.
- Set the
Disk size (GB)to the desired size. I'm going to go quite small here as I don't need much space for this container. I'll set it to2GB.
-
In the
CPUtab:- Set the
Coresto1or more if you'd like.
- Set the
-
In the
Memorytab:- Set the
Memory (MB)to512MBor more if you'd like.
- Set the
-
In the
Networktab:If you need to set your container up on a VLAN or bridge, you can do so here. I'll be using the default
vmbr0bridge and no VLAN for this container. But you can set up a static IP address here, unlike if you were creating a VM.- Set the
Bridgeto the desired bridge. I'll use the defaultvmbr0. - Set the
Firewalltotrueif you'd like to enable the firewall. This is optional. - Select the
Staticradio button to set a static IP address. I'll set the IP address to10.2.1.170/24(Using CIDR notation), and enter my gateway.
- Set the
-
Click
Nextand optionally enter DNS info and then clickNextto review your settings and then clickFinishto create the container.
Install Python in the Alpine Container
We will need to install Python in the Alpine container to run our Python script. We'll also install pip to manage Python packages. It's a good practice to create a virtual environment for your Python projects to avoid conflicts with system packages.
- Ensure your container is running.
2 We will want to SSH into the container from our local machine, but if we try now, we'll be refused. You can certainly use the Proxmox console to access the container, but I'll show you how to SSH in from your local machine. Expand the details below to see how to SSH into the container.
SSH into the Alpine Container
-
In your Proxmox UI, click on the on the
consolebutton on the menu bar for the container -
You'll need to log in with the root password you set when creating the container. Once logged in, you'll be presented with the Alpine welcome message.
-
We have a fresh install of Alpine here so we'll need to update the package list and install some packages. You may be a vi guy, and I respect you for that, but I'm a nano guy. So we'll install nano and openssh, but there's a twist. Running
setup-alpinewill walk you through a setup wizard.- The wizard will help install SSH, but your'll still need to download nano. Make sure you tell the wizard to install the openssh package.
- When prompted, create a new user and set a password. You can use the same password as the root user if you'd like.
- You'll be asked again to set a password for the root user. You can use the same password as the new user if you'd like.
- If you have a goofy network gateway like I do (don't ask), you'll be walked through setting up the network. My defaults were mostly fine except the netmask which was in the /8 range (again, goofy network). I changed it so the netmask was 255.255.255.0 (CIDR 24), and all was well.
-
You should now be able to SSH into your container from your local machine. Run the following command to SSH into your container:
ssh <your-new-user>@<your-container-ip>Replace
<your-new-user>with the new user you created during the setup wizard and<your-container-ip>with the IP address of your container. -
Install Nano:
apk update
apk add nanonoteIf you've gone through the
alpine-setupwizard, you may not need to alter the sshd config file. If you're unable to SSH into your container, you may need to allow root login. Follow the steps below to allow root login. -
With those packages installed, we will edit the sshd config file to allow root login. Run the following command to open the sshd config file in the
nanoeditor:nano /etc/ssh/sshd_config -
Look for the line that reads
#PermitRootLogin prohibit-passwordand change it toPermitRootLogin yes. You can useCtrl + Wto search for the line. Once you've made the change, save the file by pressingCtrl + Oand thenEnter. Exit the editor by pressingCtrl + X. -
Restart the sshd service to apply the changes:
/etc/init.d/sshd restart -
You should now be able to SSH into your container from your local machine.
-
SSH into your Alpine container:
ssh root@<your-container-ip>infoIf you're using the Proxmox console, you can copy the IP address from the Proxmox UI and paste it into your terminal.
Install Python3, Pip and Virtual Environment
Now that we're SSH'd into the container, we can install Python3 and Pip. Newer versions of Python complain when you try to install packages globally, so we'll use a virtual environment to manage our Python packages.
-
As the root user, update the package list and install Python3 and Pip:
apk update
apk add python3 py3-pipinfoIf you are SSH'd into the container as a non-root user, you can run the following command to switch to the root user and then run the above commands:
su - -
Install Python3 and Pip:
apk add python3 py3-pip -
Install the
virtualenvpackage. We have Pip installed, but Alpine doesn't like external and wants all packages available via apk to be installed via apk. We'll installvirtualenvusingapk:apk add py3-virtualenv -
Create a virtual environment for your Python project. We'll create a directory for our project and then create a virtual environment inside that directory:
mkdir crypto-scriptopython3 -m venv crypto-scripto/venvThis command can take a few seconds to run and the terminal will appear to hang. Once the command completes, you'll see a new directory called
venvinside yourcrypto-scriptodirectory. -
Activate the virtual environment:
source crypto-scripto/venv/bin/activateYou should see
(venv)at the beginning of your terminal prompt, indicating that the virtual environment is active.
With our virtual environment set up, we can now install the influx-client and websockets package to interact with the Bitstamp API.
Install InfluxDB Client Library
-
Ensure Python3 installed. If not, install Python3:
python3 --version -
Ensure pip3 is installed:
pip3 --versionIf you are missing either, go back up and following the steps to install Python3 and Pip.
-
Install the
influxdb-clientpackage using pip:pip3 install influxdb-clientThis will install the InfluxDB client library that we'll use to interact with InfluxDB.
Install Websockets Library
-
Install the
websocketspackage using pip:pip3 install websocketsThis will install the Websockets library that we'll use to interact with the Bitstamp API.
Python Script to Query Bitstamp API and Store Data in InfluxDB
Back when we set up the Python script to connect to the Bitstamp API, we were simply printing the trade data to the console. Interesting, but not too useful. Let's modify the script to store that data, and much more, in InfluxDB.
Modify the Python Script
We've previously set up our python environment. Let's ensure we can access everything we need and we can connect to our InfluxDB instance.
-
Activate the virtual environment:
source crypto-scripto/venv/bin/activate
If you are working with a fresh intall of Alpine, you may need to install curl, which we'll use to make some test calls to our InfluxDB instance. Run the following command to install curl:
apk add curl
-
To test that our InfluxDB is ready to write data (i.e. ingest data), we can use the following simple curl command:
curl http://<ip-of-your-influxdb>:8086/healthYou should receive a response that looks like this:
{
	"name": "influxdb",
	"message": "ready for queries and writes",
	"status": "pass",
	"checks": [{ "status": "pass" }]
}
Replace
<your-api-token>with the API token you received when setting up InfluxDB.
Test the Python Script with InfluxDB
Before we start getting fancy, we will want to ensure that data is actually writing to InfluxDB. This code deals primarily with the Websocket connection and the InfluxDB client. We'll tackle backfilling data with the HTTP API in a later step.
I'll provide the full script below that you can view if you expand the "full code" section. The eagle-eyed among you will notice that I've made some egregious errors in my implementation.
- I've written everything in one file. This is bad practice and makes it difficult to maintain and debug.
- I've also included the InfluxDB token in the script. This is a big no-no. You should never include sensitive information in your code. Sure this project will live within my local network, but I'll need to bring in version control and so checking this into a public repository would be a disaster.
Expand for Full Code - Refactored Code to Follow
Full Code in a Single File - Expand to View
import asyncio
import websockets
import json
import influxdb_client
from influxdb_client.client.write_api import SYNCHRONOUS

# --- CONFIGURATION ---
# Websocket URL
WS_URL = "wss://ws.bitstamp.net"

# InfluxDB configuration
INFLUXDB_URL = 'http://10.2.1.185:8086' # Replace with your InfluxDB URL
INFLUXDB_TOKEN = '<your-api-token>' # Replace with your InfluxDB API token
INFLUXDB_ORG = 'bglab' # Replace with your InfluxDB organization
INFLUXDB_BUCKET = 'crypto_portfolio' # Replace with your InfluxDB bucket

# Currency pairs to subscribe
CURRENCY_PAIRS = ["btcusd", "xrpusd",
                  "xlmusd", "hbarusd", "vetusd", "csprusd", "xdcusd"]

# --- INITIALIZE INFLUXDB CLIENT ---

client = influxdb_client.InfluxDBClient(
    url=INFLUXDB_URL,
    token=INFLUXDB_TOKEN,
    org=INFLUXDB_ORG
)
write_api = client.write_api(write_options=SYNCHRONOUS)

# --- WEBSOCKET FUNCTIONS ---

async def process_message(message):
    """
    Handle incoming Websocket message and write live trade prices to InfluxDB
    """
    try:
        # Parse Websocket message
        message_data = json.loads(message)
        event = message_data.get("event")
        data = message_data.get("data")

        # Process trade data
        if event == "trade":
            # Extract relevant info
            currency_pair = message_data["channel"].split("_")[2]
            price = float(data["price"])
            timestamp = int(data["timestamp"]) * 1000000000

            # Write to InfluxDB
            point = influxdb_client.Point("crypto_data") \
                .tag("currency_pair", currency_pair) \
                .field("price", price) \
                .time(timestamp)

            write_api.write(bucket=INFLUXDB_BUCKET,
                            org=INFLUXDB_ORG, record=point)

            # Print to console
            print(f"[{currency_pair}] Spot Price: {price} USD @ {timestamp}")
    except Exception as e:
        print(f"Error processing message: {e}")


async def subscribe_to_pairs(websocket, pairs):
    """
    Subscribe to Websocket 'live_trades' channel for each currency pair
    """
    for pair in pairs:
        # Build subscription message
        subscription_message = {
            "event": "bts:subscribe",
            "data": {
                "channel": f"live_trades_{pair}"
            }
        }
        await websocket.send(json.dumps(subscription_message))
        print(f"Subscribed to channel: live_trades_{pair}")


async def main():
    """
    Main Websocket connection handler for subscribing to Bitstamp API currency pairs and processing messages
    """
    async with websockets.connect(WS_URL) as websocket:
        # Subscribe to currency pairs
        await subscribe_to_pairs(websocket, CURRENCY_PAIRS)

        # Listen to Websocket messages continuously
        while True:
            message = await websocket.recv()
            await process_message(message)

# --- RUN MAIN ---
if __name__ == "__main__":
    asyncio.run(main())
Review the code above and ensure you've replaced the placeholders with your actual InfluxDB URL, API token, organization, and bucket. You can also add or remove currency pairs as needed.
Running the script should write data to InfluxDB whenever a trade occurs on the Bitstamp API. You can check the InfluxDB UI to see if the data is being written to the specified bucket. If not you can check the console output for any errors and review the code to ensure everything is set up correctly.
Refactor the Python Script
Great! It works! But we need a far better structure for our code. We'll refactor the script to separate the concerns and make it easier to maintain and debug.
1. Project Structure
I'll use the following structure, breaking out the InfluxDB-related, websocket client, and main entry point into separate files. This will make the code more modular and easier to manage. It will also set us up for bringing in historical data and backfilling data with the HTTP API later. Here's the project structure we'll use:
crypto-scripto/                  # Parent folder
├── venv/                        # Virtual environment folder (excluded from Git)
├── crypto-portfolio-project/    # Root of your Python application (checked into Git)
│   ├── .env                     # Secrets file (excluded from Git - for local configs)
│   ├── main.py                  # Main entry point for your application
│   ├── influxdb_handler.py      # Contains InfluxDB-related code (reuse, modularize)
│   ├── http_handler.py          # Contains InfluxDB-related code for HTTP / OHLC (reuse, modularize)
│   ├── websocket_client.py      # Contains WebSocket-related code to fetch Bitstamp data
│   ├── .gitignore               # Git ignore rules for safety
│   ├── requirements.txt         # Required Python packages (used to rebuild the app)
│   └── README.md                # Documentation for your project
You can create your structure using your IDE, file manager, or the terminal. I'll show you how to create the structure using the terminal. You can copy and paste the following commands into your terminal to create the structure:
# Assuming Parent folder is already created
cd crypto-scripto # Or whatever you named your parent folder
mkdir crypto-portfolio-project
cd crypto-portfolio-project
touch main.py influxdb_handler.py websocket_client.py .gitignore requirements.txt README.md
2. Configure the .gitignore File
We'll want to exclude the virtual environment folder and any secrets files from being checked into Git. We'll also exclude any compiled Python files and other unnecessary files. Open the .gitignore file and add the following lines:
# Ignore virtual environment folder
venv/

# Ignore the secrets file
.env

# Python bytecode and cache
*.pyc
__pycache__/

# IDE or editor settings
.vscode/
.idea/
3. Install and Freeze Required Packages
We'll need to install the required Python packages and freeze them into a requirements.txt file. This file will be used to rebuild the application in the future. Run the following commands to install the required packages and freeze them:
# Activate the virtual environment
source ../venv/bin/activate # Or wherever your virtual environment is located

# Install the required packages
pip install influxdb-client websockets python-dotenv

# Freeze the installed packages into requirements.txt
pip freeze > requirements.txt
You're requirements file should look something like this:
influxdb-client==1.39.0
python-dotenv==1.0.0
websockets==11.0.2
With this set up, if we ever need to rebuild the application or move it to another machine, we can simply run pip install -r requirements.txt to install the required packages.
4. Create the .env File
We'll add our project details including secrets to the .env file and then load them into our main.py script automatically. Change your variables to match your setup:
INFLUXDB_URL=http://10.2.1.185:8086
INFLUXDB_TOKEN=<your-api-token> # Replace with your InfluxDB API token
INFLUXDB_ORG=bglab # Replace with your InfluxDB organization
INFLUXDB_BUCKET=crypto_portfolio # Replace with your InfluxDB bucket
5. Create the InfluxDB Handler in influxdb_handler.py
This step will centralize all the InfluxDB-related code into a single file. This will make it easier to manage and reuse the InfluxDB code across the application. Create a new file called influxdb_handler.py and add the following code:
import influxdb_client
from influxdb_client.client.write_api import SYNCHRONOUS

class InfluxDBHandler:
    def __init__(self, url, token, org, bucket):
        """
        Initialize the InfluxDB client.
        """
        self.client = influxdb_client.InfluxDBClient(
            url=url,
            token=token,
            org=org
        )
        self.write_api = self.client.write_api(write_options=SYNCHRONOUS)
        self.bucket = bucket

    def write_data(self, currency_pair, price, timestamp):
        """
        Write crypto pair data to InfluxDB.
        """
        try:
            point = influxdb_client.Point("crypto_data") \
                .tag("currency_pair", currency_pair) \
                .field("price", price) \
                .time(timestamp)

            self.write_api.write(bucket=self.bucket, record=point)
            print(f"Data written to InfluxDB: {currency_pair} = {price} USD")
        except Exception as e:
            print(f"Failed to write data to InfluxDB: {e}")
6. Create the WebSocket Client in websocket_client.py
We'll create a new file called websocket_client.py to contain all the WebSocket-related code. This will make it easier to manage and reuse the WebSocket code across the application. Add the following code to the websocket_client.py file:
import asyncio
import json
import websockets


class WebSocketClient:
    def __init__(self, url, currency_pairs):
        self.url = url
        self.currency_pairs = currency_pairs

    async def subscribe_to_pairs(self, websocket):
        """
        Subscribe to specific currency pairs.
        """
        for pair in self.currency_pairs:
            subscription_message = {
                "event": "bts:subscribe",
                "data": {"channel": f"live_trades_{pair}"}
            }
            await websocket.send(json.dumps(subscription_message))
            print(f"Subscribed to {pair}")

    async def listen(self, message_handler):
        """
        Connect to the WebSocket, subscribe to pairs, and listen for messages.
        """
        async with websockets.connect(self.url) as websocket:
            await self.subscribe_to_pairs(websocket)

            while True:
                message = await websocket.recv()
                await message_handler(message)
7. Update the main.py File
We'll update the main.py file to load the environment variables from the .env file and use the InfluxDBHandler and WebSocketClient classes to handle the InfluxDB and WebSocket connections. Add the following code to the main.py file:
import asyncio
import json
import os
from dotenv import load_dotenv
from influxdb_handler import InfluxDBHandler
from websocket_client import WebSocketClient

# Load environment variables
dotenv_path = os.path.join(os.path.dirname(__file__), '.env')
load_dotenv(dotenv_path)

# Configuration
INFLUXDB_URL = os.getenv('INFLUXDB_URL')
INFLUXDB_TOKEN = os.getenv('INFLUXDB_TOKEN')
INFLUXDB_ORG = os.getenv('INFLUXDB_ORG')
INFLUXDB_BUCKET = os.getenv('INFLUXDB_BUCKET')
CURRENCY_PAIRS = ["btcusd", "xrpusd", "xlmusd",
                  "hbarusd", "vetusd", "csprusd", "xdcusd"]

# Bitstamp WebSocket URL
WS_URL = "wss://ws.bitstamp.net"

# Initialize InfluxDB handler
influxdb_handler = InfluxDBHandler(
    url=INFLUXDB_URL,
    token=INFLUXDB_TOKEN,
    org=INFLUXDB_ORG,
    bucket=INFLUXDB_BUCKET
)


async def process_message(message):
    """
    Handle incoming WebSocket messages and write to InfluxDB.
    """
    try:
        message_data = json.loads(message)
        event = message_data.get("event")
        data = message_data.get("data")

        if event == "trade":
            # Parse trade data
            currency_pair = message_data["channel"].split("_")[2]
            price = float(data["price"])
            timestamp = int(data["timestamp"]) * \
                1000000000  # Convert to nanoseconds

            # Write to InfluxDB
            influxdb_handler.write_data(currency_pair, price, timestamp)
    except Exception as e:
        print(f"Error processing message: {e}")


async def main():
    """
    Main function to start WebSocket client.
    """
    ws_client = WebSocketClient(url=WS_URL, currency_pairs=CURRENCY_PAIRS)
    await ws_client.listen(process_message)

if __name__ == "__main__":
    asyncio.run(main())
8. Run the Refactored Script and Test
With the refactored script in place, you can run the main.py script to start the WebSocket client and write data to InfluxDB. Run the following command to start the script:
python main.py
You should see the script connect to the Bitstamp WebSocket API, subscribe to the specified currency pairs, and write the trade data to InfluxDB. You can check the InfluxDB UI to see if the data is being written to the specified bucket.
Add Historical Data to InfluxDB with the HTTP API
Our portfolio tracker will serve a few purposes. We've handled the context wherein we are updating our portfolio value in real-time according to the latest trade prices. Once we've entered the number of coins we hold for each currency, we will be able to show total values in Grafana.
The secondary goal will be to query historical data to get a snapshot of our portfolio value at a certain point in time. We'll use the InfluxDB HTTP API to query historical data and backfill our InfluxDB bucket with historical data.
The following steps will add in some new functionality to some of our existing files while adding new files to handle the HTTP requests to the Bitstamp API. We'll also add a new function to backfill historical OHLC data into InfluxDB. Pay close attention to the changes and additions to ensure everything is set up correctly as we will be revisiting and altering some of the existing code.
1. Create an http_handler.py for historical OHLC Data
First we will need to install the requests package to make HTTP requests to the InfluxDB API. We'll create a new file called http_handler.py to handle the HTTP requests to the InfluxDB API. Add the following code to the http_handler.py file:
- Install the
requestspackage:
pip install requests
- Create the
http_handler.pyfile and add the following code:
import requests


class HTTPHandler:
    def __init__(self, base_url):
        """
        Initialize the HTTP client for Bitstamp API.
        Args:
            base_url (str): Base URL for the Bitstamp API.
        """
        self.base_url = base_url

    def fetch_ohlc(self, currency_pair, step, limit, start=None, end=None):
        """
        Fetch OHLC data for a currency pair.

        Args:
            currency_pair (str): The market symbol, e.g., "btcusd".
            step (int): Timeframe step in seconds (e.g., 3600 for 1-hour candles).
            limit (int): Maximum number of data points to retrieve (max 1000).
            start (int): Start timestamp in Unix time (optional).
            end (int): End timestamp in Unix time (optional).

        Returns:
            list: List of OHLC data points.
        """
        url = f"{self.base_url}/ohlc/{currency_pair}/"

        # Define query parameters for the API call
        params = {
            "step": step,   # OHLC timeframe (e.g., hourly = 3600 seconds)
            "limit": limit  # Max 1000 candles per request
        }
        if start:
            params["start"] = start
        if end:
            params["end"] = end

        # Perform the API request
        response = requests.get(url, params=params)

        if response.status_code == 200:
            ohlc_data = response.json().get("data", {}).get("ohlc", [])
            return ohlc_data
        else:
            raise Exception(
                f"Failed to fetch OHLC data: {response.status_code}, {response.text}")
2. Update the influxdb_handler.py File
We'll update the influxdb_handler.py file to include a new method write_ohlc_data to write historical OHLC data into InfluxDB. Add the following code to the influxdb_handler.py file:
import influxdb_client
from influxdb_client.client.write_api import SYNCHRONOUS

class InfluxDBHandler:
    def __init__(self, url, token, org, bucket):
        """
        Initialize the InfluxDB client.
        Args:
            url (str): URL for the InfluxDB instance.
            token (str): InfluxDB authentication token.
            org (str): The organization name.
            bucket (str): The bucket name for storing data.
        """
        self.client = influxdb_client.InfluxDBClient(
            url=url,
            token=token,
            org=org
        )
        self.write_api = self.client.write_api(write_options=SYNCHRONOUS)
        self.bucket = bucket

    def write_data(self, currency_pair, price, timestamp):
        """
        Write real-time price data to InfluxDB.
        """
        try:
            point = influxdb_client.Point("crypto_data") \
                .tag("currency_pair", currency_pair) \
                .field("price", price) \
                .time(timestamp)

            self.write_api.write(bucket=self.bucket, record=point)
            print(f"Real-time price data written: {currency_pair} = {price} USD")
        except Exception as e:
            print(f"Failed to write data to InfluxDB: {e}")

    # Add the following method to write OHLC data (NEW METHOD ADDED)
   def write_ohlc_data(self, currency_pair, open_, high, low, close, volume, timestamp):
        """
        Write OHLC data into InfluxDB.
        """
        try:
            point = influxdb_client.Point("crypto_ohlc") \
                .tag("currency_pair", currency_pair) \
                .field("open", open_) \
                .field("high", high) \
                .field("low", low) \
                .field("close", close) \
                .field("volume", volume) \
                .time(timestamp)

            self.write_api.write(bucket=self.bucket, record=point)
            print(f"OHLC data written for {currency_pair}: {timestamp}")
        except Exception as e:
            print(f"Error writing OHLC data to InfluxDB: {e}")
Update the main.py File to Fetch Historical Data
Quite a bit of code has been added to the main.py file. We've added the HTTPHandler class to handle HTTP requests to the Bitstamp API and fetch historical OHLC data for each currency pair. We've also added a new function backfill_ohlc to backfill historical OHLC data into InfluxDB.
Note the new additions highlighted in the code below. Also pay close attention to the MAIN FUNCTION block where we backfill historical OHLC data for each currency pair and we treat the
Websocket listener in conjunction with the backfilling process. Notes regarding this will follow the code block.
import asyncio
import json
import os
from dotenv import load_dotenv
from influxdb_handler import InfluxDBHandler
from websocket_client import WebSocketClient
from http_handler import HTTPHandler

# --- ENVIRONMENT AND CONFIGURATION ---

# Load environment variables
dotenv_path = os.path.join(os.path.dirname(__file__), '.env')
load_dotenv(dotenv_path)

# InfluxDB Configuration
INFLUXDB_URL = os.getenv('INFLUXDB_URL')
INFLUXDB_TOKEN = os.getenv('INFLUXDB_TOKEN')
INFLUXDB_ORG = os.getenv('INFLUXDB_ORG')
INFLUXDB_BUCKET = os.getenv('INFLUXDB_BUCKET')

# Bitstamp Configurations
CURRENCY_PAIRS = ["btcusd", "xrpusd", "xlmusd",
                  "hbarusd", "vetusd", "csprusd", "xdcusd"]
WS_URL = "wss://ws.bitstamp.net"
HTTP_BASE_URL = "https://www.bitstamp.net/api/v2"  # Base URL for Bitstamp HTTP API

# --- MODULE INITIALIZATIONS ---
influxdb_handler = InfluxDBHandler(
    url=INFLUXDB_URL,
    token=INFLUXDB_TOKEN,
    org=INFLUXDB_ORG,
    bucket=INFLUXDB_BUCKET
)

http_handler = HTTPHandler(base_url=HTTP_BASE_URL)  # Initialize the HTTP handler

# --- PROCESS LIVE TRADE DATA ---
async def process_message(message):
    try:
        message_json = json.loads(message)
        event = message_json.get("event")

        if event == "trade":
            data = message_json.get("data")
            currency_pair = message_json["channel"].split("_")[2]
            price = float(data["price"])
            timestamp = int(data["timestamp"]) * 1000000000  # InfluxDB requires nanoseconds

            # Write live WebSocket trade data to InfluxDB
            influxdb_handler.write_data(currency_pair, price, timestamp)

    except Exception as e:
        print(f"Error in process_message: {e}")


# --- BACKFILL HISTORICAL DATA ---
async def backfill_ohlc(currency_pair):
    """
    Fetch and backfill historical OHLC data into InfluxDB for a currency pair.
    """
    print(f"Backfilling OHLC data for {currency_pair}...")
    try:
        ohlc_data = http_handler.fetch_ohlc(
            currency_pair=currency_pair,
            step=3600,  # Timeframe of 1-hour candles
            limit=1000  # Fetch up to 1000 data points
        )

        for candle in ohlc_data:
            influxdb_handler.write_ohlc_data(
                currency_pair=currency_pair,
                open_=float(candle["open"]),
                high=float(candle["high"]),
                low=float(candle["low"]),
                close=float(candle["close"]),
                volume=float(candle["volume"]),
                timestamp=int(candle["timestamp"]) * 1000000000  # Nanoseconds
            )
        print(f"Finished backfilling OHLC data for {currency_pair}.")
    except Exception as e:
        print(f"Error fetching OHLC data for {currency_pair}: {e}")


# --- MAIN FUNCTION ---
async def main():
    """
    Main function to perform OHLC backfill first, then start real-time WebSocket streaming.
    """
    print("Starting historical backfill...")
    for pair in CURRENCY_PAIRS:
        await backfill_ohlc(pair)  # Sequentially backfill historical data for each pair

    print("Switching to real-time WebSocket listener...")
    ws_client = WebSocketClient(url=WS_URL, currency_pairs=CURRENCY_PAIRS)
    await ws_client.listen(process_message)  # Start WebSocket listener


if __name__ == "__main__":
    asyncio.run(main())
Run the Refactored Script and Test the Backfill and Real-Time Data
The moment of truth is upon us. Run the main.py script to backfill historical OHLC data for each currency pair and start the real-time WebSocket listener to write live trade data to InfluxDB. Run the following command to start the script.
Don't fret when you see an incredible amount of data being written to InfluxDB. We're pulling 1000 data points per requested coin/USD pair and each datapoint is being written to the console.
- Ensure your virtual environment is activated:
source ../venv/bin/activate
- Run the script:
python main.py
The wall of text ensues as the script backfills historical data, and then starts the WebSocket listener to write live trade data to InfluxDB. If you only have a few coins, you can scroll up to confirm the backfilling was successful where you'll see something like Finished backfilling OHLC data for btcusd.. If you have a lot of coins, you may need to wait a bit for the backfilling to complete.
Query Historical Data in InfluxDB
-
Log in to the InfluxDB UI by navigating to
http://<your-influxdb-ip>:8086in your browser. -
Click the
Data Explorertab on the left sidebar, and look for your bucket. You should see thecrypto_portfoliobucket that we've been writing data to. -
You can click around the UI on the bucket and select varioius fields to see the data that has been written to InfluxDB. You can also run queries to fetch historical data for a specific currency pair. To test our backfilling, you can run a query to fetch the OHLC data for a specific currency pair. We'll use the 'flux' query language to run a query to fetch the OHLC data for the
btcusdcurrency pair.
Click Script Editor in the right corner of the Data Explorer below the graph pane and enter the following Flux query:
from(bucket: "crypto_portfolio")
  |> range(start: -1d)
  |> filter(fn: (r) => r._measurement == "crypto_ohlc")
  |> filter(fn: (r) => r.currency_pair == "btcusd")
This will query historical data for Bitcoin (BTC) to USD (USD) for the past 24 hours. You can adjust the range function to fetch data for a different time period. Click Submit to run the query and view the results.
Next, let's check again to ensure we are also writing the live data to InfluxDB.
from(bucket: "crypto_portfolio")
  |> range(start: -15m)
  |> filter(fn: (r) => r._measurement == "crypto_data")
  |> filter(fn: (r) => r.currency_pair == "btcusd")
I'm relatively new to InfluxDB and the Flux query language, so I'm still learning how to write queries and I'm a bit shaky on how to use the graphical filter options -- they seem to yield no results or I just don't know how to use them properly. I'm sure I'll get the hang of it, but for now, I'm sticking with the Flux query language and keeping things simple.
Automate Historical Data Backfilling Twice Daily
Currently our backfilling will run only once when we start the script. We can automate this process to run twice daily to ensure we have the most up-to-date historical data in our InfluxDB bucket. We'll use the argparse and 'time' modules to schedule the backfilling process to run twice daily.
import asyncio
import json
import os
import argparse
import time
from dotenv import load_dotenv
from influxdb_handler import InfluxDBHandler
from websocket_client import WebSocketClient
from http_handler import HTTPHandler

# --- ENVIRONMENT AND CONFIGURATION ---

# Load environment variables
dotenv_path = os.path.join(os.path.dirname(__file__), '.env')
load_dotenv(dotenv_path)

# **InfluxDB Configuration**
INFLUXDB_URL = os.getenv('INFLUXDB_URL')
INFLUXDB_TOKEN = os.getenv('INFLUXDB_TOKEN')
INFLUXDB_ORG = os.getenv('INFLUXDB_ORG')
INFLUXDB_BUCKET = os.getenv('INFLUXDB_BUCKET')

# **Bitstamp Configuration**
CURRENCY_PAIRS = ["btcusd", "xrpusd", "xlmusd",
                  "hbarusd", "vetusd", "csprusd", "xdcusd"]
WS_URL = "wss://ws.bitstamp.net"
HTTP_BASE_URL = "https://www.bitstamp.net/api/v2"  # Base URL for Bitstamp HTTP API

# --- MODULE INITIALIZATIONS ---
influxdb_handler = InfluxDBHandler(
    websocket_url=INFLUXDB_URL,
    ohlc_url=INFLUXDB_URL,
    token=INFLUXDB_TOKEN,
    org=INFLUXDB_ORG,
)

# Initialize the HTTP handler
http_handler = HTTPHandler(base_url=HTTP_BASE_URL)


# --- UTILITY FUNCTIONS ---

async def get_last_influx_timestamp(currency_pair):
    """
    Query InfluxDB for the last recorded timestamp for a specified currency pair.
    """
    query = f"""
    from(bucket: "crypto_history")
      |> range(start: -1y)  # Query for data within the last year (adjust as needed)
      |> filter(fn: (r) => r._measurement == "crypto_history" and r["currency_pair"] == "{currency_pair}")
      |> keep(columns: ["_time"])
      |> sort(desc: true)  # Sort timestamps in descending order
      |> limit(n: 1)  # Retrieve only the most recent entry
    """
    result = influxdb_handler.query(query)
    try:
        last_time = result[0]["_time"]
        return int(time.mktime(last_time.timetuple()))  # Convert to Unix timestamp
    except (IndexError, KeyError):
        print(f"No existing OHLC data for {currency_pair}, backfilling all available data.")
        return None  # Return None if no existing timestamps are found


# --- PROCESS LIVE TRADE DATA ---
async def process_message(message):
    try:
        message_json = json.loads(message)
        event = message_json.get("event")

        if event == "trade":
            data = message_json.get("data")
            currency_pair = message_json["channel"].split("_")[2]
            price = float(data["price"])
            # InfluxDB requires nanoseconds
            timestamp = int(data["timestamp"]) * 1000000000

            # Write live WebSocket trade data to InfluxDB
            influxdb_handler.write_data(currency_pair, price, timestamp)

    except Exception as e:
        print(f"Error in process_message: {e}")


# --- BACKFILL HISTORICAL DATA ---
async def backfill_ohlc(currency_pair):
    """
    Fetch and backfill historical OHLC data into InfluxDB for a currency pair.
    Avoid duplicates by starting from the last InfluxDB timestamp.
    """
    print(f"Backfilling OHLC data for {currency_pair}...")
    try:
        start = await get_last_influx_timestamp(currency_pair)  # Start from the last recorded timestamp
        end = int(time.time())  # Current Unix timestamp
        print(f"Fetching {currency_pair} OHLC data from {start} to {end}...")

        # Call the HTTPHandler to fetch OHLC data
        ohlc_data = http_handler.fetch_ohlc(
            currency_pair=currency_pair,
            step=3600,  # Timeframe of 1-hour candles
            limit=1000,  # Fetch maximum 1000 data points
            start=start,  # Dynamic start timestamp
            end=end  # Fetch data up to the current time
        )

        # Write fetched OHLC data into InfluxDB
        for candle in ohlc_data:
            influxdb_handler.write_ohlc_data(
                currency_pair=currency_pair,
                open_=float(candle["open"]),
                high=float(candle["high"]),
                low=float(candle["low"]),
                close=float(candle["close"]),
                volume=float(candle["volume"]),
                timestamp=int(candle["timestamp"]) * 1000000000  # Convert to nanoseconds
            )
        print(f"Finished backfilling OHLC data for {currency_pair}.")
    except Exception as e:
        print(f"Error fetching OHLC data for {currency_pair}: {e}")


# --- SCHEDULED BACKFILL TASK ---
async def scheduled_backfill():
    """
    Perform OHLC backfills for all currency pairs twice daily.
    """
    while True:
        print("Starting scheduled OHLC backfill task...")
        for pair in CURRENCY_PAIRS:
            await backfill_ohlc(pair)
        print("Scheduled backfill completed. Sleeping for 12 hours.")
        await asyncio.sleep(43200)  # Wait 12 hours (twice daily)


# --- MAIN FUNCTION ---
async def main(manual_backfill):
    """
    Main function to handle both real-time WebSocket streaming and OHLC backfills.
    """
    if manual_backfill:
        print("Manual backfill triggered...")
        for pair in CURRENCY_PAIRS:
            await backfill_ohlc(pair)
        return

    # Start the WebSocket listener for real-time trade data
    print("Starting WebSocket listener...")
    ws_client = WebSocketClient(url=WS_URL, currency_pairs=CURRENCY_PAIRS)
    websocket_task = asyncio.create_task(ws_client.listen(process_message))

    # Start the recurring backfill task for twice-daily updates
    backfill_task = asyncio.create_task(scheduled_backfill())

    # Run both tasks concurrently
    await asyncio.gather(websocket_task, backfill_task)


if __name__ == "__main__":
    # ADD: Parse arguments for manual backfill
    parser = argparse.ArgumentParser()
    parser.add_argument(
        "--manual-backfill", help="Trigger a manual OHLC data backfill", action="store_true"
    )
    args = parser.parse_args()

    asyncio.run(main(manual_backfill=args.manual_backfill))
Details
Summary of Changes (Highlighted)
Summary of Changes (Highlighted)-
Imports:
- Added argparse and time libraries to handle command-line arguments and deal with timestamps.
-
New Utility Function:
- Added get_last_influx_timestamp to ensure there are no duplicate entries by fetching the last-recorded OHLC timestamp from InfluxDB.
-
backfill_ohlc():
-Updated to dynamically set start and end timestamps, avoiding duplication.
- Cleaned and added log statements for more clarity.
-
Scheduled Backfills:
- Added scheduled_backfill to perform backfills every 12 hours.
-
Manual Trigger:
- Added support for a manual backfill trigger via the --manual-backfill argument.
-
Concurrency:
- Main function (main()) now runs real-time WebSocket streaming and scheduled backfills concurrently.
The changes above include provisions to add a manual backfill trigger in Grafana. If you have been in crypto for any amount of time, you know that the market can be volatile and you may want to backfill data more frequently than twice daily. You can now trigger a manual backfill by running the script with the --manual-backfill argument. This will backfill the OHLC data for all currency pairs once and then exit the script.
Expand the details above to see the summary of changes.
Retention Policies and Continuous Queries
Thought were were done with Database heaven? No soup for you! Things are just getting started. Have you ever wondered what happens when we have a program with instructions to write ... and write and write, and write some more? Answer: We spend our crypto fortune on storage. We don't want to do that, especially when our primary concern is getting the live value of our portfolio with an occasional look back in time.
Enter retention policies and continuous queries. I'll optionally bore you with the details should you decide to expand the sections below. Otherwise, don't click that expansion button and simply note the retention scheme and continuous query I've set up for our InfluxDB instance.
Settling on a Retention Policy
You're here and ready to be wowed by the magic of retention policies. Let's dive in. To be honest, I spent a significant amount of time in discussion with ChatGPT trying to figure out what the best method would be that would allow me to do the relatively simple things I wanted (show my current portfolio value) and some of the added functionality I thought mgiht be useful (show my portfolio value at a certain point in time).
I'd worked out that I could use the Websockets API to query data and then write it to InfluxDB, storing the stream of data for a short amount of time, and then capturing snapshots of the datat in various timeframes to create dedicated types of records over time. For example, I could have a record that shows the value of my portfolio at the end of each day, or at the end of each week. I could also have a record that shows the value of my portfolio at the end of each month.
I woudl simply freeze some of the data from the websocket stream at the end of each day, week, and month, and then use that data to calculate the value of my portfolio at those points in time. I could then use Grafana to display the data in a way that makes sense to me.
I then went to sleep, dreamed of data and graphs and coloured cards showing my soaring (or plummeting) value over time. I woke up, and very quickly realized something that should have been obvious from the start ... every crypto API worth its salt has a historical data endpoint (or multiple) and not only could I use this to show my portfolio value from this day foward, but I could also use it to backfill historical data (assuming I knew that I held X amount of X coin at a certain point in time - That is a different problem to solve).
Knowing for a fact that Bitstamp has a few APIs, one of which is an HTTP API with OHLC data, my super elaborate snapshot schema was a redunancy to end all redundancies. I could simply query the OHLC data for the coins I hold and then use that data to calculate the value of my portfolio at any point in time.
My python script may have become a bit more complex as I'd intended to handle snapshots of data using InfluxDB, but as it happens getting both the Websocket and HTTP data will end up being a good overall solution.
Retention Policies For Websocket Data and OHLC Data
Here is the retention policy I've set up for the Websocket data and OHLC data:
Websocket Data Retention Policy: - Since the Websocket data is real-time data that we only need for a short period of time, we'll set a retention policy to keep the data for 90 days. This may seem like a long time, but it will allow us to look back at the live trade data for the past 3 months if needed.
OHLC Data Retention Policy: - The OHLC data is historical data that we'll use to backfill and query historical data for our portfolio. I am primarily focused on a small group of coins so won't be collecting massive amounts of data on thousands of coints. I'd like to keep this data for a long time and my retention policy will be set to keep the OHLC data for 10 years.
Bucket Configuration for Retention Policies
With the current setup, you may have noticed that all data is currently being written to the crypto_portfolio bucket. We'll need to create a new bucket for the OHLC data and set the appropriate retention policy for each bucket. This will help us avoid unnecessary complexities and keep the data organized. Our crypto_portfolio bucket will be used for the live trade data, and a new bucket called crypto_history will be used for the OHLC data.
Add a new Bucket for OHLC Data in InfluxDB
-
Log in to the InfluxDB UI by navigating to
http://<your-influxdb-ip>:8086in your browser. -
Click the
Datatab on the left sidebar, and then click theBucketstab. -
Click the
Create Bucketbutton to create a new bucket for the OHLC data. Enter the following details for the new bucket:- Name: crypto_history
- Retention Period: 10 years
-
Click
Createto create the new bucket.
This is also a good time to check the retention policy for the crypto_portfolio bucket. You can click on the crypto_portfolio bucket and check the retention policy to ensure it is set to 90 days, or less if you are tight on storage.
Update the InfluxDB Handler in our Python Code to Write OHLC Data to the New Bucket
We'll need to update the InfluxDBHandler class in the influxdb_handler.py file to write the OHLC data to the new crypto_history bucket as it's currently being added as a measurement to the crypto_portfolio bucket. We also need to ensure that our HTTP request for OHLC data runs twice daily and that we've provided for our manual request button in Grafana. Change the code in the influxdb_handler.py file as follows:
- Edits to the
InfluxDBHandlerclass to write OHLC data to the newcrypto_historybucket:
import influxdb_client
from influxdb_client.client.write_api import SYNCHRONOUS


class InfluxDBHandler:
    def __init__(self, websocket_url, ohlc_url, token, org):
        """
        Initialize the InfluxDB clients for WebSocket and OHLC data buckets.
        Args:
            websocket_url (str): URL for WebSocket InfluxDB bucket.
            ohlc_url (str): URL for OHLC InfluxDB bucket.
            token (str): InfluxDB authentication token.
            org (str): The organization name.
        """

        # Separate clients for WebSocket and OHLC buckets
        self.ws_client = influxdb_client.InfluxDBClient(
            url=websocket_url,
            token=token,
            org=org
        )
        self.ohlc_client = influxdb_client.InfluxDBClient(
            url=ohlc_url,
            token=token,
            org=org
        )


        # Separate write APIs for two buckets
        self.ws_write_api = self.ws_client.write_api(write_options=SYNCHRONOUS)
        self.ohlc_write_api = self.ohlc_client.write_api(write_options=SYNCHRONOUS)

    def write_data(self, currency_pair, price, timestamp):
        """
        Write real-time WebSocket price data to InfluxDB (WebSocket bucket).
        """
        try:
            point = influxdb_client.Point("crypto_data") \
                .tag("currency_pair", currency_pair) \
                .field("price", price) \
                .time(timestamp)

            # Write to WebSocket bucket
            self.ws_write_api.write(bucket="crypto_portfolio", record=point)
            print(f"Real-time WebSocket data written: {currency_pair} = {price} USD")
        except Exception as e:
            print(f"Failed to write WebSocket data to InfluxDB: {e}")

    def write_ohlc_data(self, currency_pair, open_, high, low, close, volume, timestamp):
        """
        Write OHLC data into InfluxDB (OHLC bucket).
        """
        try:
            point = influxdb_client.Point("crypto_history") \
                .tag("currency_pair", currency_pair) \
                .field("open", open_) \
                .field("high", high) \
                .field("low", low) \
                .field("close", close) \
                .field("volume", volume) \
                .time(timestamp)

            # Write to OHLC bucket
            self.ohlc_write_api.write(bucket="crypto_history", record=point)
            print(f"OHLC data written for {currency_pair}: {timestamp}")
        except Exception as e:
            print(f"Error writing OHLC data to InfluxDB: {e}")
    def query(self, query_string):
        """
        Query InfluxDB using Flux and return the results.
        """
        try:
            # Perform the query using the OHLC client
            query_api = self.ohlc_client.query_api()
            tables = query_api.query(query_string)

            # Extract the data from results
            results = []
            for table in tables:
                for record in table.records:
                    # Only include _time (and fallback gracefully for other fields)
                    results.append({"_time": record.get_time(), **record.values})

            return results
        except Exception as e:
            print(f"Error querying InfluxDB: {e}")
            return []  # Return an empty list on error
Deploying the Updated Script
I built my script on my local machine in an IDE that I prefer to use for Python development. This means my code is not yet living on my Alpine Proxmox VM. You may have your Python script where it needs to be. If that's the case then skip on down to the next section.
The following will walk through moving the project files from your local machine to your VM and setting up the Python environment on your VM to run the script.
Ensure you have super user privileges on your VM
You'll need to have super user privileges on your VM to install the required packages and run the Python script. If you don't have super user privileges, you can use the sudo command to run commands as a super user.
My Alpine VM guided me through a user creation wizard upon creation but the user was not added to the sudoers file. First, because this is a bear bone Apline install, sudo is not installed. We'll need to install it first.
- Install
sudoon your VM:
apk add sudo
- Add the user to the "wheel" group to grant sudo privileges:
adduser <your-username> wheel
- Edit the
sudoersfile to allow users in the "wheel" group to run commands as a super user:
visudo
- Uncomment the following line in the
sudoersfile:
%wheel ALL=(ALL) ALL
-
Save and exit the
sudoersfile. -
Test that the user has sudo privileges:
su -  <your-username>
sudo whoami
1. Copy the Project Files to Your VM
You can use scp to copy the project files from your local machine to your VM. Run the following command in your terminal to copy the project files to your VM:
scp -r /path/to/crypto-portfolio-project root@<your-vm-ip>:/opt/
Make sure you are running the scp command from your local machine and replace /path/to/crypto-portfolio-project with the path to your project folder. Replace <your-vm-ip> with the IP address of your VM.
2. SSH into Your VM and Install Virtual Environment (if not already installed)
Remember our project structure from earlier? If you built out the structure on your VM, you can skip this step. If your copying your files over from your local machine, ensure you emulate the two folder structure here:
crypto-scripto/
├── crypto-portfolio-project/
│   ├── .env                     # Environment variables
│   ├── main.py                  # Main script for your app
│   ├── influxdb_handler.py      # InfluxDB interaction
│   ├── websocket_client.py      # WebSocket logic
│   ├── http_handler.py          # HTTP-based historical data fetcher
│   ├── requirements.txt         # Python dependencies
In the parent folder crypto-scripto, we'll create a virtual environment and install the required Python packages. Run the following commands to set up the virtual environment and install the required packages:
# Create a virtual environment
cd crypto-scripto
python3 -m venv venv

# Activate the virtual environment
source venv/bin/activate

# Install the required packages
pip install -r requirements.txt # make sure you select the correct path to the requirements file
3. Run the Python Script on Your VM to Test
You can now run the main.py script on your VM to backfill historical OHLC data and start the real-time WebSocket listener. Run the following command to start the script:
python3 main.py
If all goes well, you'll see the same (well same kind of) wall of text as you did on your local machine but the joy here is that it's running on your server and you can do whatever you want with your local machine without stopping the script.
Persisting the Python Script with Systemd
Ok great. We're up and running, but what happens when we aren't? I mean, what happens when we close the terminal, when the power goes out, when our server reboots?! Kablouey! No more script. No more data. Someone probably stole your crypto too. We need to persist the script so that it runs in the background and we can access it whenever we want. I insist! We must persist!
We can use systemd or alternatively, we can use tmux to run the script in the background. Since we are running Alpine Linux, we won't use either and instead use the OpenRC init system that comes with Alpine Linux.
1. Create a New Service File
nano /etc/init.d/crypto-portfolio
- Add the following script to the file:
#!/sbin/openrc-run
# OpenRC service script for Crypto Portfolio Python app

name="Crypto Portfolio Python App"
description="Python script to process live trades and historical OHLC to InfluxDB."
command="/opt/crypto-script/venv/bin/python"  # Update to the correct path to Python
command_args="/opt/crypto-script/crypto-portfolio-project/main.py"
pidfile="/run/${RC_SVCNAME}.pid"

depend() {
    need net  # Ensure network is up
}

start_pre() {
    # Check if the virtual environment exists in the correct location
    if [ ! -f /opt/crypto-script/venv/bin/activate ]; then
        eerror "Virtual environment not found at /opt/crypto-script/venv. Create it using: python3 -m venv venv"
        return 1
    fi
}
Key Components Explained:
- command: Absolute path to Python inside your virtual environment.
- command_args: Path to your main program script (main.py).
- start_pre: Pre-checks run before starting the service (e.g., ensure the venv is present).
- depend(): Ensures this service runs after the network is up.
2. Run the following to ensure OpenRC can execute the new service script:
chmod +x /etc/init.d/crypto-portfolio
3. Add the Service to OpenRC
rc-update add crypto-portfolio default
4. Start the Service
rc-service crypto-portfolio start
Your script will run and you'll see all your data being populated again -- if you are writing hte OLHC data to the console, you'll see a lot of data being written to the console as it populates and gets sent to InfluxDB.
5. Check the Service Status
rc-service crypto-portfolio status
Add Logo and Description API Queries to Python Script
We have some of the raw data that we need to show our portfolio information, but we are lacking in the visual department. Bitstamp's HTTP API provides a way to fetch the logo and description for each currency pair. We can use this data to display the logo and description for each currency pair in our Grafana dashboard.
This means we will be adding a new method to the HTTPHandler class to fetch the logo and description for each currency pair. We'll also update the main.py script to fetch this data and write it to InfluxDB. To test that our data is being fetched correctly without running the entire script which pulls thousands of data points, we will build a quick test script to fetch the logo and other currency info.
Update the HTTPHandler Class to Fetch Logo and Description
import requests


class HTTPHandler:
    def __init__(self, base_url, tracked_currency_pairs):
        """
        Initialize the HTTP client for Bitstamp API.
        Args:
            base_url (str): Base URL for the Bitstamp API.
        """
        self.base_url = base_url
        self.tracked_currency_pairs = tracked_currency_pairs

    def fetch_ohlc(self, currency_pair, step, limit, start=None, end=None):
        """
        Fetch OHLC data for a currency pair.

        Args:
            currency_pair (str): The market symbol, e.g., "btcusd".
            step (int): Timeframe step in seconds (e.g., 3600 for 1-hour candles).
            limit (int): Maximum number of data points to retrieve (max 1000).
            start (int): Start timestamp in Unix time (optional).
            end (int): End timestamp in Unix time (optional).

        Returns:
            list: List of OHLC data points.
        """
        url = f"{self.base_url}/ohlc/{currency_pair}/"

        # Define query parameters for the API call
        params = {
            "step": step,   # OHLC timeframe (e.g., hourly = 3600 seconds)
            "limit": limit  # Max 1000 candles per request
        }
        if start:
            params["start"] = start
        if end:
            params["end"] = end

        # Perform the API request
        response = requests.get(url, params=params)

        if response.status_code == 200:
            ohlc_data = response.json().get("data", {}).get("ohlc", [])
            return ohlc_data
        else:
            raise Exception(
                f"Failed to fetch OHLC data: {response.status_code}, {response.text}")


     #  Fetch and filter currencies with logos and descriptions
    def fetch_currencies_with_logo(self):
        """
        Fetch a list of all available currencies with their logos and filter them.

        Returns:
            tuple: (filtered_currencies: list, all_currencies: list, unmatched_pairs: list)
                - filtered_currencies: Only the coins that match your tracked pairs.
                - all_currencies: Full list of currencies from the Bitstamp API.
                - unmatched_pairs: A list of pairs where no matching symbol was found in the response.
        """
        url = f"{self.base_url}/currencies/"
        response = requests.get(url)

        if response.status_code != 200:
            print(
                f"Failed to fetch currencies: {response.status_code}, {response.text}")
            return [], [], []

        all_currencies = response.json()

        # Get unique symbols (e.g., ["BTC", "XRP"]) from tracked pairs (e.g., ["btcusd", "xrpusd"])
        tracked_symbols = set(pair[:-3].upper()
                              for pair in self.tracked_currency_pairs)

        # Filter the currencies based on tracked symbols
        filtered_currencies = [
            currency for currency in all_currencies if currency["currency"].upper() in tracked_symbols
        ]

        # Identify pairs that didn't match any symbol in /currencies/
        matched_symbols = {currency["currency"].upper()
                           for currency in all_currencies}
        unmatched_pairs = [
            pair for pair in self.tracked_currency_pairs if pair[:-3].upper() not in matched_symbols
        ]

        return filtered_currencies, all_currencies, unmatched_pairs
Test the fetch_currencies_with_logo Method in a New Script
from http_handler import HTTPHandler

# Test the fetch_currencies_with_logo method from bitsamp API
def test_fetch_currencies_with_logo():
    """
    Test the fetch_currencies_with_logo method to filter only tracked coins with logos.
    """
    # Define tracked currency pairs (this should match your CURRENCY_PAIRS list)
    tracked_currency_pairs = ["btcusd", "xrpusd",
                              "xlmusd", "hbarusd", "vetusd", "csprusd", "xdcusd"]

    # Instantiate the HTTP handler
    http_handler = HTTPHandler(
        base_url="https://www.bitstamp.net/api/v2", tracked_currency_pairs=tracked_currency_pairs)

    # Fetch filtered currencies, all currencies, and unmatched pairs
    filtered_currencies, all_currencies, unmatched_pairs = http_handler.fetch_currencies_with_logo()

    # Print filtered currencies
    print("Filtered Currencies (Tracked only):")
    for currency in filtered_currencies:
        print(
            f"Name: {currency['name']}, Symbol: {currency['currency']}, "
            f"Logo: {currency['logo']}, Type: {currency['type']}"
        )

    # Print unmatched pairs
    print("\nUnmatched Pairs:")
    for pair in unmatched_pairs:
        print(f"{pair} (Base symbol: {pair[:-3].upper()})")


if __name__ == "__main__":
    test_fetch_currencies_with_logo()
Add Logo and Description Data to InfluxDB
We are now pulling some of the critical data we need to get information of on our portfolio. Numbers, numbers, numbers. Wouldn't it be nice to get a bit of a pop in our Grafana dashboard? We can add the logo and description data to InfluxDB to display the logo and description for each currency pair in our Grafana dashboard. This will help us visualize our portfolio data in a more engaging way.
Step 1. Create a cyrpto_ticker bucket in InfluxDB
-
Log in to the InfluxDB UI by navigating to
http://<your-influxdb-ip>:8086in your browser. -
Click the
Datatab on the left sidebar, and then click theBucketstab. -
Click the
Create Bucketbutton to create a new bucket for the currency ticker data. Enter the following details for the new bucket:- Name: crypto_ticker
- Retention Period: forever
-
Click
Createto create the new bucket.
Step 2. Add Ticker Writing Logic to the HTTPHandler Class http_handler.py
Add the highlighted code to the InfluxDBHandler class in the influxdb_handler.py file to write the logo and description data to the crypto_ticker bucket:
import requests


class HTTPHandler:
    def __init__(self, base_url, tracked_currency_pairs):
        """
        Initialize the HTTP client for Bitstamp API.
        Args:
            base_url (str): Base URL for the Bitstamp API.
            tracked_currency_pairs (list): List of tracked currency pairs (e.g., ["btcusd", "xrpusd"]).
        """
        self.base_url = base_url
        self.tracked_currency_pairs = tracked_currency_pairs

    def fetch_ohlc(self, currency_pair, step, limit, start=None, end=None):
        """
        Fetch OHLC data for a currency pair.

        Args:
            currency_pair (str): The market symbol, e.g., "btcusd".
            step (int): Timeframe step in seconds (e.g., 3600 for 1-hour candles).
            limit (int): Maximum number of data points to retrieve (max 1000).
            start (int): Start timestamp in Unix time (optional).
            end (int): End timestamp in Unix time (optional).

        Returns:
            list: List of OHLC data points.
        """
        url = f"{self.base_url}/ohlc/{currency_pair}/"

        # Define query parameters for the API call
        params = {
            "step": step,   # OHLC timeframe (e.g., hourly = 3600 seconds)
            "limit": limit  # Max 1000 candles per request
        }
        if start:
            params["start"] = start
        if end:
            params["end"] = end

        # Perform the API request
        response = requests.get(url, params=params)

        if response.status_code == 200:
            ohlc_data = response.json().get("data", {}).get("ohlc", [])
            return ohlc_data
        else:
            raise Exception(
                f"Failed to fetch OHLC data: {response.status_code}, {response.text}")


    def fetch_ticker_info(self, currency_pairs):
        """
        Fetch ticker information for the given currency pairs.

        Args:
            currency_pairs (list): List of currency pair symbols (e.g., ["btcusd", "xrpusd"]).

        Returns:
            dict: A dictionary with currency pairs as keys and their ticker data as values.
        """
        tickers = {}
        for pair in currency_pairs:
            # Construct the URL for the API call
            url = f"{self.base_url}/ticker/{pair}/"

            # Perform the API request
            response = requests.get(url)

            # Handle successful responses
            if response.status_code == 200:
                tickers[pair] = response.json()
            else:
                print(f"[WARNING] Failed to fetch ticker data for {pair}: {response.status_code}, {response.text}")

        return tickers

    def fetch_currencies_with_logo(self):
        """
        Fetch a list of all available currencies with their logos and filter them.

        Returns:
            tuple: (filtered_currencies: list, all_currencies: list, unmatched_pairs: list)
                - filtered_currencies: Only the coins that match your tracked pairs.
                - all_currencies: Full list of currencies from the Bitstamp API.
                - unmatched_pairs: A list of pairs where no matching symbol was found in the response.
        """
        url = f"{self.base_url}/currencies/"
        response = requests.get(url)

        if response.status_code != 200:
            print(f"Failed to fetch currencies: {response.status_code}, {response.text}")
            return [], [], []

        all_currencies = response.json()

        # Get unique symbols (e.g., ["BTC", "XRP"]) from tracked pairs (e.g., ["btcusd", "xrpusd"])
        tracked_symbols = set(pair[:-3].upper() for pair in self.tracked_currency_pairs)

        # Filter the currencies based on tracked symbols
        filtered_currencies = [
            currency for currency in all_currencies if currency["currency"].upper() in tracked_symbols
        ]

        # Identify pairs that didn't match any symbol in /currencies/
        matched_symbols = {currency["currency"].upper() for currency in all_currencies}
        unmatched_pairs = [
            pair for pair in self.tracked_currency_pairs if pair[:-3].upper() not in matched_symbols
        ]

        return filtered_currencies, all_currencies, unmatched_pairs
Step 3. Update the InfluxDBHandler Class to Write Ticker Data InfluxDB
Next we will add a write_ticker_data method to the InfluxDBHandler class in the influxdb_handler.py file to write the logo and description data to the crypto_ticker bucket:
# New file with changes highlighted and comments on removed lines

import influxdb_client
from influxdb_client.client.write_api import SYNCHRONOUS


class InfluxDBHandler:
    def __init__(self, websocket_url, ohlc_url, token, org):
        """
        Initialize the InfluxDB clients for WebSocket and OHLC data buckets.
        Args:
            websocket_url (str): URL for WebSocket InfluxDB bucket.
            ohlc_url (str): URL for OHLC InfluxDB bucket.
            token (str): InfluxDB authentication token.
            org (str): The organization name.
        """
        # Separate clients for WebSocket and OHLC buckets
        self.ws_client = influxdb_client.InfluxDBClient(
            url=websocket_url, token=token, org=org
        )
        self.ohlc_client = influxdb_client.InfluxDBClient(
            url=ohlc_url, token=token, org=org
        )

        # Separate write APIs for two buckets
        self.ws_write_api = self.ws_client.write_api(write_options=SYNCHRONOUS)
        self.ohlc_write_api = self.ohlc_client.write_api(write_options=SYNCHRONOUS)

    # WebSocket Price Updates
    def write_data(self, currency_pair, price, timestamp):
        """
        Write real-time WebSocket price data to InfluxDB (WebSocket bucket).
        """
        try:
            point = influxdb_client.Point("crypto_data") \
                .tag("currency_pair", currency_pair) \
                .field("price", price) \
                .time(timestamp)

            # Write to WebSocket bucket
            self.ws_write_api.write(bucket="crypto_portfolio", record=point)
            print(f"Real-time WebSocket data written: {currency_pair} = {price} USD")
        except Exception as e:
            print(f"Failed to write WebSocket data to InfluxDB: {e}")

    # OHLC Writing Logic
    def write_ohlc_data(self, currency_pair, open_, high, low, close, volume, timestamp):
        """
        Write OHLC data into InfluxDB (OHLC bucket).
        """
        try:
            point = influxdb_client.Point("crypto_history") \
                .tag("currency_pair", currency_pair) \
                .field("open", open_) \
                .field("high", high) \
                .field("low", low) \
                .field("close", close) \
                .field("volume", volume) \
                .time(timestamp)

            # Write to OHLC bucket
            self.ohlc_write_api.write(bucket="crypto_history", record=point)
            print(f"OHLC data written for {currency_pair}: {timestamp}")
        except Exception as e:
            print(f"Error writing OHLC data to InfluxDB: {e}")

    # Ticker Data Storage (Augmented Feature for Step 2)
    def write_ticker_data(self, currency_pair, ticker_data, timestamp):
        """
        Write ticker data to InfluxDB.

        Args:
            currency_pair (str): The currency pair, e.g., "btcusd".
            ticker_data (dict): The ticker data, including fields like open, high, low, last, volume, etc.
            timestamp (int): The UNIX timestamp in nanoseconds.
        """
        try:
            # Build a point for the ticker data
            point = influxdb_client.Point("crypto_ticker") \
                .tag("currency_pair", currency_pair) \
                .field("open", float(ticker_data["open"])) \
                .field("high", float(ticker_data["high"])) \
                .field("low", float(ticker_data["low"])) \
                .field("last", float(ticker_data["last"])) \
                .field("volume", float(ticker_data["volume"])) \
                .time(timestamp)

            # Write the point to the OHLC bucket
            self.ohlc_write_api.write(bucket="crypto_ticker", record=point)
            print(f"Ticker data written for {currency_pair}: {timestamp}")
        except Exception as e:
            print(f"Error writing ticker data to InfluxDB: {e}")

    # Query Logic (Unmodified for Historical Data)
    def query(self, query_string):
        """
        Query InfluxDB using Flux and return the results.
        """
        try:
            # Perform the query using the OHLC client
            query_api = self.ohlc_client.query_api()
            tables = query_api.query(query_string)

            # Extract the data from results
            results = []
            for table in tables:
                for record in table.records:
                    # Only include _time (and fallback gracefully for other fields)
                    results.append({"_time": record.get_time(), **record.values})

            return results
        except Exception as e:
            print(f"Error querying InfluxDB: {e}")
            return []  # Return an empty list on error
Step 4. Create a Test Script to Fetch and Write Ticker Data - test_influxdb_handler.py
Again, instead of running the entire script to test the new functionality, we'll create a test script to fetch the logo and description data and write it to InfluxDB. This will help us verify that the data is being fetched correctly and written to InfluxDB.
from http_handler import HTTPHandler
from influxdb_handler import InfluxDBHandler
import time


def test_ticker_to_influxdb():
    """
    Test writing ticker data directly into InfluxDB.
    """

    http_handler = HTTPHandler(
        base_url="https://www.bitstamp.net/api/v2",
        tracked_currency_pairs=["btcusd", "xrpusd"]
    )


    # Fetch ticker info for tracked pairs
    ticker_info = {
        "btcusd": {
            "open": "27100.00",
            "high": "27300.00",
            "low": "26950.00",
            "last": "27200.00",
            "volume": "120.5",
            "logo": "https://example.com/btc.png",
            "description": "Bitcoin is a decentralized digital currency without a central bank or single administrator."
        },
        "xrpusd": {
            "open": "0.50000",
            "high": "0.51000",
            "low": "0.48000",
            "last": "0.49250",
            "volume": "543211.2"
        }
    }

    influxdb_handler = InfluxDBHandler(
        websocket_url="http://10.2.1.185:8086",
        ohlc_url="http://10.2.1.185:8086",
        token="YOUR_INFLUXDB_TOKEN",
        org="YOUR_ORGANIZATION"
    )

    for pair, data in ticker_info.items():
        # Convert current time to nanoseconds for InfluxDB
        timestamp = int(time.time() * 1e9)

        # Write the ticker information
        influxdb_handler.write_ticker_data(pair, data, timestamp)


if __name__ == "__main__":
    test_ticker_to_influxdb()
Add Logo and Description Data to InfluxDB
So far the above script gets some of the general ticker data into InfluxDB but we are still missing the logo and description data. We can add the logo and description data to InfluxDB to display the logo and description for each currency pair in our Grafana dashboard. This will help us visualize our portfolio data in a more engaging way.
Step 1. Update the write_ticker_data Method in the InfluxDBHandler Class
In your influxdb_handler.py file, update the write_ticker_data method to include the logo and description fields:
# New file with changes highlighted and comments on removed lines

import influxdb_client
from influxdb_client.client.write_api import SYNCHRONOUS


class InfluxDBHandler:
    def __init__(self, websocket_url, ohlc_url, token, org):
        """
        Initialize the InfluxDB clients for WebSocket and OHLC data buckets.
        Args:
            websocket_url (str): URL for WebSocket InfluxDB bucket.
            ohlc_url (str): URL for OHLC InfluxDB bucket.
            token (str): InfluxDB authentication token.
            org (str): The organization name.
        """
        # Separate clients for WebSocket and OHLC buckets
        self.ws_client = influxdb_client.InfluxDBClient(
            url=websocket_url, token=token, org=org
        )
        self.ohlc_client = influxdb_client.InfluxDBClient(
            url=ohlc_url, token=token, org=org
        )

        # Separate write APIs for two buckets
        self.ws_write_api = self.ws_client.write_api(write_options=SYNCHRONOUS)
        self.ohlc_write_api = self.ohlc_client.write_api(
            write_options=SYNCHRONOUS)

    # WebSocket Price Updates
    def write_data(self, currency_pair, price, timestamp):
        """
        Write real-time WebSocket price data to InfluxDB (WebSocket bucket).
        """
        try:
            point = influxdb_client.Point("crypto_data") \
                .tag("currency_pair", currency_pair) \
                .field("price", price) \
                .time(timestamp)

            # Write to WebSocket bucket
            self.ws_write_api.write(bucket="crypto_portfolio", record=point)
            print(
                f"Real-time WebSocket data written: {currency_pair} = {price} USD")
        except Exception as e:
            print(f"Failed to write WebSocket data to InfluxDB: {e}")

    # OHLC Writing Logic
    def write_ohlc_data(self, currency_pair, open_, high, low, close, volume, timestamp):
        """
        Write OHLC data into InfluxDB (OHLC bucket).
        """
        try:
            point = influxdb_client.Point("crypto_history") \
                .tag("currency_pair", currency_pair) \
                .field("open", open_) \
                .field("high", high) \
                .field("low", low) \
                .field("close", close) \
                .field("volume", volume) \
                .time(timestamp)

            # Write to OHLC bucket
            self.ohlc_write_api.write(bucket="crypto_history", record=point)
            print(f"OHLC data written for {currency_pair}: {timestamp}")
        except Exception as e:
            print(f"Error writing OHLC data to InfluxDB: {e}")

    # Ticker Data Storage (Augmented Feature for Step 2)
    def write_ticker_data(self, currency_pair, ticker_data, timestamp, logo_url=None):
        """
        Write ticker data to InfluxDB.

        Args:
            currency_pair (str): The currency pair, e.g., "btcusd".
            ticker_data (dict): The ticker data, including fields like open, high, low, last, volume, etc.
            timestamp (int): The UNIX timestamp in nanoseconds.
        """
        try:
            # Build a point for the ticker data
            point = influxdb_client.Point("crypto_ticker") \
                .tag("currency_pair", currency_pair) \
                .field("open", float(ticker_data["open"])) \
                .field("high", float(ticker_data["high"])) \
                .field("low", float(ticker_data["low"])) \
                .field("last", float(ticker_data["last"])) \
                .field("volume", float(ticker_data["volume"])) \
                .time(timestamp)

            # Add logo field if available
            if logo_url:
                point = point.tag("logo_url", logo_url)

                # Write the point to the OHLC bucket
            self.ohlc_write_api.write(bucket="crypto_ticker", record=point)
            print(
                f"Ticker data written for {currency_pair}: {timestamp} with logo {logo_url} ")
        except Exception as e:
            print(f"Error writing ticker data to InfluxDB: {e}")

    # Query Logic (Unmodified for Historical Data)
    def query(self, query_string):
        """
        Query InfluxDB using Flux and return the results.
        """
        try:
            # Perform the query using the OHLC client
            query_api = self.ohlc_client.query_api()
            tables = query_api.query(query_string)

            # Extract the data from results
            results = []
            for table in tables:
                for record in table.records:
                    # Only include _time (and fallback gracefully for other fields)
                    results.append(
                        {"_time": record.get_time(), **record.values})

            return results
        except Exception as e:
            print(f"Error querying InfluxDB: {e}")
            return []  # Return an empty list on error
Step 2. Update the test_ticker_to_influxdb Method in the test_influxdb_handler.py Script
from http_handler import HTTPHandler
from influxdb_handler import InfluxDBHandler
import time
import os
from dotenv import load_dotenv

# Load environment variables
dotenv_path = os.path.join(os.path.dirname(__file__), '.env')
load_dotenv(dotenv_path)

# **InfluxDB Configuration**
INFLUXDB_URL = os.getenv('INFLUXDB_URL')
INFLUXDB_TOKEN = os.getenv('INFLUXDB_TOKEN')
INFLUXDB_ORG = os.getenv('INFLUXDB_ORG')


def test_ticker_to_influxdb():
    """
    Test writing ticker data directly into InfluxDB with logos.
    """
    # Initialize the HTTPHandler
    http_handler = HTTPHandler(
        base_url="https://www.bitstamp.net/api/v2",
        tracked_currency_pairs=["btcusd", "xrpusd"]
    )

    # Fetch logos and metadata for the tracked coins
    filtered_currencies, all_currencies, unmatched_pairs = http_handler.fetch_currencies_with_logo()
    logos = {currency["currency"].upper(): currency["logo"] for currency in filtered_currencies}

    # Example ticker data (static for testing)
    ticker_info = {
        "btcusd": {
            "open": "27100.00",
            "high": "27300.00",
            "low": "26950.00",
            "last": "27200.00",
            "volume": "120.5",
        },
        "xrpusd": {
            "open": "0.50000",
            "high": "0.51000",
            "low": "0.48000",
            "last": "0.49250",
            "volume": "543211.2"
        }
    }

    # Initialize the InfluxDBHandler
    influxdb_handler = InfluxDBHandler(
        websocket_url=INFLUXDB_URL,
        ohlc_url=INFLUXDB_URL,
        token=INFLUXDB_TOKEN,
        org=INFLUXDB_ORG,
    )

    # Write the ticker data to InfluxDB (including logos)
    for pair, data in ticker_info.items():
        # Convert current time to nanoseconds for InfluxDB
        timestamp = int(time.time() * 1e9)

        # Extract logo URL for the base currency (e.g., "BTC" from "btcusd")
        base_currency = pair[:-3].upper()
        logo_url = logos.get(base_currency)  # Fallback to None if not found

        influxdb_handler.write_ticker_data(pair, data, timestamp, logo_url=logo_url)


if __name__ == "__main__":
    test_ticker_to_influxdb()
Step 3. Adjust the Test Script to Write Logo Data to InfluxDB
We will need to update the test_ticker_to_influxdb method in the test_influxdb_handler.py script again to ensure logo data is written to InfluxDB:
from http_handler import HTTPHandler
from influxdb_handler import InfluxDBHandler
import time
import os
from dotenv import load_dotenv

# Load environment variables
dotenv_path = os.path.join(os.path.dirname(__file__), '.env')
load_dotenv(dotenv_path)

# **InfluxDB Configuration**
INFLUXDB_URL = os.getenv('INFLUXDB_URL')
INFLUXDB_TOKEN = os.getenv('INFLUXDB_TOKEN')
INFLUXDB_ORG = os.getenv('INFLUXDB_ORG')


def test_ticker_to_influxdb():
    """
    Test writing ticker data directly into InfluxDB with logos.
    """
    # Updated docstring to add note about logos being handled.

    # Initialize the HTTPHandler
    http_handler = HTTPHandler(
        base_url="https://www.bitstamp.net/api/v2",
        tracked_currency_pairs=["btcusd", "xrpusd"]
    )
    # Removed redundant trailing comma from `tracked_currency_pairs`.
    # Old Line: tracked_currency_pairs=["btcusd", "xrpusd",]
    # Removed for clarity and to follow standard Python formatting.

    # Fetch logos and metadata for the tracked coins
    filtered_currencies, all_currencies, unmatched_pairs = http_handler.fetch_currencies_with_logo()
    logos = {currency["currency"].upper(): currency["logo"] for currency in filtered_currencies}
    # Added HTTPHandler method `fetch_currencies_with_logo()` to obtain logos for tracked currencies.
    # `logos` dictionary is built to map currency codes to logo URLs.

    # Example ticker data (static for testing)
    ticker_info = {
        "btcusd": {
            "open": "27100.00",
            "high": "27300.00",
            "low": "26950.00",
            "last": "27200.00",
            "volume": "120.5",
        },
        "xrpusd": {
            "open": "0.50000",
            "high": "0.51000",
            "low": "0.48000",
            "last": "0.49250",
            "volume": "543211.2"
        }
    }

    # Initialize the InfluxDBHandler
    influxdb_handler = InfluxDBHandler(
        websocket_url=INFLUXDB_URL,
        ohlc_url=INFLUXDB_URL,
        token=INFLUXDB_TOKEN,
        org=INFLUXDB_ORG,
    )

    # Write the ticker data to InfluxDB (including logos)
    for pair, data in ticker_info.items():
        # Convert current time to nanoseconds for InfluxDB
        timestamp = int(time.time() * 1e9)

        # Extract logo URL for the base currency (e.g., "BTC" from "btcusd")
        base_currency = pair[:-3].upper()
        logo_url = logos.get(base_currency)  # Fallback to None if not found

        influxdb_handler.write_ticker_data(pair, data, timestamp, logo_url=logo_url)
    # Updated call to `influxdb_handler.write_ticker_data()` to include an additional parameter `logo_url`.
    # Highlight shows major logic added to associate and pass logo URLs from the `logos` dictionary.


if __name__ == "__main__":
    test_ticker_to_influxdb()
Step 4. Run the Test Script to Write Logo Data to InfluxDB
Run the test_influxdb_handler.py script to test the new functionality and write the logo and description data to InfluxDB:
python test_influxdb_handler.py
If the script runs successfully, you should see the following output:
Ticker data written for btcusd: 1631234567890123456 with logo https://example.com/btc.png
Ticker data written for xrpusd: 1631234567890123456 with logo None
Step 5. Verify the Data in InfluxDB
-
Log in to the InfluxDB UI by navigating to
http://<your-influxdb-ip>:8086in your browser. -
Click the
Datatab on the left sidebar, and then click theBucketstab. -
Click the
crypto_tickerbucket to view the data written by the test script. -
You should see the ticker data for the
btcusdandxrpusdcurrency pairs, including the logo URL forbtcusd.
Add Logo and Description Data to Production Script
We have successfully tested the functionality to fetch and write logo and description data to InfluxDB. Now we will integrate this functionality into the main.py script to fetch the logo and description data for each currency pair and write it to InfluxDB.
We will also add a few other elements from the Bitstamp /currenies/ API response to the ticker data, such as name, type, symbol, and available supply. This will provide more context and information about each currency pair in our Grafana dashboard.
Overview of Next Steps - Updated Features for HTTPHandler Class and InfluxDBHandler Class
-
Update the
InfluxDBHandler.write_ticker_datamethod to to store these extra fields (if present) in InfluxDB for visualization. -
Adjusting any logic to dynamically handle all configured pairs and make the handling of available/unavailable pairs seamless.
Update the influxdb_handler.py File
Update the write_ticker_data method in the InfluxDBHandler class to include the new fields from the Bitstamp /currencies/ API response:
Keep all the other code but chage only the write_ticker_data method.
import influxdb_client
from influxdb_client.client.write_api import SYNCHRONOUS


class InfluxDBHandler:
    def __init__(self, websocket_url, ohlc_url, token, org):
        """
        Initialize the InfluxDB clients for WebSocket and OHLC data buckets.
        Args:
            websocket_url (str): URL for WebSocket InfluxDB bucket.
            ohlc_url (str): URL for OHLC InfluxDB bucket.
            token (str): InfluxDB authentication token.
            org (str): The organization name.
        """
        # Original constructor logic continues here...

    def write_ticker_data(self, currency_pair, ticker_data, timestamp, metadata=None):
        """
        Write ticker data to InfluxDB.

        Args:
            currency_pair (str): The currency pair, e.g., "btcusd".
            ticker_data (dict): The ticker data, including fields like open, high, low, last, volume, etc.
            timestamp (int): The UNIX timestamp in nanoseconds.
            metadata (dict): Additional metadata for the currency (e.g., name, logo, etc.)
        """
        try:
            # Build a point for the ticker data
            point = influxdb_client.Point("crypto_ticker") \
                .tag("currency_pair", currency_pair) \
                .field("open", float(ticker_data["open"])) \
                .field("high", float(ticker_data["high"])) \
                .field("low", float(ticker_data["low"])) \
                .field("last", float(ticker_data["last"])) \
                .field("volume", float(ticker_data["volume"])) \
                .time(timestamp)

            # Add metadata as tags if provided
            if metadata:
                if "name" in metadata:
                    point = point.tag("name", metadata["name"])
                if "symbol" in metadata:
                    point = point.tag("symbol", metadata["symbol"])
                if "logo" in metadata:
                    point = point.tag("logo_url", metadata["logo"])
                if "type" in metadata:
                    point = point.tag("type", metadata["type"])
                if "available_supply" in metadata:
                    point = point.field("available_supply", float(metadata["available_supply"]))

            # Write the point to the OHLC bucket
            self.ohlc_write_api.write(bucket="crypto_ticker", record=point)
            print(f"Ticker data written for {currency_pair}: {timestamp}")
        except Exception as e:
            print(f"Error writing ticker data to InfluxDB: {e}")
Update the test_influxdb_handler.py Script
Update the test_ticker_to_influxdb method in the test_influxdb_handler.py script to include the new metadata fields for the currency pairs:
from http_handler import HTTPHandler
from influxdb_handler import InfluxDBHandler
import time
import os
from dotenv import load_dotenv

# Load environment variables
dotenv_path = os.path.join(os.path.dirname(__file__), '.env')
load_dotenv(dotenv_path)

# **InfluxDB Configuration**
INFLUXDB_URL = os.getenv('INFLUXDB_URL')
INFLUXDB_TOKEN = os.getenv('INFLUXDB_TOKEN')
INFLUXDB_ORG = os.getenv('INFLUXDB_ORG')


def test_ticker_to_influxdb():
    """
    Test writing ticker data directly into InfluxDB with metadata and logos.
    """
    # Initialize the HTTPHandler
    http_handler = HTTPHandler(
        base_url="https://www.bitstamp.net/api/v2",
        tracked_currency_pairs=[
            "btcusd",
            "xrpusd",
            "csprusd",
            "hbarusd",
            "xdcusd",
            "xlmusd",
        ],  # Extended list of tracked currency pairs
    )
    # Updated `tracked_currency_pairs` to include more pairs for broader testing.

    # Fetch logos and metadata for the tracked coins
    tracked_metadata, _, unmatched_pairs = http_handler.fetch_currencies_with_logo()
    metadata_map = {currency["currency"].upper(): currency for currency in tracked_metadata}
    # Updated the metadata logic to include creating `metadata_map` for providing
    # metadata (e.g., name, logo) for each tracked currency.

    # Example ticker data (static for testing)
    ticker_info = {
        "btcusd": {
            "open": "27100.00",
            "high": "27300.00",
            "low": "26950.00",
            "last": "27200.00",
            "volume": "120.5",
        },
        # You would dynamically have XRPs and every other pair instead!
    }
    # Reduced ticker data to one entry for brevity and clarity.

    # Initialize the InfluxDBHandler
    influxdb_handler = InfluxDBHandler(
        websocket_url=INFLUXDB_URL,
        ohlc_url=INFLUXDB_URL,
        token=INFLUXDB_TOKEN,
        org=INFLUXDB_ORG,
    )

    # Write the ticker data to InfluxDB (including logos)
    for pair, data in ticker_info.items():
        # Convert current time to nanoseconds for InfluxDB
        timestamp = int(time.time() * 1e9)

        # Extract metadata (e.g., name, logo) for the base currency
        base_currency = pair[:-3].upper()
        metadata = metadata_map.get(base_currency, {})  # Fallback to empty dict if not present

        influxdb_handler.write_ticker_data(pair, data, timestamp, metadata=metadata)
    # Updated call to `write_ticker_data()` to include a `metadata` argument.
    # Logic now dynamically provides metadata for each base currency.


if __name__ == "__main__":
    test_ticker_to_influxdb()
Update the main.py Script & Push to Production
So far we've done a lot of testing to ensure that the new functionality works as expected. Now we will integrate the new features into the main.py script to fetch the logo and description data for each currency pair and write it to InfluxDB.
Once we have updated the main.py script, we will push the changes to the production server and run the script to start fetching and storing the logo and description data for each currency pair.
Update the main.py Script
Update the main.py script to include the new functionality to fetch the logo and other meta data for each currency pair and write it to InfluxDB.
Step 1 - We will update the main.py script to include the following changes:
- Integrate Logo and other Metadata Fetching Logic
- Use
fetch_currencies_with_logo()to retrieve the metadata (e.g., name, logo, type, etc.) for all configured currency pairs.
- Fetch and Write Real-Time Ticker Data:
- Dynamically fetch ticker data for all pairs and write them to InfluxDB alongside metadata.
-
Ensure Websocket Data continues
-
Update the
main.pyScript with the New Features
- Add functionality for real-time fetching of ticker data and inclusion of metadata
Step 2 - Update the Websocket Data Fetching Logic
import asyncio
import json
import websockets


class WebSocketClient:
    def __init__(self, url, currency_pairs, timeout=20):
        """
        Initialize the WebSocket client.

        Args:
            url (str): WebSocket server URL.
            currency_pairs (list): List of currency pairs to subscribe to.
            timeout (int): Timeout for the WebSocket handshake (in seconds, default: 20).
        """
        self.url = url
        self.currency_pairs = currency_pairs
        self.timeout = timeout  # Ensure this is properly initialized

    async def subscribe_to_pairs(self, websocket):
        """
        Subscribe to specific currency pairs.
        """
        for pair in self.currency_pairs:
            subscription_message = {
                "event": "bts:subscribe",
                "data": {"channel": f"live_trades_{pair}"}
            }
            await websocket.send(json.dumps(subscription_message))
            print(f"Subscribed to {pair}")

    async def listen(self, message_handler):
        """
        Connect to the WebSocket, subscribe to pairs, and listen for messages.
        """
        try:
            async with websockets.connect(self.url, ping_interval=None, timeout=self.timeout) as websocket:
                print("[INFO] WebSocket connection established.")
                await self.subscribe_to_pairs(websocket)

                while True:
                    message = await websocket.recv()
                    await message_handler(message)

        except websockets.exceptions.ConnectionClosed as e:
            print(f"[ERROR] WebSocket connection closed: {e}")
        except asyncio.TimeoutError:
            print("[ERROR] WebSocket connection timed out during handshake.")
        except Exception as e:
            print(f"[ERROR] Unexpected WebSocket error: {e}")
        finally:
            print("[INFO] Reconnecting to WebSocket...")
            await asyncio.sleep(5)
            await self.listen(message_handler)
Step 3 - Change the main.py Script
import asyncio
import json
import os
import argparse
import time
from dotenv import load_dotenv
from influxdb_handler import InfluxDBHandler
from websocket_client import WebSocketClient
from http_handler import HTTPHandler

# --- ENVIRONMENT AND CONFIGURATION ---

# Load environment variables
dotenv_path = os.path.join(os.path.dirname(__file__), '.env')
load_dotenv(dotenv_path)

# InfluxDB Configuration
INFLUXDB_URL = os.getenv('INFLUXDB_URL')
INFLUXDB_TOKEN = os.getenv('INFLUXDB_TOKEN')
INFLUXDB_ORG = os.getenv('INFLUXDB_ORG')

# Bitstamp Configuration
CURRENCY_PAIRS = ["btcusd", "xrpusd", "xlmusd", "hbarusd", "vetusd", "csprusd", "xdcusd"]
WS_URL = "wss://ws.bitstamp.net"
HTTP_BASE_URL = "https://www.bitstamp.net/api/v2"

# Initialize InfluxDB and HTTP Handlers
influxdb_handler = InfluxDBHandler(
    websocket_url=INFLUXDB_URL,
    ohlc_url=INFLUXDB_URL,
    token=INFLUXDB_TOKEN,
    org=INFLUXDB_ORG,
)
http_handler = HTTPHandler(base_url=HTTP_BASE_URL, tracked_currency_pairs=CURRENCY_PAIRS)

# --- FUNCTIONS ---

# Fetch the last recorded timestamp from InfluxDB
async def get_last_influx_timestamp(currency_pair):
    """
    Query InfluxDB for the last recorded timestamp for a specified currency pair.
    """
    query = f"""
    from(bucket: "crypto_history")
      |> range(start: -1y)
      |> filter(fn: (r) => r._measurement == "crypto_history" and r["currency_pair"] == "{currency_pair}")
      |> keep(columns: ["_time"])
      |> sort(desc: true)
      |> limit(n: 1)
    """
    try:
        result = influxdb_handler.query(query)
        if result:
            last_time = result[0]["_time"]
            return int(time.mktime(last_time.timetuple()))
        return None
    except Exception as e:
        print(f"Error querying last InfluxDB timestamp for {currency_pair}: {e}")
        return None

# Process WebSocket trade messages and write to InfluxDB
async def process_message(message):
    try:
        message_json = json.loads(message)
        if message_json.get("event") == "trade":
            data = message_json.get("data", {})
            currency_pair = message_json["channel"].split("_")[2]
            price = float(data["price"])
            timestamp = int(data["timestamp"]) * 1_000_000_000
            influxdb_handler.write_data(currency_pair, price, timestamp)
    except Exception as e:
        print(f"Failed to process WebSocket message: {e}")

async def fetch_and_write_ticker_data():
    """
    Fetch ticker data for all configured pairs and write to InfluxDB.
    """
    print("[INFO] Fetching ticker data and metadata for configured pairs...")
    tracked_metadata, _, unmatched_pairs = http_handler.fetch_currencies_with_logo()

    # Warn about unmatched pairs
    if unmatched_pairs:
        print(f"[WARNING] Unmatched currency pairs: {unmatched_pairs}")

    # Map base currencies to their metadata
    metadata_map = {currency["currency"].upper(): currency for currency in tracked_metadata}

    # Fetch ticker data
    ticker_info = http_handler.fetch_ticker_info(CURRENCY_PAIRS)
    if not ticker_info:
        print("[ERROR] No ticker data fetched. Exiting.")
        return  # Exit if no ticker data is retrieved

    for pair, data in ticker_info.items():
        try:
            # Log data before writing to InfluxDB
            print(f"[DEBUG] Writing ticker data for {pair}: {data}")

            timestamp = int(time.time() * 1e9)  # Current time in nanoseconds
            base_currency = pair[:-3].upper()
            metadata = metadata_map.get(base_currency, {})
            influxdb_handler.write_ticker_data(pair, data, timestamp, metadata)
        except Exception as e:
            print(f"[ERROR] Failed to process ticker data for {pair}: {e}")

async def backfill_ohlc(currency_pair):
    try:
        start = await get_last_influx_timestamp(currency_pair)
        if start is None:
            print(f"[INFO] No previous data found for {currency_pair}, backfilling from the start.")
        end = int(time.time())
        ohlc_data = http_handler.fetch_ohlc(
            currency_pair, step=3600, limit=1000, start=start, end=end
        )
        for candle in ohlc_data:
            influxdb_handler.write_ohlc_data(
                currency_pair=currency_pair,
                open_=float(candle["open"]),
                high=float(candle["high"]),
                low=float(candle["low"]),
                close=float(candle["close"]),
                volume=float(candle["volume"]),
                timestamp=int(candle["timestamp"]) * 1_000_000_000,
            )
    except Exception as e:
        print(f"[ERROR] Failed to backfill OHLC data for {currency_pair}: {e}")

async def scheduled_fetch():
    """
    Periodically fetch ticker data and backfill historical OHLC data.
    """
    while True:
        print("[INFO] Running scheduled ticker data fetch...")
        await fetch_and_write_ticker_data()  # Fetch and write ticker data

        print("[INFO] Running scheduled OHLC backfill...")
        for pair in CURRENCY_PAIRS:
            await backfill_ohlc(pair)

        print("[INFO] Scheduled fetch completed. Sleeping for 12 hours.")
        await asyncio.sleep(43200)  # 12-hour interval

async def main(manual_backfill, fetch_ticker):
    """
    Main function for periodic tasks or manual commands.
    """
    if manual_backfill:
        print("[INFO] Manual backfill mode activated...")
        for pair in CURRENCY_PAIRS:
            await backfill_ohlc(pair)
        return

    if fetch_ticker:
        print("[INFO] Manual ticker fetch mode activated...")
        await fetch_and_write_ticker_data()
        return

    # Default: Run WebSocket + Scheduled Fetch (OHLC + Ticker)
    print("[INFO] Starting WebSocket listener and scheduled tasks...")
    ws_client = WebSocketClient(url=WS_URL, currency_pairs=CURRENCY_PAIRS)
    websocket_task = asyncio.create_task(ws_client.listen(process_message))
    scheduled_task = asyncio.create_task(scheduled_fetch())
    await asyncio.gather(websocket_task, scheduled_task)

# --- ENTRY POINT ---
if __name__ == "__main__":
    parser = argparse.ArgumentParser()
    parser.add_argument("--manual-backfill", action="store_true",
                        help="Trigger manual OHLC data backfill.")
    parser.add_argument("--fetch-ticker", action="store_true",
                        help="Manually fetch ticker data.")
    args = parser.parse_args()
    asyncio.run(main(manual_backfill=args.manual_backfill, fetch_ticker=args.fetch_ticker))
The above script should write 3 types of data to InfluxDB and should likewise be show data writes for each in our console output. Data types are: WebSocket, OHLC, and Ticker data which will include our logoes and some general currency metadata. If you do not see these data types being written to InfluxDB, please review the script and ensure that the data is being written correctly.
Click to see the full main.py, influxdb_handler.py, and http_handler.py scripts
Full http_handler.py Script
import requests


class HTTPHandler:
    def __init__(self, base_url, tracked_currency_pairs):
        """
        Initialize the HTTP client for Bitstamp API.
        Args:
            base_url (str): Base URL for Bitstamp API.
            tracked_currency_pairs (list): List of tracked currency pairs (e.g., ["btcusd", "xrpusd"]).
        """
        self.base_url = base_url
        self.tracked_currency_pairs = tracked_currency_pairs

    def fetch_ohlc(self, currency_pair, step, limit, start=None, end=None):
        """
        Fetch OHLC data for a currency pair.

        Args:
            currency_pair (str): The market symbol, e.g., "btcusd".
            step (int): Timeframe step in seconds (e.g., 3600 for 1-hour candles).
            limit (int): Maximum number of data points to retrieve (max 1000).
            start (int): Start timestamp in Unix time (optional).
            end (int): End timestamp in Unix time (optional).

        Returns:
            list: List of OHLC data points.
        """
        url = f"{self.base_url}/ohlc/{currency_pair}/"

        # Define query parameters for the API call
        params = {
            "step": step,   # OHLC timeframe (e.g., hourly = 3600 seconds)
            "limit": limit  # Max 1000 candles per request
        }
        if start:
            params["start"] = start
        if end:
            params["end"] = end

        # Perform the API request
        response = requests.get(url, params=params)

        if response.status_code == 200:
            ohlc_data = response.json().get("data", {}).get("ohlc", [])
            return ohlc_data
        else:
            raise Exception(
                f"Failed to fetch OHLC data: {response.status_code}, {response.text}")

    # Add this method back to your HTTPHandler class

    def fetch_ticker_info(self, currency_pairs):
        """
        Fetch ticker information for the given currency pairs.

        Args:
            currency_pairs (list): List of currency pair symbols (e.g., ["btcusd", "xrpusd"]).

        Returns:
            dict: A dictionary with currency pairs as keys and their ticker data as values.
        """
        tickers = {}
        for pair in currency_pairs:
            # Construct the URL for the API call
            url = f"{self.base_url}/ticker/{pair}/"

            # Perform the API request
            response = requests.get(url)

            # Handle successful responses
            if response.status_code == 200:
                tickers[pair] = response.json()
            else:
                print(
                    f"[WARNING] Failed to fetch ticker data for {pair}: {response.status_code}, {response.text}")

        return tickers

    def fetch_currencies_with_logo(self):
        """
        Fetch a list of all available currencies with their logos and filter them.

        Returns:
            tuple: (filtered_currencies: list, all_currencies: list, unmatched_pairs: list)
                - filtered_currencies: Only the coins that match your tracked pairs.
                - all_currencies: Full list of currencies from the Bitstamp API.
                - unmatched_pairs: A list of pairs where no matching symbol was found in the response.
        """
        url = f"{self.base_url}/currencies/"
        response = requests.get(url)

        if response.status_code != 200:
            print(
                f"Failed to fetch currencies: {response.status_code}, {response.text}")
            return [], [], []

        all_currencies = response.json()

        # Get unique symbols (e.g., ["BTC", "XRP"]) from tracked pairs (e.g., ["btcusd", "xrpusd"])
        tracked_symbols = set(pair[:-3].upper()
                              for pair in self.tracked_currency_pairs)

        # Filter the currencies based on tracked symbols
        filtered_currencies = [
            currency for currency in all_currencies if currency["currency"].upper() in tracked_symbols
        ]

        # Identify pairs that didn't match any symbol in /currencies/
        matched_symbols = {currency["currency"].upper()
                           for currency in all_currencies}
        unmatched_pairs = [
            pair for pair in self.tracked_currency_pairs if pair[:-3].upper() not in matched_symbols
        ]

        return filtered_currencies, all_currencies, unmatched_pairs
Full influxdb_handler.py Script
# New file with changes highlighted and comments on removed lines

import influxdb_client
from influxdb_client.client.write_api import SYNCHRONOUS


class InfluxDBHandler:
    def __init__(self, websocket_url, ohlc_url, token, org):
        """
        Initialize the InfluxDB clients for WebSocket and OHLC data buckets.
        Args:
            websocket_url (str): URL for WebSocket InfluxDB bucket.
            ohlc_url (str): URL for OHLC InfluxDB bucket.
            token (str): InfluxDB authentication token.
            org (str): The organization name.
        """
        # Separate clients for WebSocket and OHLC buckets
        self.ws_client = influxdb_client.InfluxDBClient(
            url=websocket_url, token=token, org=org
        )
        self.ohlc_client = influxdb_client.InfluxDBClient(
            url=ohlc_url, token=token, org=org
        )

        # Separate write APIs for two buckets
        self.ws_write_api = self.ws_client.write_api(write_options=SYNCHRONOUS)
        self.ohlc_write_api = self.ohlc_client.write_api(
            write_options=SYNCHRONOUS)

    # WebSocket Price Updates
    def write_data(self, currency_pair, price, timestamp):
        """
        Write real-time WebSocket price data to InfluxDB (WebSocket bucket).
        """
        try:
            point = influxdb_client.Point("crypto_data") \
                .tag("currency_pair", currency_pair) \
                .field("price", price) \
                .time(timestamp)

            # Write to WebSocket bucket
            self.ws_write_api.write(bucket="crypto_portfolio", record=point)
            print(
                f"Real-time WebSocket data written: {currency_pair} = {price} USD")
        except Exception as e:
            print(f"Failed to write WebSocket data to InfluxDB: {e}")

    # OHLC Writing Logic
    def write_ohlc_data(self, currency_pair, open_, high, low, close, volume, timestamp):
        """
        Write OHLC data into InfluxDB (OHLC bucket).
        """
        try:
            point = influxdb_client.Point("crypto_history") \
                .tag("currency_pair", currency_pair) \
                .field("open", open_) \
                .field("high", high) \
                .field("low", low) \
                .field("close", close) \
                .field("volume", volume) \
                .time(timestamp)

            # Write to OHLC bucket
            self.ohlc_write_api.write(bucket="crypto_history", record=point)
            print(f"OHLC data written for {currency_pair}: {timestamp}")
        except Exception as e:
            print(f"Error writing OHLC data to InfluxDB: {e}")

    # Ticker Data Storage
    def write_ticker_data(self, currency_pair, ticker_data, timestamp, metadata=None):
        """
        Write ticker data to InfluxDB.

        Args:
            currency_pair (str): The currency pair, e.g., "btcusd".
            ticker_data (dict): The ticker data, including fields like open, high, low, last, volume, etc.
            timestamp (int): The UNIX timestamp in nanoseconds.
            metadata (dict): Additional metadata for the currency (e.g., name, logo, etc.)
        """
        try:
            # Build a point for the ticker data
            point = influxdb_client.Point("crypto_ticker") \
                .tag("currency_pair", currency_pair) \
                .field("open", float(ticker_data["open"])) \
                .field("high", float(ticker_data["high"])) \
                .field("low", float(ticker_data["low"])) \
                .field("last", float(ticker_data["last"])) \
                .field("volume", float(ticker_data["volume"])) \
                .time(timestamp)

            # Add metadata as tags if provided
            if metadata:
                if "name" in metadata:
                    point = point.tag("name", metadata["name"])
                if "symbol" in metadata:
                    point = point.tag("symbol", metadata["symbol"])
                if "logo" in metadata:
                    point = point.tag("logo_url", metadata["logo"])
                if "type" in metadata:
                    point = point.tag("type", metadata["type"])
                if "available_supply" in metadata:
                    point = point.field("available_supply", float(
                        metadata["available_supply"]))

            # Write the point to the OHLC bucket
            self.ohlc_write_api.write(bucket="crypto_ticker", record=point)
            print(f"Ticker data written for {currency_pair}: {timestamp}")
        except Exception as e:
            print(f"Error writing ticker data to InfluxDB: {e}")

    # Query Logic (Unmodified for Historical Data)
    def query(self, query_string):
        """
        Query InfluxDB using Flux and return the results.
        """
        try:
            # Perform the query using the OHLC client
            query_api = self.ohlc_client.query_api()
            tables = query_api.query(query_string)

            # Extract the data from results
            results = []
            for table in tables:
                for record in table.records:
                    # Only include _time (and fallback gracefully for other fields)
                    results.append(
                        {"_time": record.get_time(), **record.values})

            return results
        except Exception as e:
            print(f"Error querying InfluxDB: {e}")
            return []  # Return an empty list on error
Full main.py Script
import asyncio
import json
import os
import argparse
import time
from dotenv import load_dotenv
from influxdb_handler import InfluxDBHandler
from websocket_client import WebSocketClient
from http_handler import HTTPHandler

# --- ENVIRONMENT AND CONFIGURATION ---

# Load environment variables
dotenv_path = os.path.join(os.path.dirname(__file__), '.env')
load_dotenv(dotenv_path)

# InfluxDB Configuration
INFLUXDB_URL = os.getenv('INFLUXDB_URL')
INFLUXDB_TOKEN = os.getenv('INFLUXDB_TOKEN')
INFLUXDB_ORG = os.getenv('INFLUXDB_ORG')

# Bitstamp Configuration
CURRENCY_PAIRS = ["btcusd", "xrpusd", "xlmusd",
                  "hbarusd", "vetusd", "csprusd", "xdcusd"]
WS_URL = "wss://ws.bitstamp.net"
HTTP_BASE_URL = "https://www.bitstamp.net/api/v2"

# Initialize InfluxDB and HTTP Handlers
influxdb_handler = InfluxDBHandler(
    websocket_url=INFLUXDB_URL,
    ohlc_url=INFLUXDB_URL,
    token=INFLUXDB_TOKEN,
    org=INFLUXDB_ORG,
)
http_handler = HTTPHandler(base_url=HTTP_BASE_URL,
                           tracked_currency_pairs=CURRENCY_PAIRS)

# --- FUNCTIONS ---

# Fetch the last recorded timestamp from InfluxDB


async def get_last_influx_timestamp(currency_pair):
    """
    Query InfluxDB for the last recorded timestamp for a specified currency pair.
    """
    query = f"""
    from(bucket: "crypto_history")
      |> range(start: -1y)
      |> filter(fn: (r) => r._measurement == "crypto_history" and r["currency_pair"] == "{currency_pair}")
      |> keep(columns: ["_time"])
      |> sort(desc: true)
      |> limit(n: 1)
    """
    try:
        result = influxdb_handler.query(query)
        if result:
            last_time = result[0]["_time"]
            return int(time.mktime(last_time.timetuple()))
        return None
    except Exception as e:
        print(
            f"Error querying last InfluxDB timestamp for {currency_pair}: {e}")
        return None

# Process WebSocket trade messages and write to InfluxDB


async def process_message(message):
    try:
        message_json = json.loads(message)
        if message_json.get("event") == "trade":
            data = message_json.get("data", {})
            currency_pair = message_json["channel"].split("_")[2]
            price = float(data["price"])
            timestamp = int(data["timestamp"]) * 1_000_000_000
            influxdb_handler.write_data(currency_pair, price, timestamp)
    except Exception as e:
        print(f"Failed to process WebSocket message: {e}")


async def fetch_and_write_ticker_data():
    """
    Fetch ticker data for all configured pairs and write to InfluxDB.
    """
    print("[INFO] Fetching ticker data and metadata for configured pairs...")
    tracked_metadata, _, unmatched_pairs = http_handler.fetch_currencies_with_logo()

    # Warn about unmatched pairs
    if unmatched_pairs:
        print(f"[WARNING] Unmatched currency pairs: {unmatched_pairs}")

    # Map base currencies to their metadata
    metadata_map = {currency["currency"].upper(
    ): currency for currency in tracked_metadata}

    # Fetch ticker data
    ticker_info = http_handler.fetch_ticker_info(CURRENCY_PAIRS)
    if not ticker_info:
        print("[ERROR] No ticker data fetched. Exiting.")
        return  # Exit if no ticker data is retrieved

    for pair, data in ticker_info.items():
        try:
            # Log data before writing to InfluxDB
            print(f"[DEBUG] Writing ticker data for {pair}: {data}")

            timestamp = int(time.time() * 1e9)  # Current time in nanoseconds
            base_currency = pair[:-3].upper()
            metadata = metadata_map.get(base_currency, {})
            influxdb_handler.write_ticker_data(pair, data, timestamp, metadata)
        except Exception as e:
            print(f"[ERROR] Failed to process ticker data for {pair}: {e}")


async def backfill_ohlc(currency_pair):
    try:
        start = await get_last_influx_timestamp(currency_pair)
        if start is None:
            print(
                f"[INFO] No previous data found for {currency_pair}, backfilling from the start.")
        end = int(time.time())
        ohlc_data = http_handler.fetch_ohlc(
            currency_pair, step=3600, limit=1000, start=start, end=end
        )
        for candle in ohlc_data:
            influxdb_handler.write_ohlc_data(
                currency_pair=currency_pair,
                open_=float(candle["open"]),
                high=float(candle["high"]),
                low=float(candle["low"]),
                close=float(candle["close"]),
                volume=float(candle["volume"]),
                timestamp=int(candle["timestamp"]) * 1_000_000_000,
            )
    except Exception as e:
        print(f"[ERROR] Failed to backfill OHLC data for {currency_pair}: {e}")


async def scheduled_fetch():
    """
    Periodically fetch ticker data and backfill historical OHLC data.
    """
    while True:
        print("[INFO] Running scheduled ticker data fetch...")
        await fetch_and_write_ticker_data()  # Fetch and write ticker data

        print("[INFO] Running scheduled OHLC backfill...")
        for pair in CURRENCY_PAIRS:
            await backfill_ohlc(pair)

        print("[INFO] Scheduled fetch completed. Sleeping for 12 hours.")
        await asyncio.sleep(43200)  # 12-hour interval


async def main(manual_backfill, fetch_ticker):
    """
    Main function for periodic tasks or manual commands.
    """
    if manual_backfill:
        print("[INFO] Manual backfill mode activated...")
        for pair in CURRENCY_PAIRS:
            await backfill_ohlc(pair)
        return

    if fetch_ticker:
        print("[INFO] Manual ticker fetch mode activated...")
        await fetch_and_write_ticker_data()
        return

    # Default: Run WebSocket + Scheduled Fetch (OHLC + Ticker)
    print("[INFO] Starting WebSocket listener and scheduled tasks...")
    ws_client = WebSocketClient(url=WS_URL, currency_pairs=CURRENCY_PAIRS)
    websocket_task = asyncio.create_task(ws_client.listen(process_message))
    scheduled_task = asyncio.create_task(scheduled_fetch())
    await asyncio.gather(websocket_task, scheduled_task)

# --- ENTRY POINT ---

if __name__ == "__main__":
    parser = argparse.ArgumentParser()
    parser.add_argument("--manual-backfill", action="store_true",
                        help="Trigger manual OHLC data backfill.")
    parser.add_argument("--fetch-ticker", action="store_true",
                        help="Manually fetch ticker data.")
    args = parser.parse_args()
    asyncio.run(main(manual_backfill=args.manual_backfill,
                fetch_ticker=args.fetch_ticker))
Step 4 - Push the Updated Script to the Production Server
- Push the updated
main.pyscript to the production server using the same method as before.
scp main.py <username>@<your-server-ip>:~/crypto-tracker/
- SSH into the production server and navigate to the
crypto-trackerdirectory.
ssh <username>@<your-server-ip>
cd ~/crypto-tracker
- Run the updated
main.pyscript on the production server.
python3 main.py
- The script should now fetch and write real-time ticker data for all configured currency pairs to InfluxDB, including the logo and description metadata for each currency pair.
If you successfully configured the script to run on an external server previously (for example, using Alpine's OpenRC), and configured the script to run as a service, you won't need to configure it again.
Simply ensure you've activated your virtual environment and run the script as you did before, using the rc-service command.
source venv/bin/activate
rc-service crypto-portfolio start
Purge Old Data from InfluxDB (Optional)
We have done a lot of testing and development and our current InfluxDB has a lot of data in it - some of which may be duplicates or outdated. We have taken measures in the script to ensure that we are not writing duplicate data, but we may still have some old data that we want to remove.
One way to remove old data from InfluxDB is to use the InfluxDB CLI to run a query that deletes data older than a certain timestamp.
In our case, however, I'm going to go a bit crazy and destroy the bucket and start fresh. This is not recommended in a production environment, but for our purposes, it will be fine.
Step 1 - Stop the Service in the Alpine Linux Server
If you are running the script as a service in the Alpine Linux server, you should stop the service before proceeding.
rc-service crypto-portfolio stop
Step 2 - Delete the InfluxDB Bucket(s) and Start Fresh
Navigate into the InfluxDB UI and delete your buckets. Ensure you have noted the exact names of the buckets you are deleting as the bucket names are referenced in the script. We are deleting:
crypto_portfolio(WebSocket data)crypto_history(OHLC data)crypto_ticker(Ticker data)
Note that deleting a bucket in InfluxDB is rediculously easy and there is no undo. Be sure you are deleting the correct bucket. This is like smashing the Delete button in the Danger Zone on GitHub, but without any of the safety nets.
Step 3 - Restart the Service in the Alpine Linux Server
If you are running the script as a service in the Alpine Linux server, you should restart the service after deleting the buckets.
rc-service crypto-portfolio start
Step 4 - Review the Data in InfluxDB
After restarting the service, you should see new data being written to the InfluxDB buckets. You can verify this by checking the InfluxDB UI.
Be patient as it may take a few minutes for the new data to start appearing in the UI as we are backfilling OHLC data and fetching new ticker data. Even the Websockets datat may take a few minutes to start appearing as trading may be slow at the time. Data for each pair will only be written when a trade occurs.
Conclusion
In this tutorial, we have successfully integrated the Bitstamp API with InfluxDB to store real-time cryptocurrency data. We have also added metadata such as logos and descriptions for each currency pair to the InfluxDB database.
Next, we will dive into the wonderful world of data visualization using Grafana. We will connect Grafana to our InfluxDB database and create beautiful dashboards to visualize the cryptocurrency data in real-time.