Linux VM on Proxmox
There are a whole host of reasons to run a Linux VM on Proxmox -- from simply testing new Linux distros, to running a web server, a VPN server, or implementating a base platform to host a variety of services like Nextcloud, Plex, or Home Assistant et al. If you navigate around this site a bit, you'll find this guide will be referred to over and over again.
Let's get a Linux Server VM up and running on Proxmox.
Prerequisites
- A Proxmox server ready to go - Proxmox Installation - Part I
- A Linux ISO - I'll be using Ubuntu Server 20.04 LTS for this guide but you can use any Linux distro you like
- Basic knowledge of Linux and Proxmox
Overview of What We'll Cover
This guide will walk you through the process of creating a Linux VM on Proxmox. We will start by creating a new VM, configuring the VM settings, and installing the Linux OS. We will then connect to the VM using SSH and configure the network settings.
Step 1: Get your Linux ISO and Upload it to Proxmox
-
Navigate to the Linux distro of your choice and download the ISO. For this guide, I'll be using Ubuntu Server 24.04 LTS. You can find the download link here.
-
Once you have downloaded the ISO, navigate to the Proxmox web interface and log in.
-
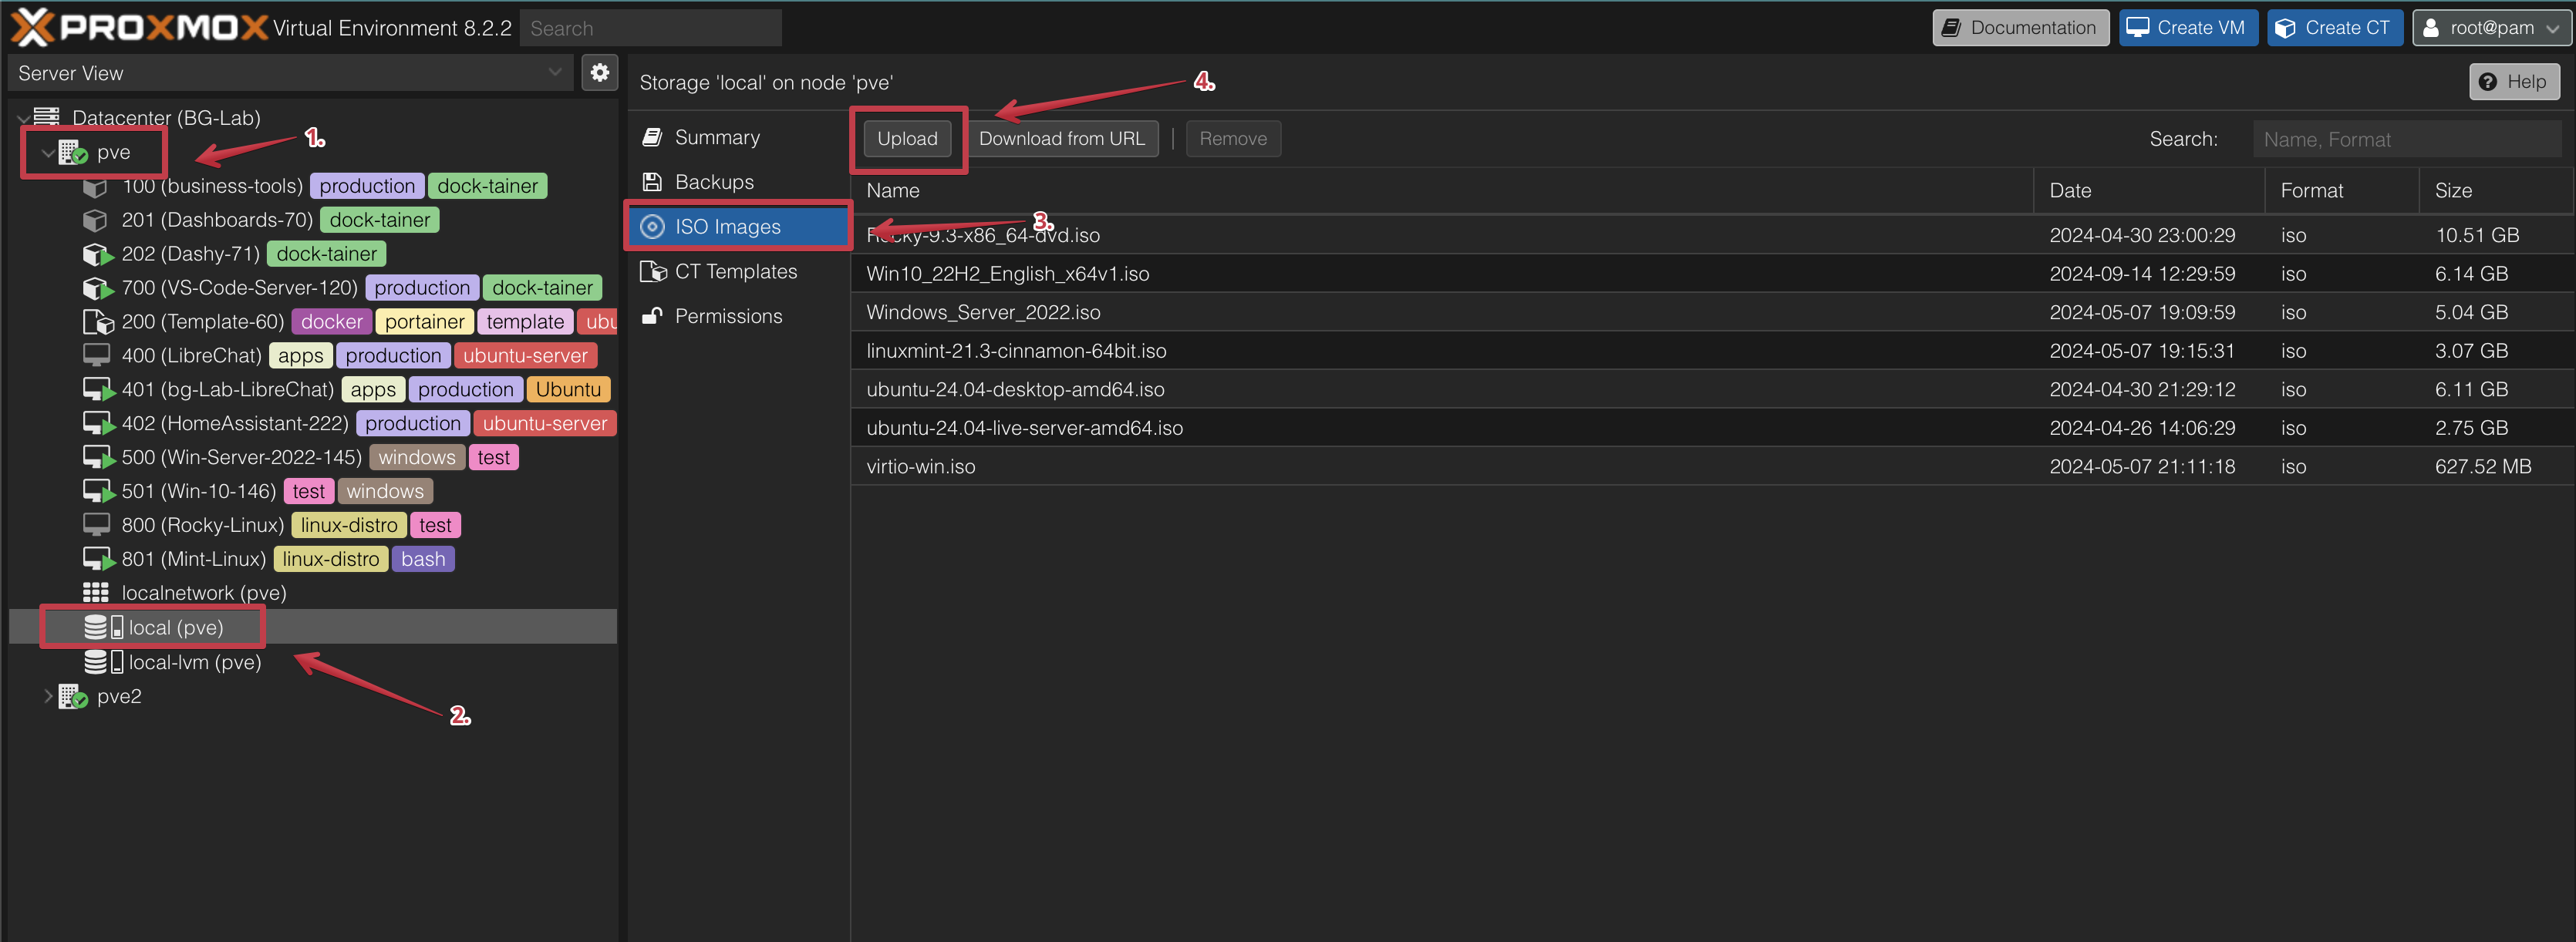
Click on your proxmox node, for example: pve > local (pve) > ISO Images
-
Click on the Upload button and select the ISO you downloaded in step 1.
-
Once the ISO has been uploaded, you can close the window.
Step 2: Create a New VM
-
In the Proxmox web interface, click on Create VM.
-
Enter a name for your VM, for example: LinuxVM. I'm currently working on building a subnet router using Tailscale, so I'll name my VM Subnet-Router-202, but you can name it whatever you like. I'll describe my settings below the screenshot.
Tab 1 - General
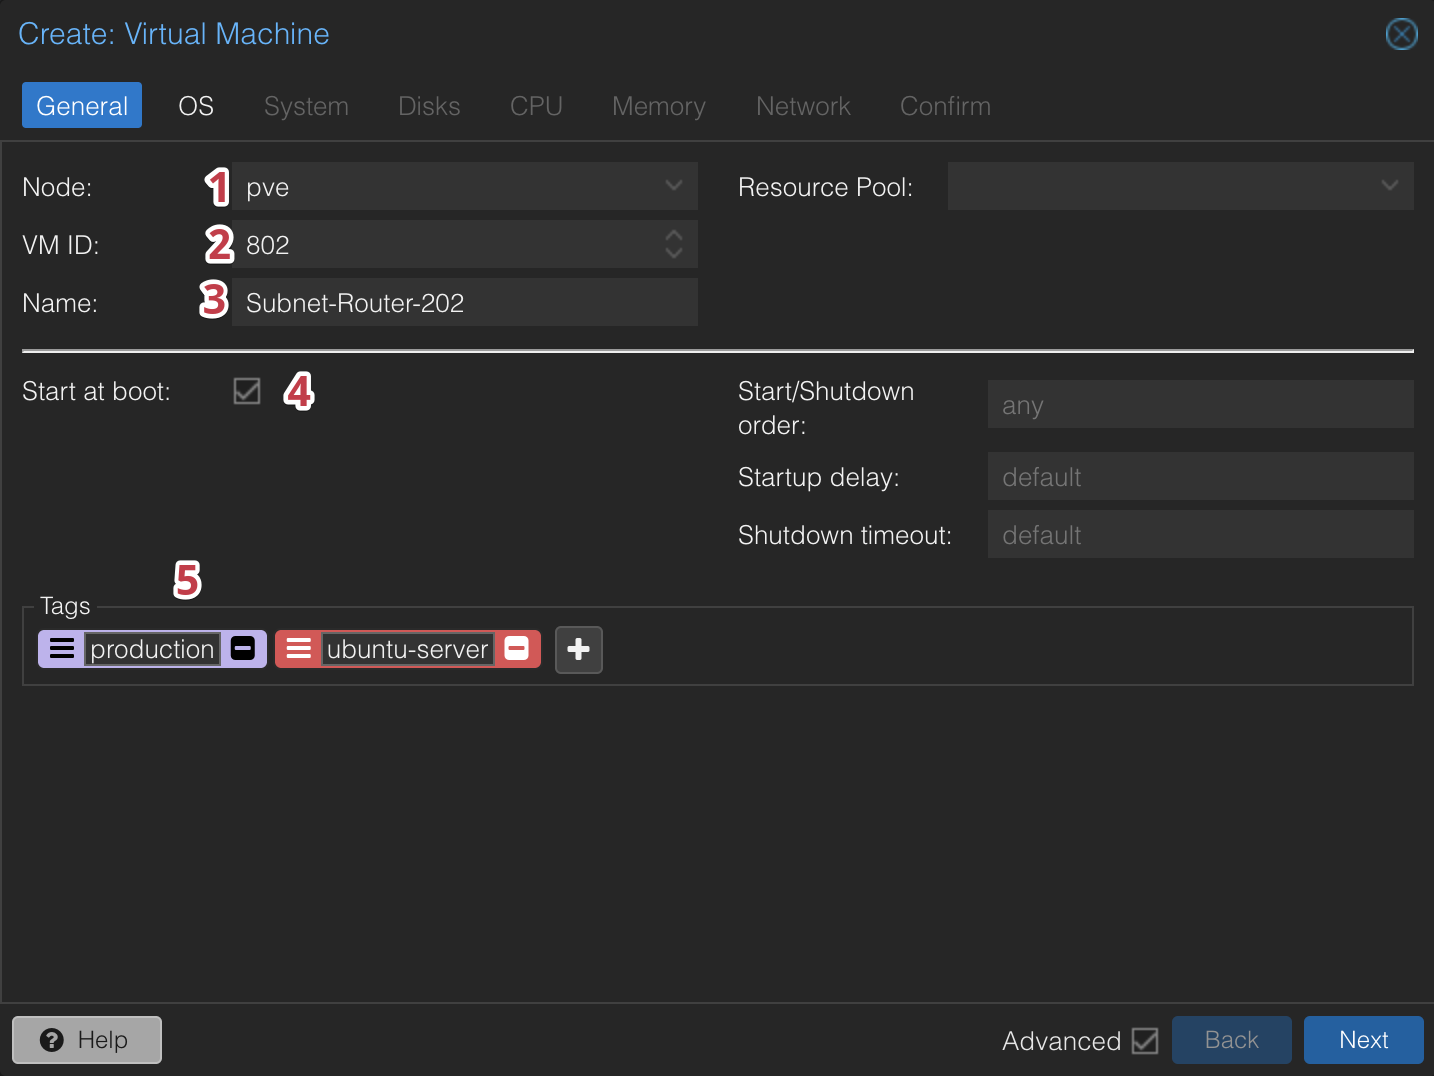
- Node - If you have multiple nodes, select the node you want to run the VM on. I have two, but I'll choose my first node as it is dedicated to VMs
- VM ID - This is automatically generated. You can change it if you like. I have given mine an ID of 802 - all my Linux VMs start with 8, Wndows start with 5, docker based services start with 2, and app services start with 4 ... you get the picture.
- Name - I've named mine Subnet-Router-202. The name makes sense, but you may be wondering why I've added
202to the end. I have adopted the practice of adding the last octet of the IP address to the name of the VM. This makes it easier to identify the VM when I'm working in the Proxmox interface. If it is numbered in will be on my main network. - Start at boot - I've left this checked. I want the VM to start when the Proxmox server boots up as it will be a critical part of my network.
- Tags - I've given it a few tags to help visually identify it in the Proxmox interface. Here I've given it the tags
Productioandubuntu-server.
-
Click Next.
Tab 2 - OS
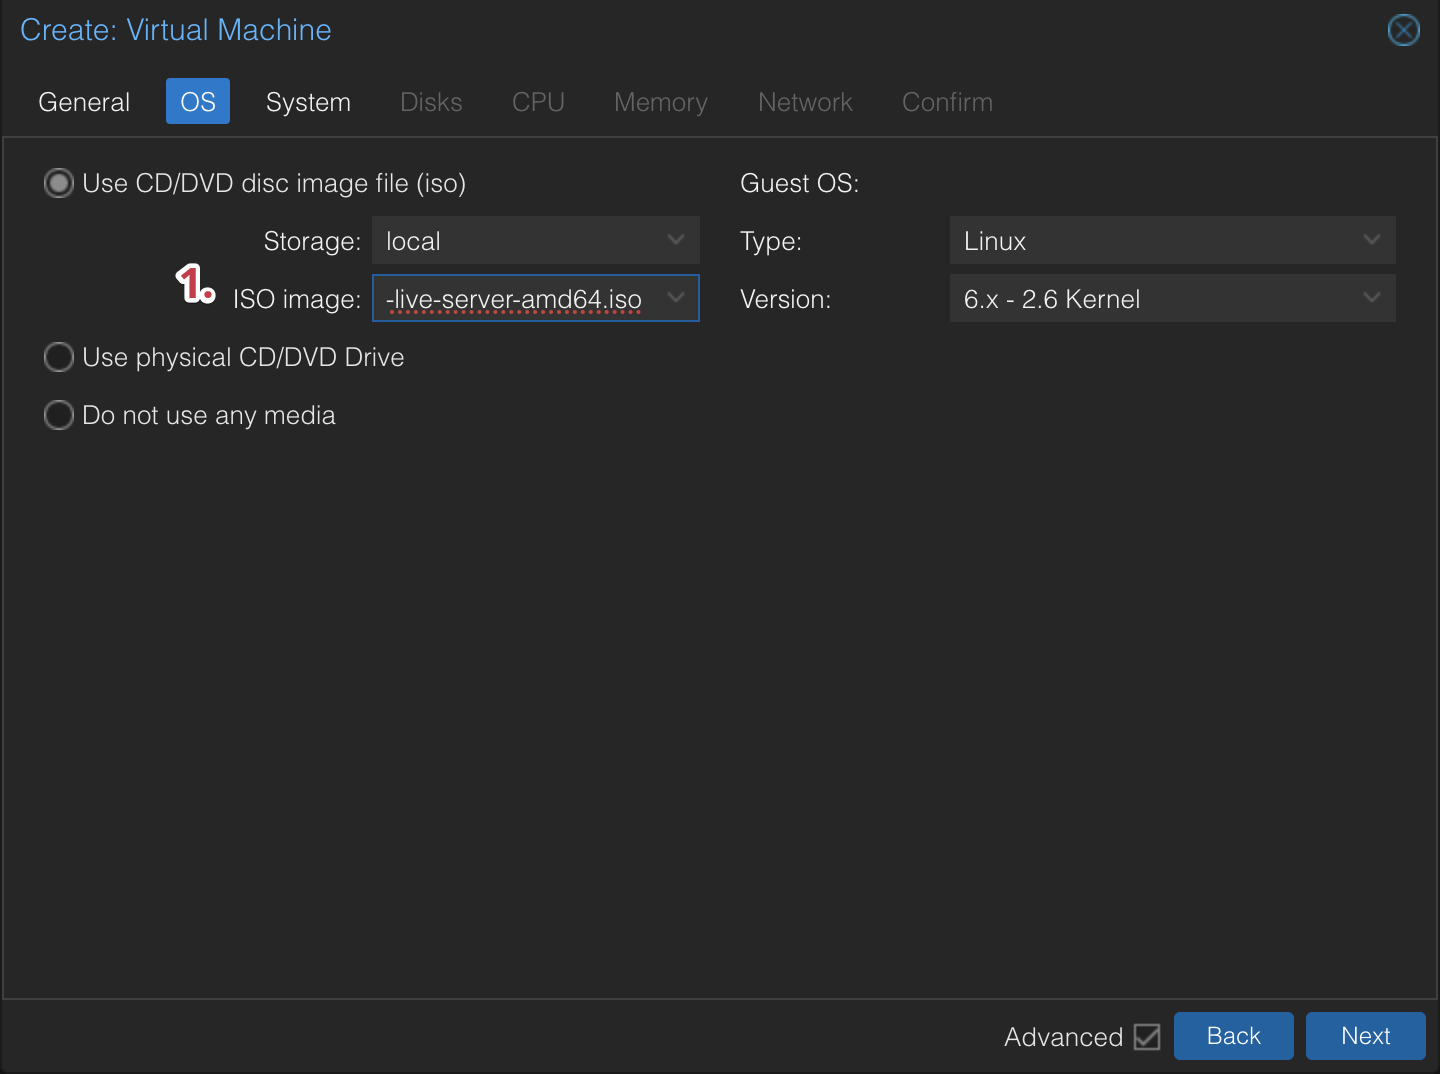
- ISO Image - Select the ISO you uploaded in step 1. I've selected the Ubuntu Server 20.04 LTS ISO. This is the only thing I changed on this tab.
-
Click Next.
Tab 3 - System
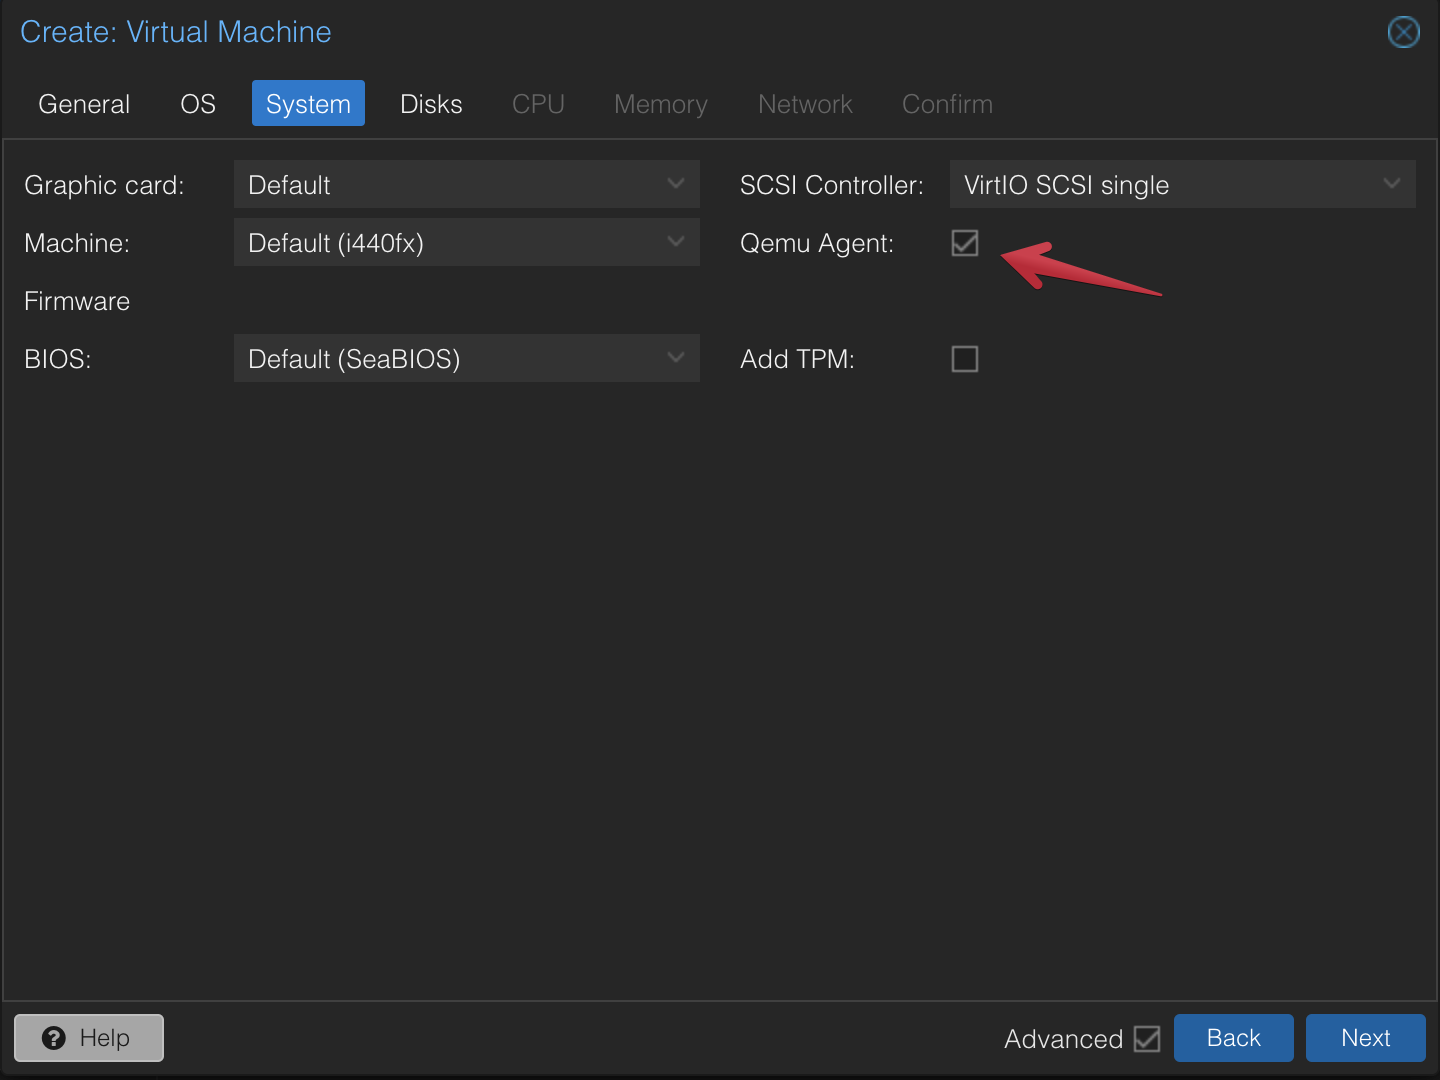
The only thing I did here was to check the box for QEMU Agent. This will allow me to use the Proxmox web interface to interact with the VM.
-
Click Next.
Tab 4 - Hard Disk
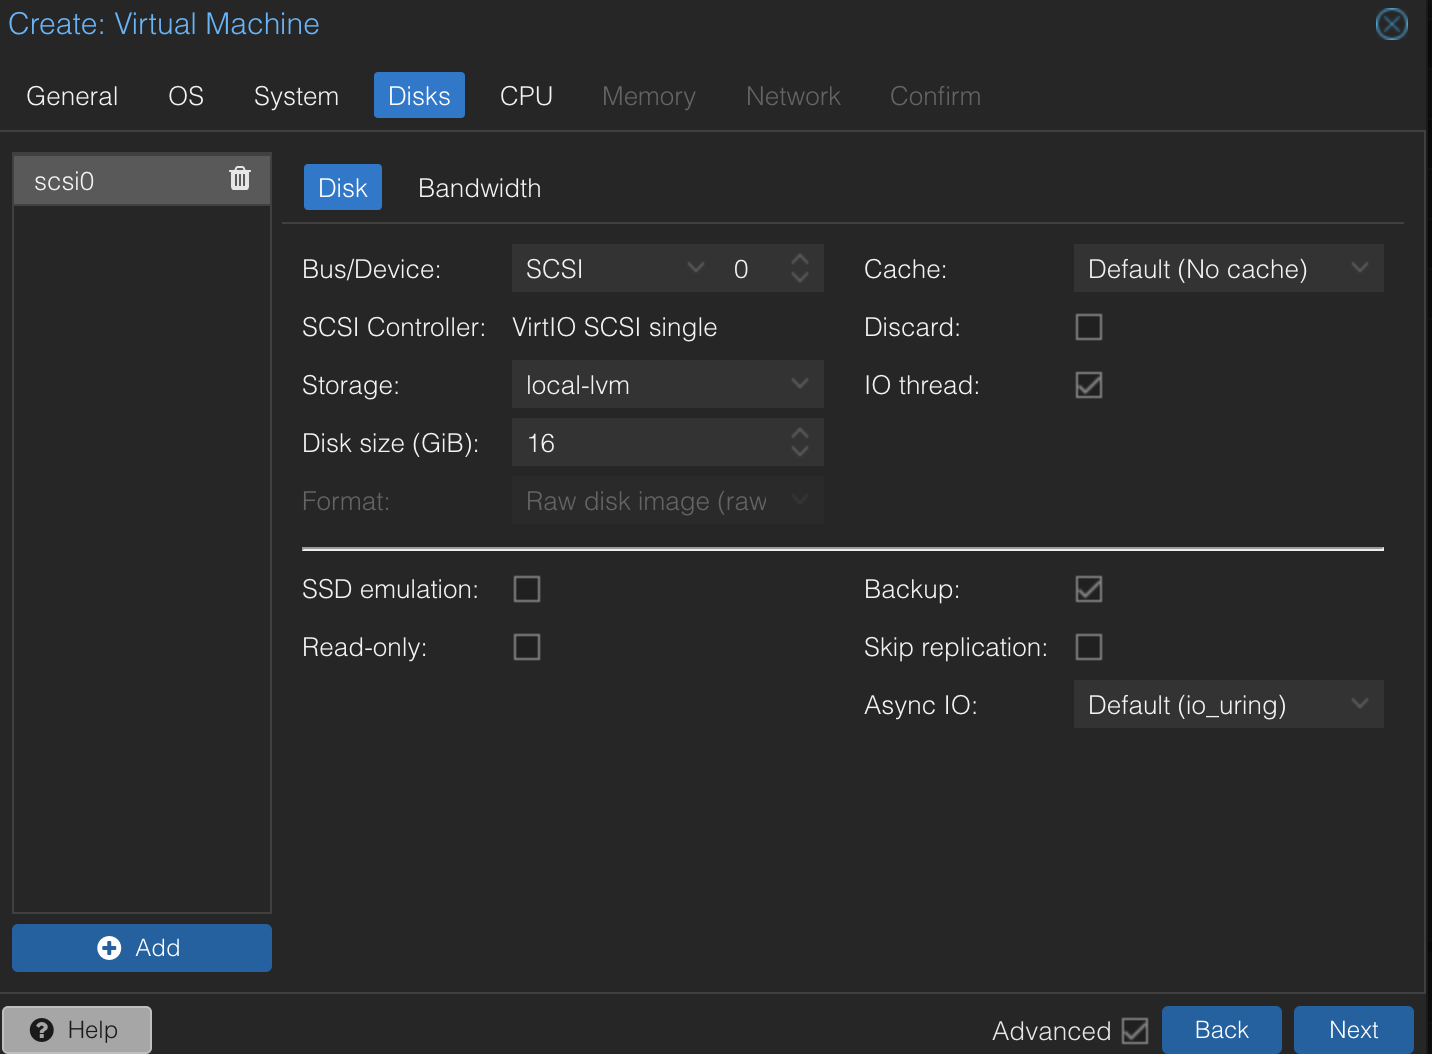
The only change I'll make here is to decrease the size of the hard disk. The default is 32GB, but I'll change it to 16GB. I don't need a lot of space for this VM as it will be a subnet router and won't be storing much data. If for whatever reason our log files get out of hand, I can always increase the size later.
-
Click Next.
Tab 5 - CPU
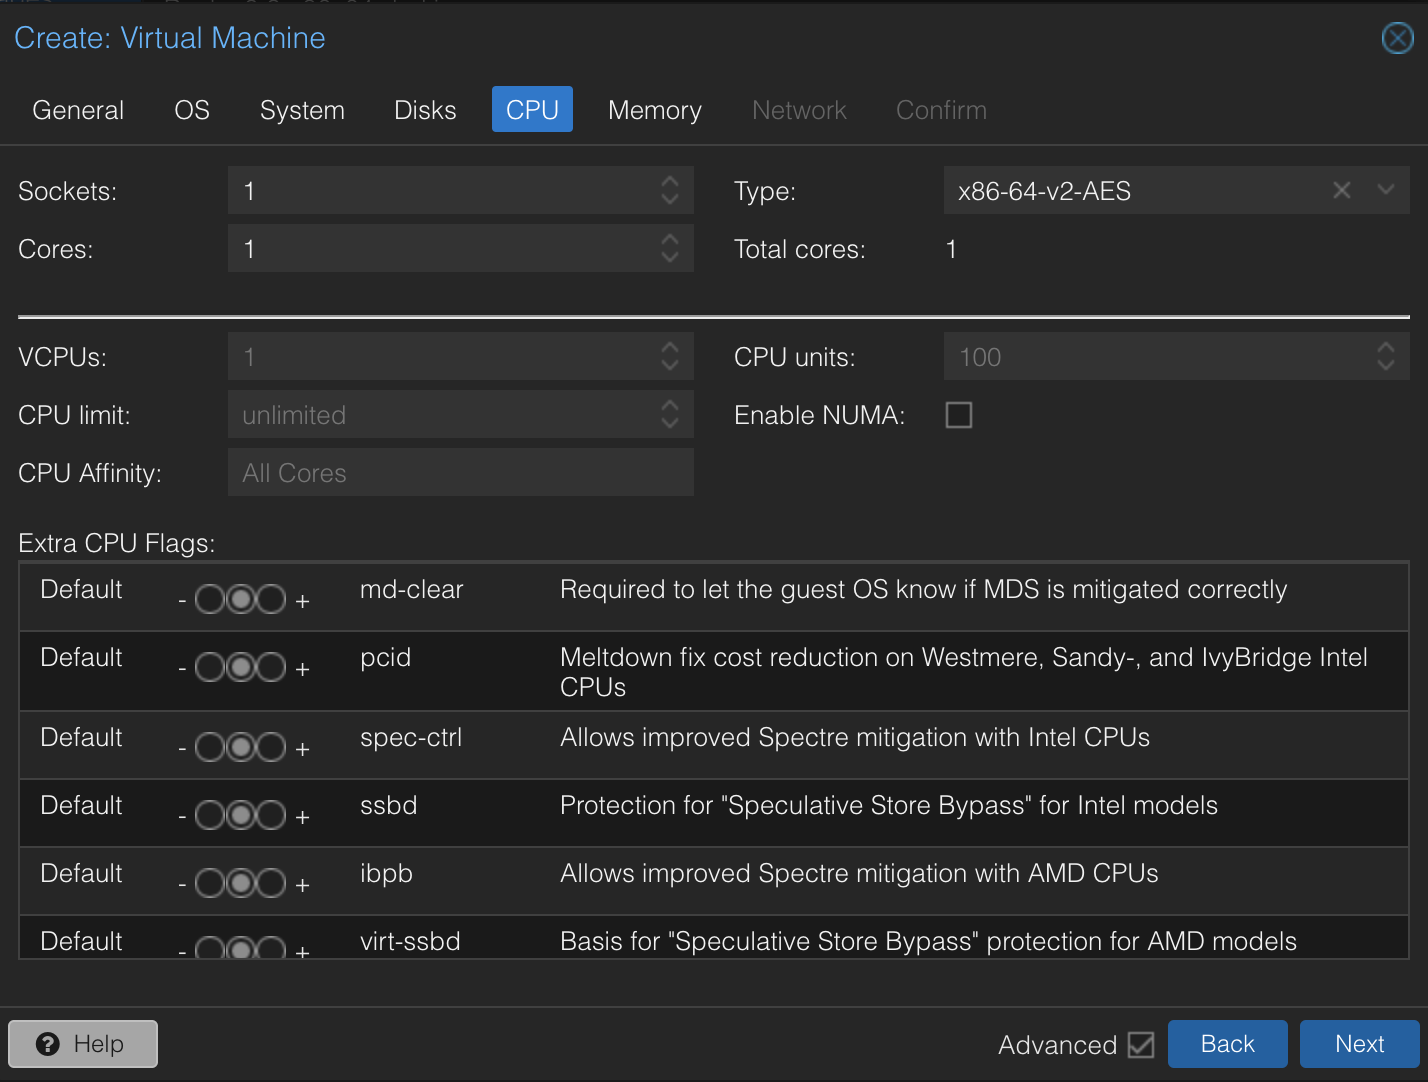
I've left the CPU settings as default. We won't need a ton of CPU power for this. I usually give my VMs 2 cores, but you can adjust this as needed. I'm going to leave this one at 1 core.
The beauty of a VM is that you can always adjust the resources later if you find that you need more CPU power.
-
Click Next.
Tab 6 - Memory
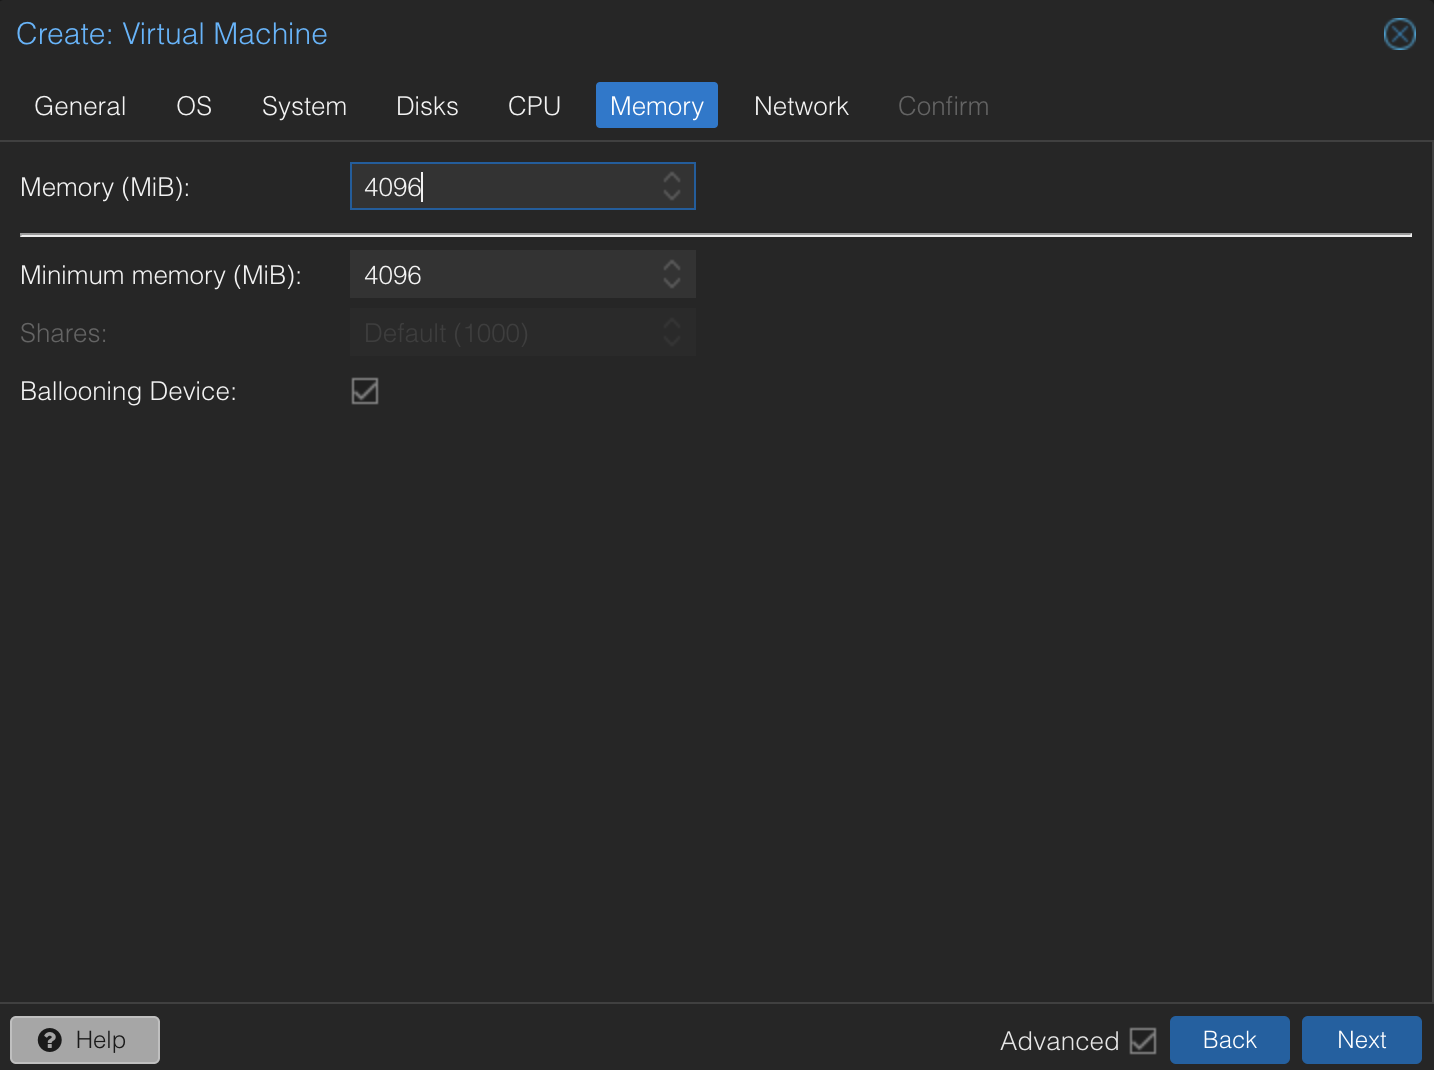
Given that Proxmox allows for sharing memory across VMs, I've given this VM 4GB of RAM. This should be more than enough for a subnet router.
-
Click Next.
Tab 7 - Network
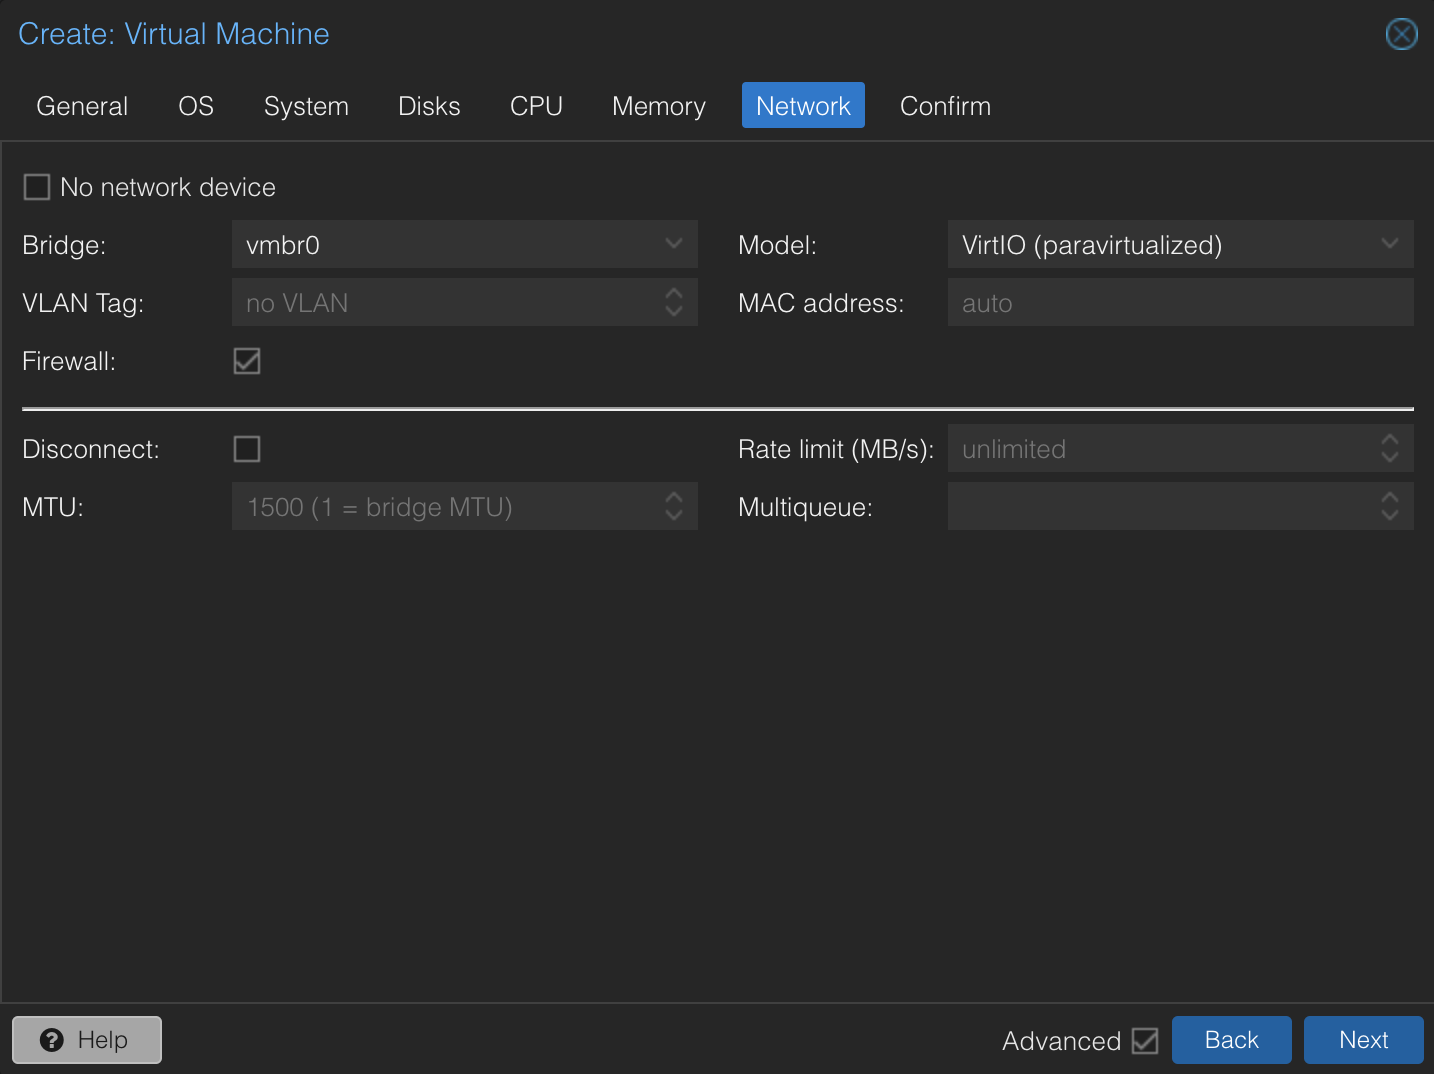
I've left the network settings as default. The VM will be connected to the default Proxmox bridge. If you have a specific network setup, you can adjust the settings here.
-
Click Next > Finish.
Congrats! You've created a new VM on Proxmox. Now lets get that Server OS installed.
Step 3: Install the Linux OS
-
Click on your new VM in the Proxmox web interface and click Start.
-
Click on Console to open the console window. Watch the wall of text fly by as the VM boots up.
-
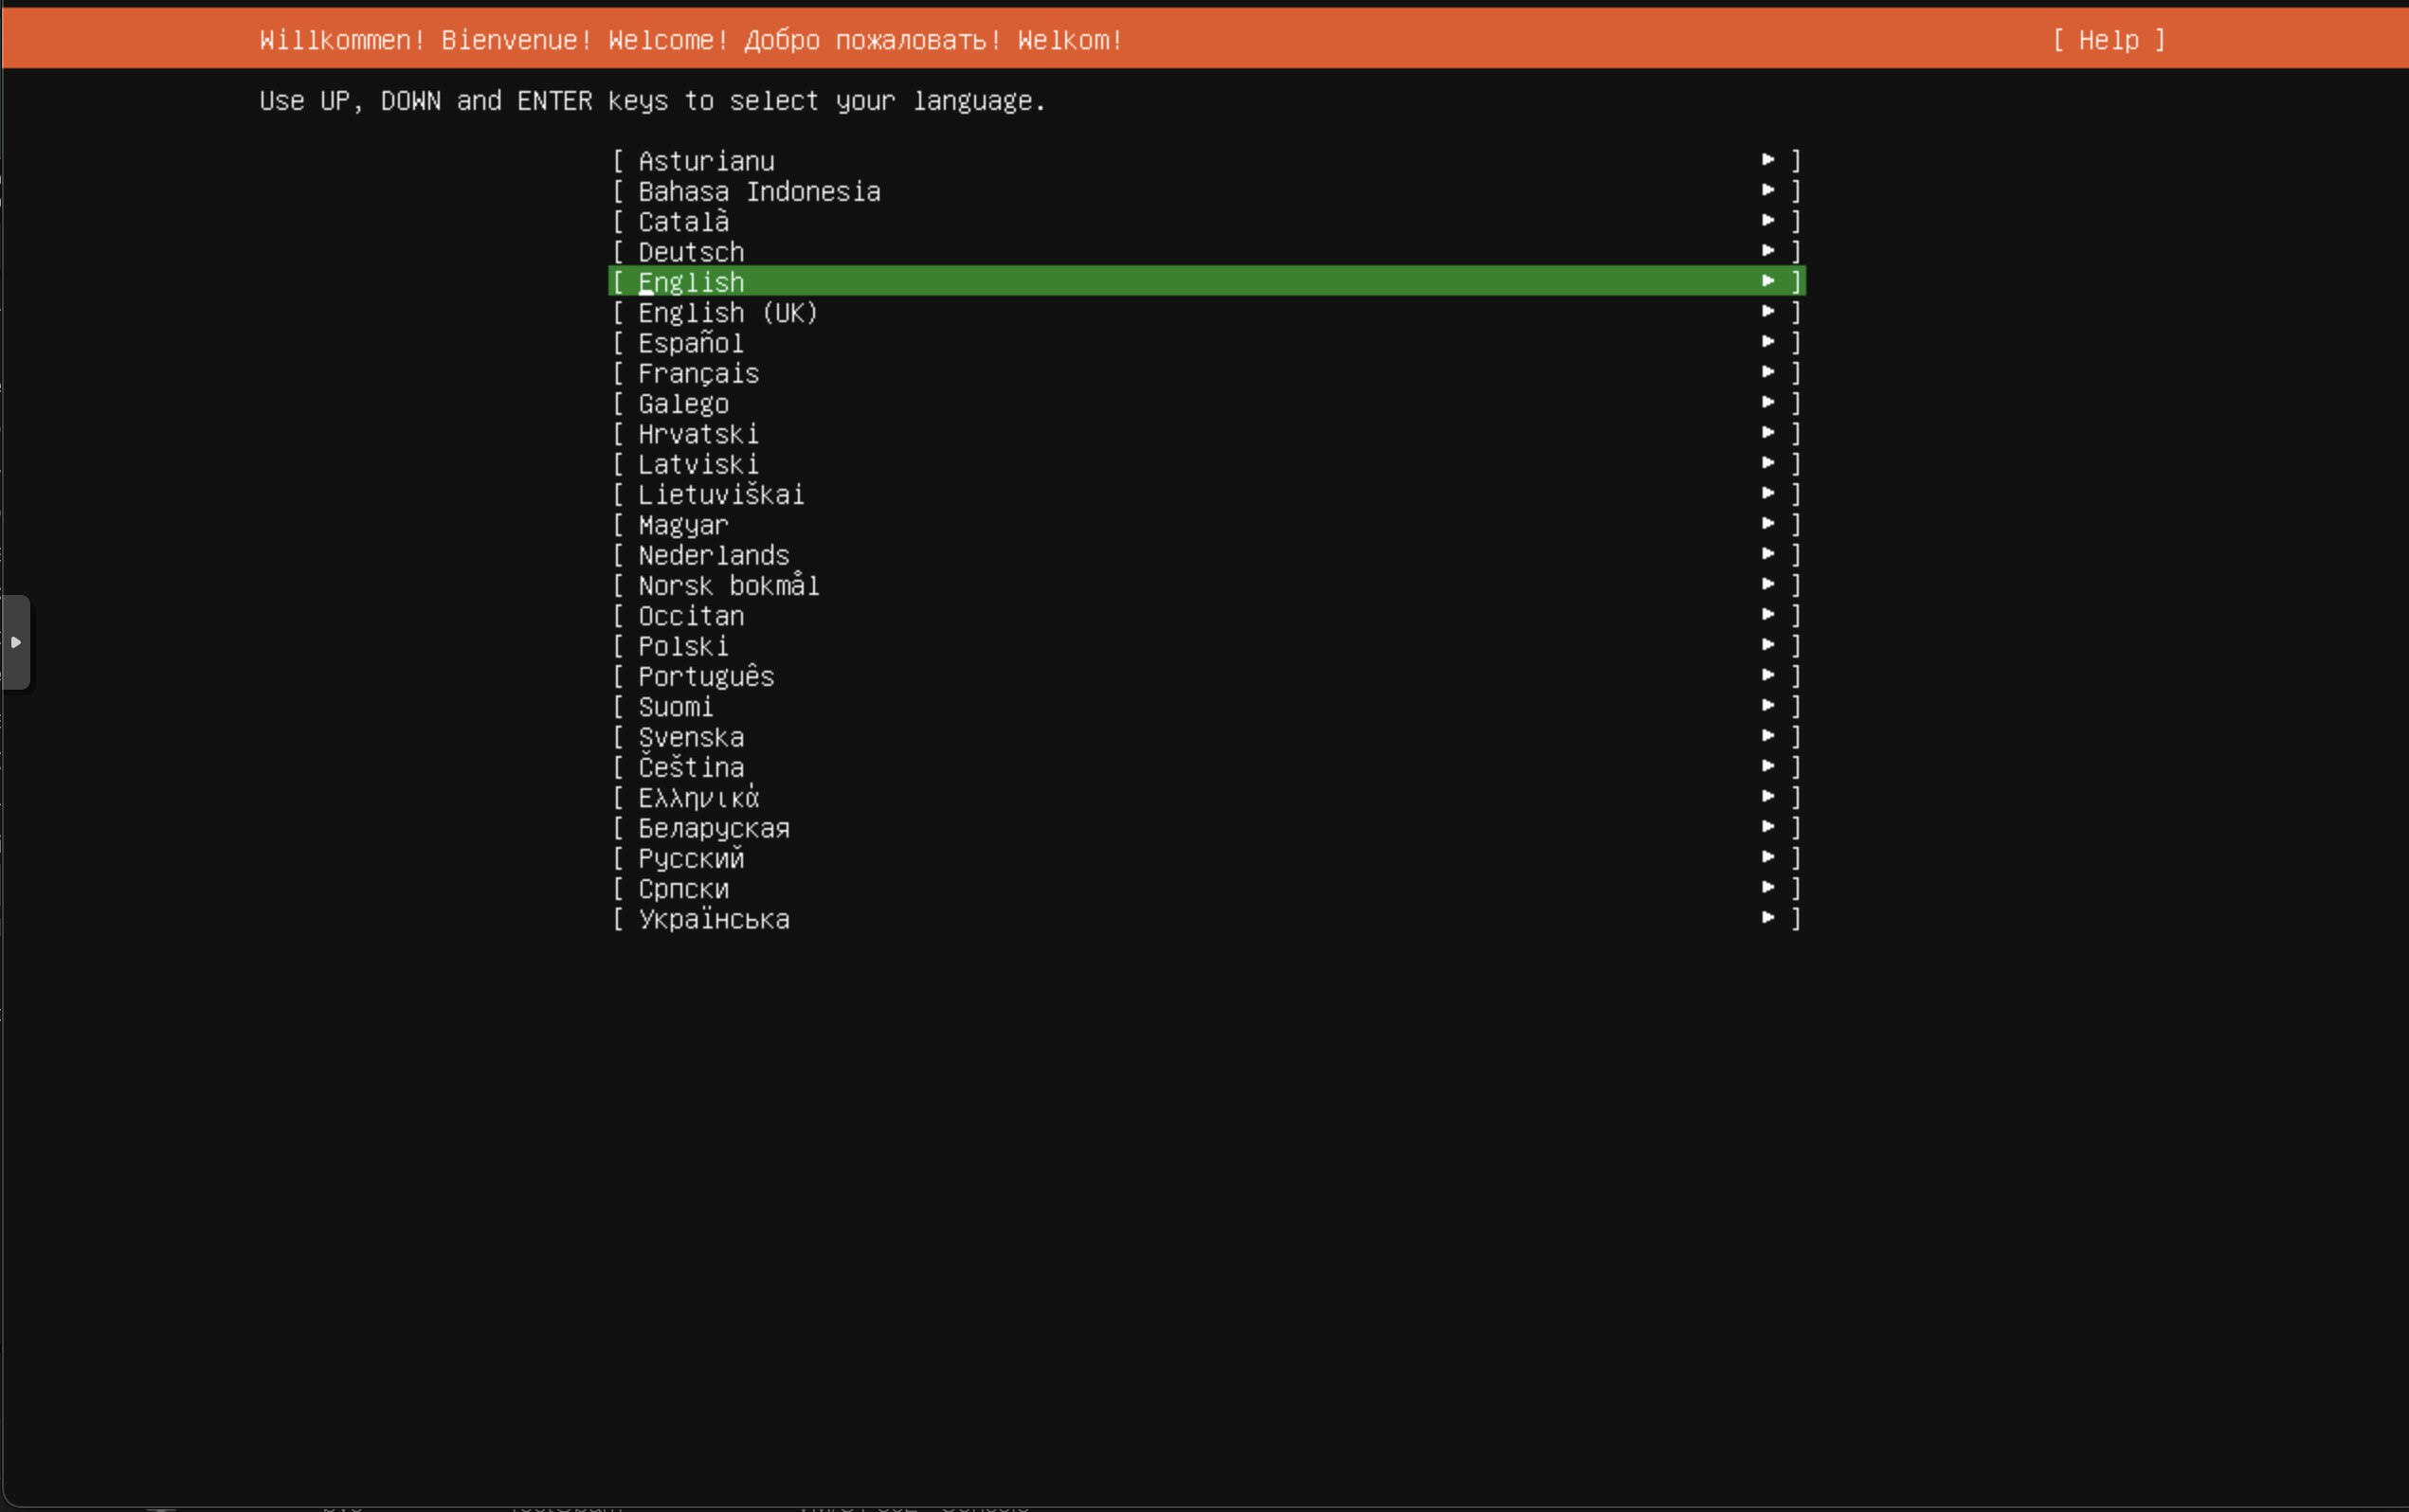
You'll be prompted to select the installation language. Select your language and press Enter.
-
The next screen will prompt your to select your keyboard layout. Select your layout and press Enter.
-
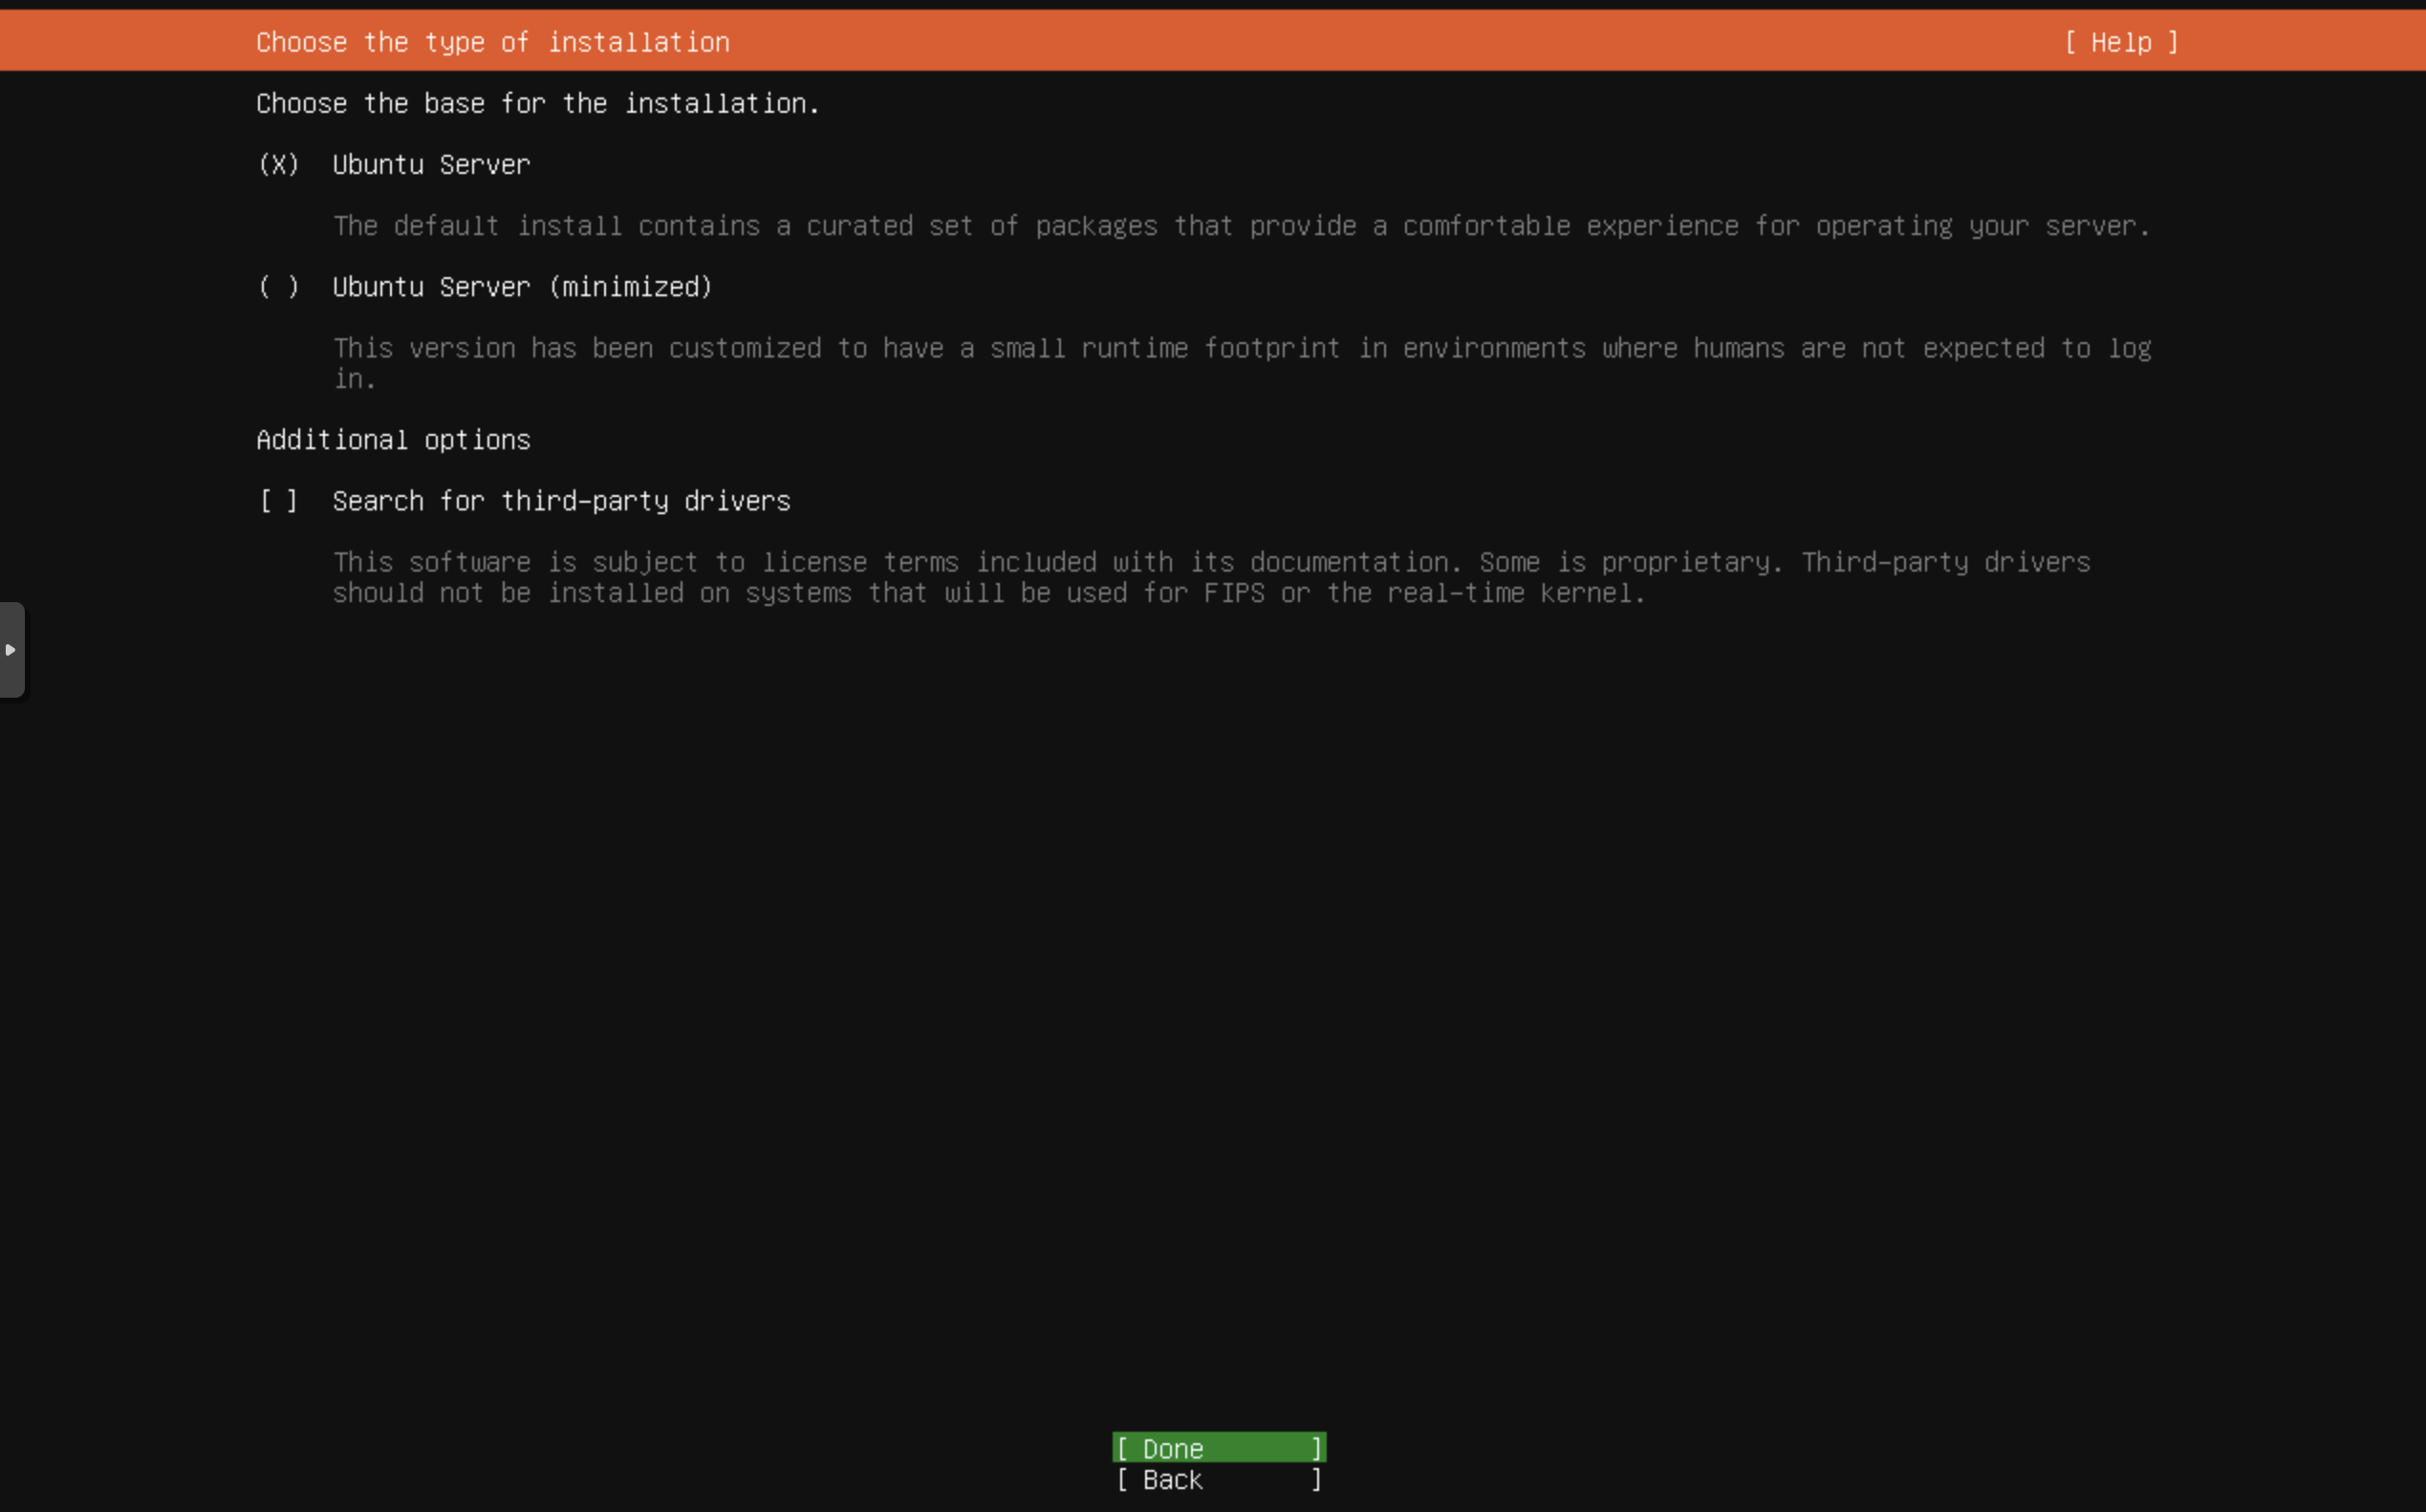
Next we'll be asked to "Choose the base for the installation" with options for Ubuntu Server, Ubuntu Server (minimized) and an option to Search for third-party drivers. I'll be selecting Ubuntu Server.
-
Network configuration - Earlier we set the VM name to indicate the host portion of the IP address. We should be able to set the static address here, however, the last few times I've attempted this, the network configuration has failed. I'll be setting the IP address after the installation is complete.
-
Configure the Ubuntu archive mirror - I'll be selecting the default mirror.
-
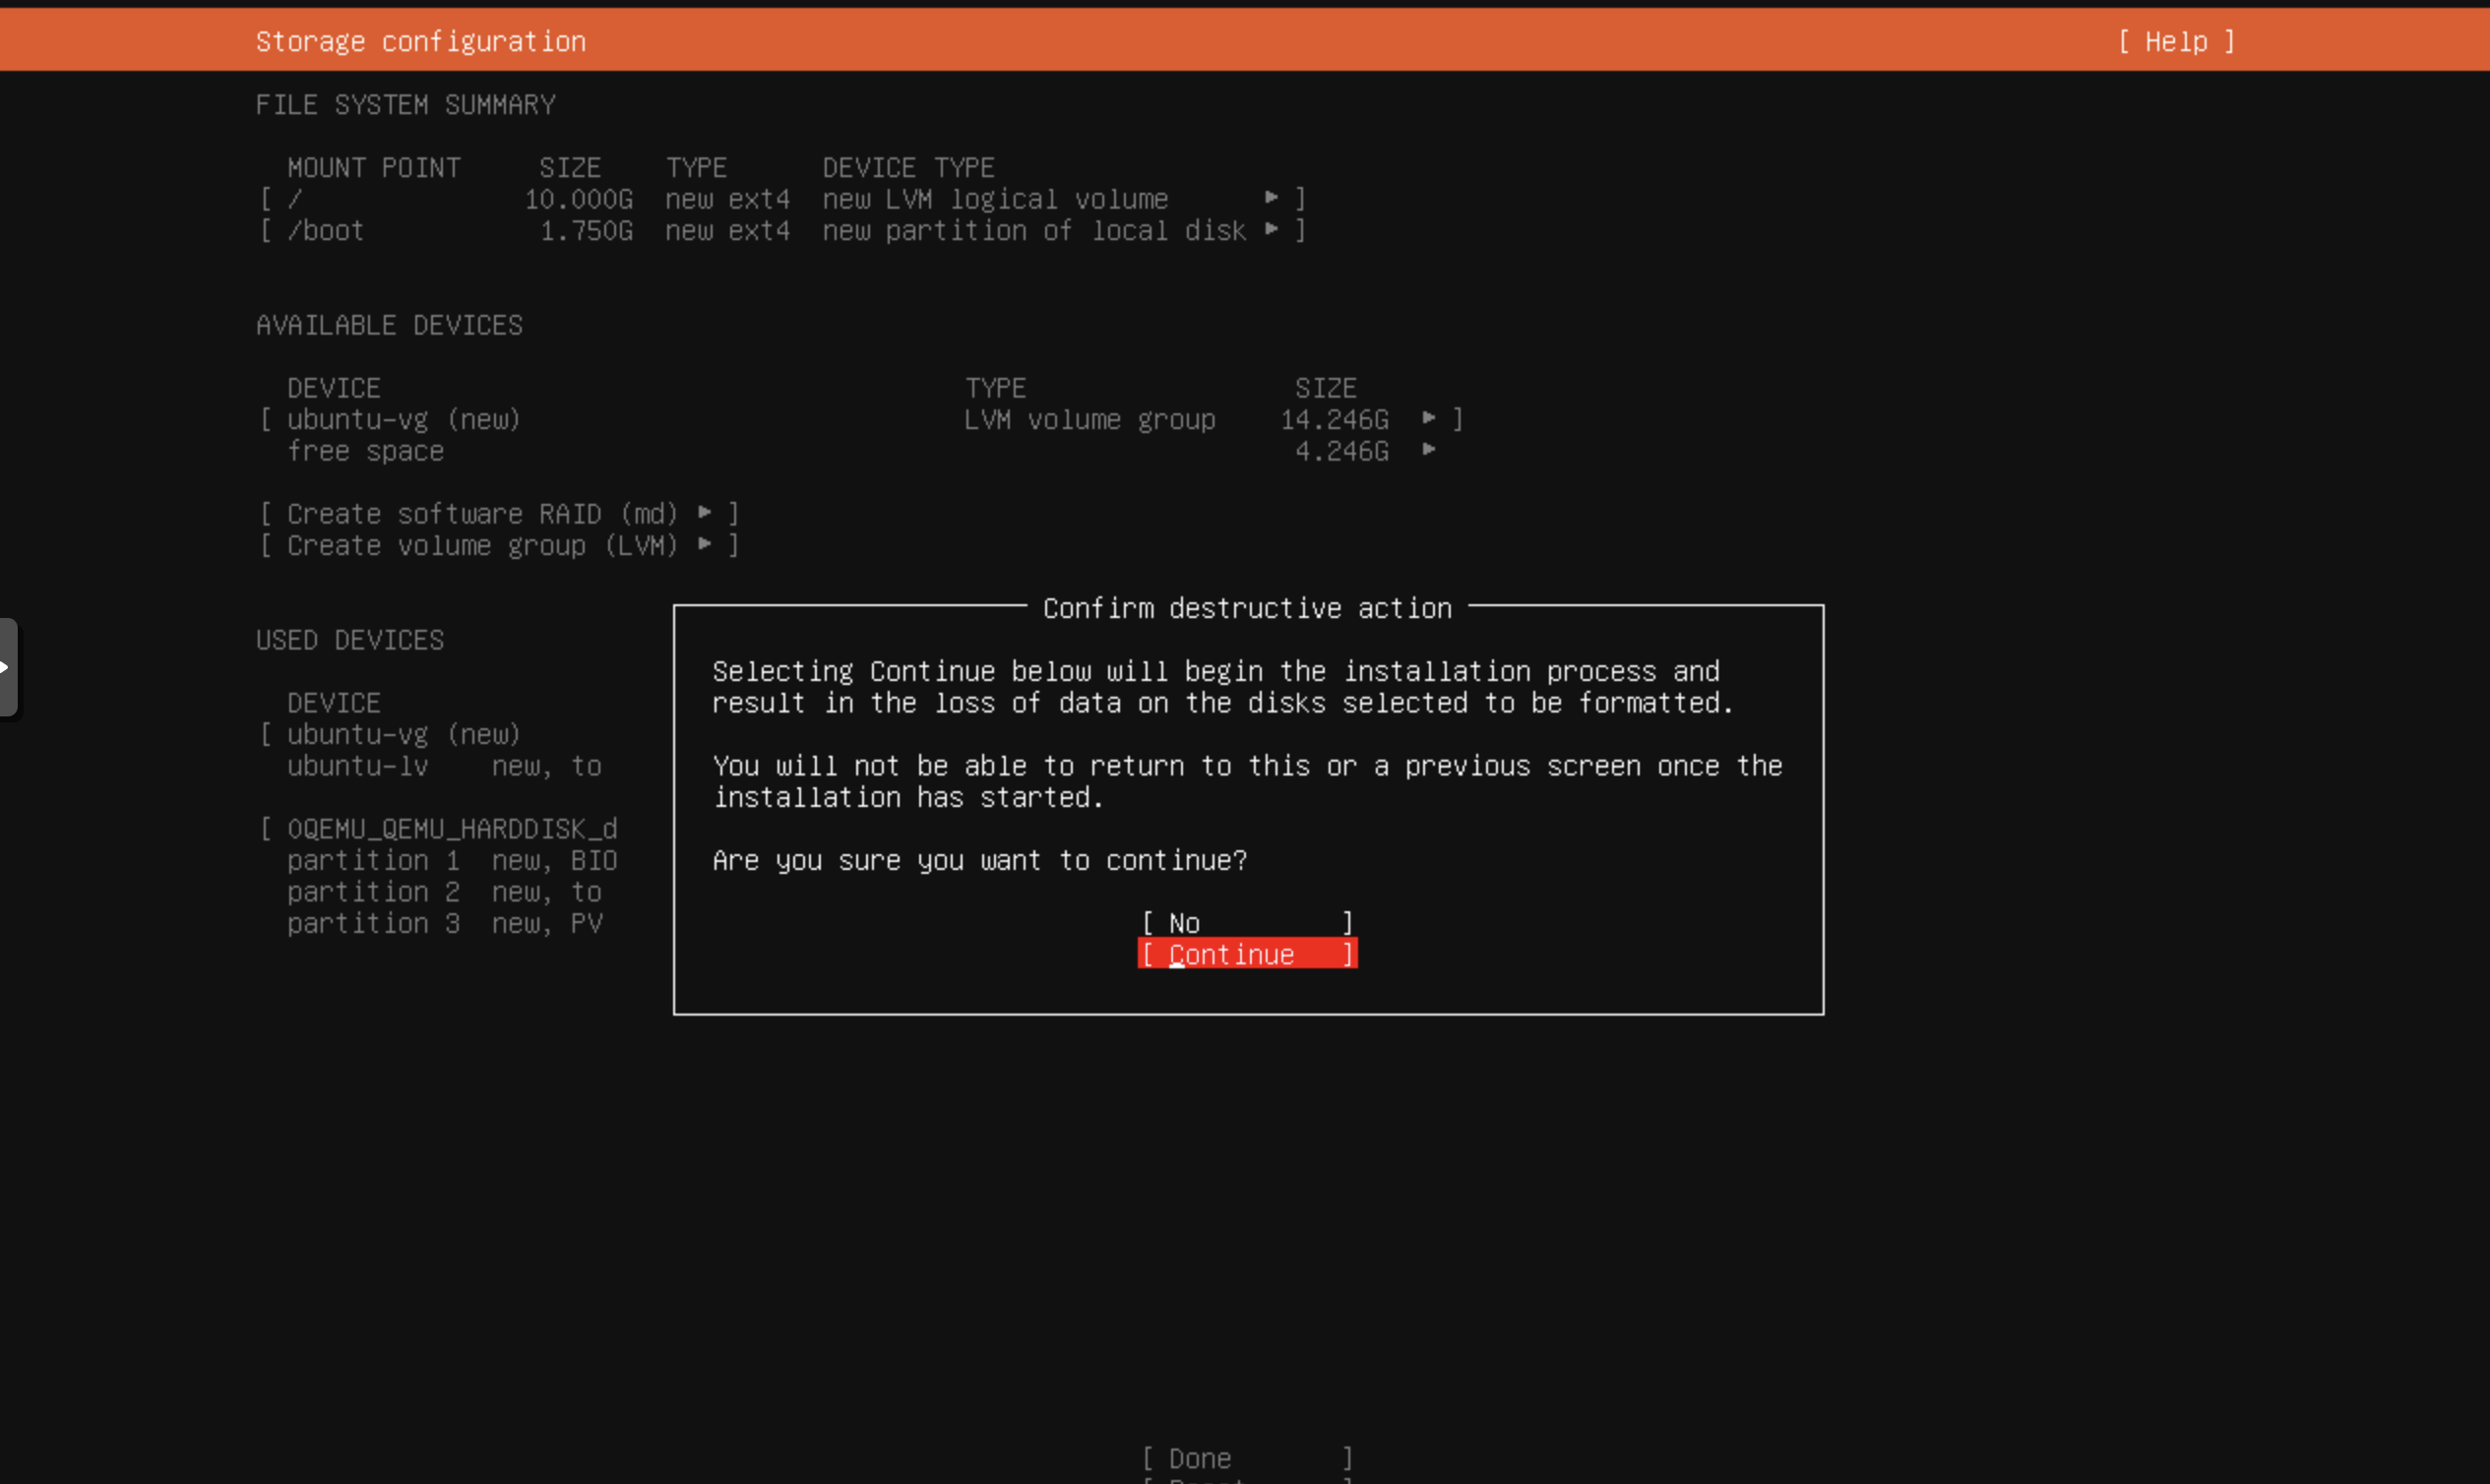
When you get to the Guided storage configuration we will leave the default settings.

-
Confirm the Filesystem setup and write the changes to disk.
-
Next you'll be asked to entere some info for the user account. Go ahead and fill this out as you desire.
-
Skip the Upgrade screen and move onto the SSH configuration screen. I'll be enabling SSH as I'll be configuring the network settings from my desktop. Hint - press spacebar to select the option.
-
Skip the Snap screen by selecting Done.
-
The installation will begin.
-
Once the installation is complete, you'll be prompted to Reboot. Go ahead and reboot the VM.
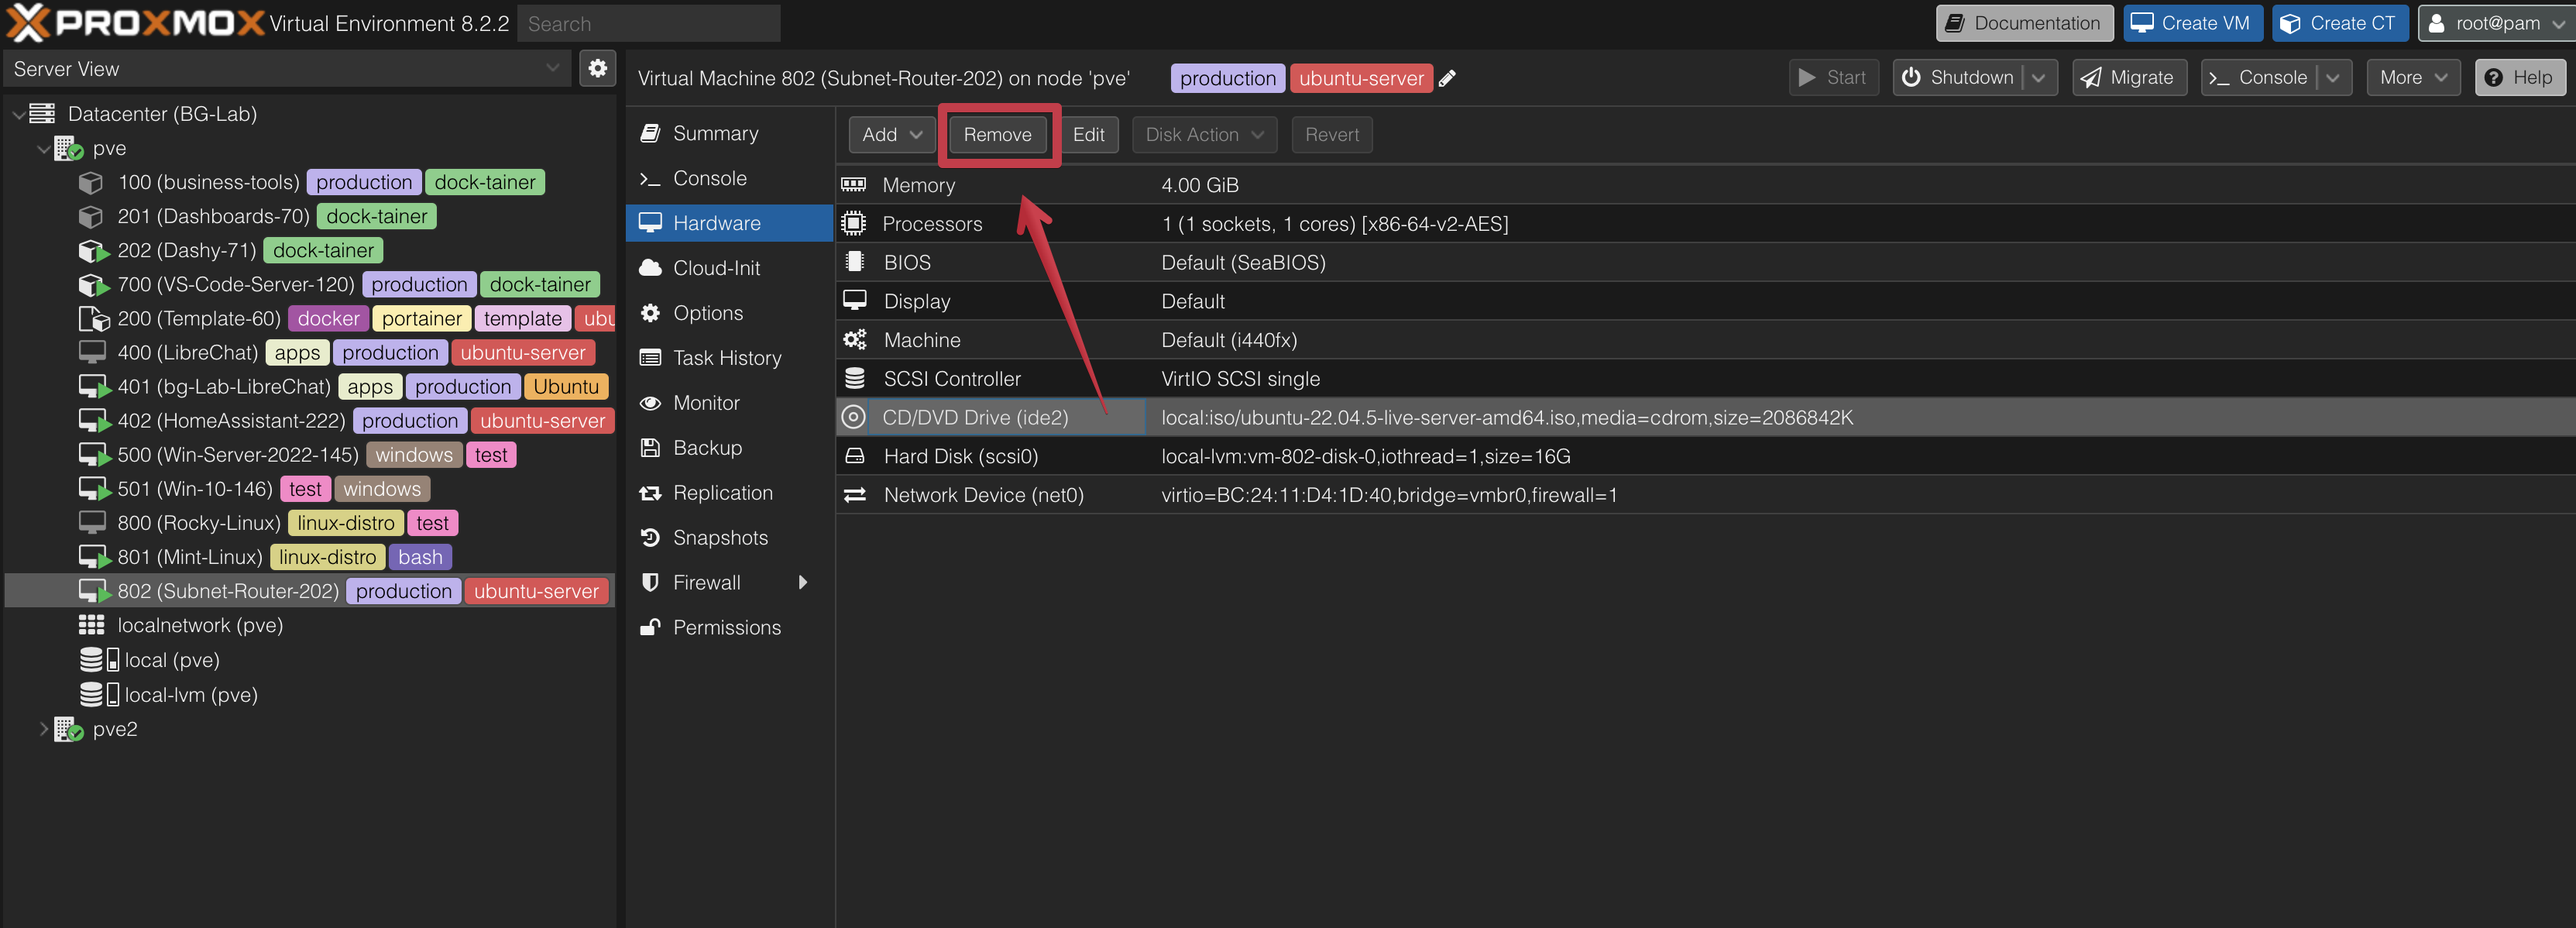
OH wait, CD/DVD is still in the drive. Let's remove that. then reboot the VM.
-
In your Proxmox web interface, click on your VM and click Hardware > CD/DVD Drive > Remove.
-
Reboot the VM.
Step 4: Configure the Network Settings
Well Drat! The Ubuntu Server installation did not like our network setup and the bridge was getting a DHCP address in the 172.XXX.XXX.XXX range. We tried and failed to give it the static IP address we wanted and know should work according to other VMs on the network. Let's hop into the VM through an SSH session and set the IP address manually.
I typically like to work with my headless VMs from my a terminal on m laptop or desktop so I can copy and paste commands. It makes life much easier. Let open a terminal and SSH into the VM. First we will need to find the IP address of the VM using the Proxmox console window.
-
Your VM should be running. Click on the VM in the Proxmox web interface and click Console if you've closed the console window.
-
You'll see a blinking cursor. Log in with the credentials you set up during the installation. IF you don't see a blinking cursor, press Enter, and you'll be shown the login prompt.
-
Use the credentials you set up during the installation to log in.
-
Once you are logged in, run the following command to find the IP address of the VM.
ip aYou should see the IP address of the VM listed under the a name like
enxxetc. There will be one address that starts with 127... don't use that as it it the link-local or loopback address. My address was listed under theens18interface as10.2.1.153. Thanks DHCP server, we tried to set it to something in the 10.2.1.XXX range, but Ubuntu had other ideas. We will set it manually now. -
In your terminal (not Proxmox console), SSH into the VM using the IP address you found in the previous step.
ssh username@<ip-address-from-ubuntu>For example:
ssh firesoflife@10.2.1.153You will be shown a screen about fingerprints and asked if you want to continue. Type
yesand press Enter. -
Enter your password when prompted.
Yay! You are now in your VM. Let's set the IP address manually.
Step 5: Set the IP Address Manually
- Let's check the installation for a network configuration file. Run the following command:
cd /etc/netplan and then ls to see what files are in the directory.
I have a file called 50-cloud-init.yaml. Let's edit that file. Yours may have another name like 01-netcfg.yaml or 00-installer-config.yaml.
-
Edit the file using the
nanotext editor.sudo nano 50-cloud-init.yaml #presuming you are inside the /etc/netplan directory -
There is a good chance your file wiil be empty. Mine had the following with a pretty important comment at the top:
# This file is generated from information provided by the datasource.  Changes
# to it will not persist across an instance reboot.  To disable cloud-init's
# network configuration capabilities, write a file
# /etc/cloud/cloud.cfg.d/99-disable-network-config.cfg with the following:
# network: {config: disabled}
network:
    ethernets:
        ens18:
            dhcp4: true
    version: 2
- The comment lets us know that we can do what we want in this file, but it will be overwritten on reboot. This is not good. What happens if, for example the power goes out and the VM reboots? We will lose our network settings and then everything we do here will have been for naught.
- Let's make a new file that will persist across reboots. We will first create a configuration file to disable cloud-init's network configuration capabilities. Exit the file you are in and run the following command:
sudo mkdir -p /etc/cloud/cloud.cfg.d
echo -e "network: {config: disabled}" | sudo tee /etc/cloud/cloud.cfg.d/99-disable-network-config.cfg
- Navigate back to the
/etc/netplan/50-cloud-init.yamlfile and edit it again.
network:
  version: 2
  ethernets:
    ens18:
      dhcp4: no
      addresses:
        - 10.2.1.202/24
      nameservers:
        addresses:
          - 8.8.8.8
          - 8.8.4.4
      routes:
        - to: 0.0.0.0/0
          via: 10.2.1.42
-
Save and exit by pressing
Ctrl + X, thenYto confirm, andEnterto save. -
Apply the changes by running the following command:
sudo netplan apply
You may see a warning about OpenVSwitch, but you can ignore it as the changes have been applied.
-
Exit the SSH session by typing
exitand pressing Enter. Then open a new SSH session to the VM to ensure the changes have been applied.noteGotcha! You will need to SSH into the VM using the new IP address you set.
That's it! You now have a Linux VM running on Proxmox with a static IP address. You can now use this VM as a base for a variety of services or projects.