Active Directory - Remote Access and NAT
In this guide, we will explore how to configure Remote Access and Network Address Translation (NAT) on a Windows Server running Active Directory Domain Services. These features are essential for enabling remote access to your network and providing internet connectivity to your internal clients. We will be configuring a Windows 10 client to connect to our Active Directory network using a VPN connection and enabling NAT on our Windows Server to allow the client to access the internet.
Prerequisites
Before we get started, make sure you have the following:
- A Windows Server running Active Directory Domain Services (refer to the Active Directory - Domain Services guide for setup instructions).
- A Windows 10 or 11 client machine that is joined to the Active Directory domain. You can also use a Windows 10 client if you prefer.
- Administrative access to both the server and client machines.
- Basic knowledge of networking concepts such as IP addressing, subnetting, and routing.
Steps
Step 1: Configure Remote Access on the Windows Server
-
Open Server Manager on your Windows Server and click on Add roles and features if it's not already open.
-
Click Next on the Before you begin screen.
-
Click Next until you are on the Select server roles screen.
-
Select Remote Access from the list of roles and click Next.
-
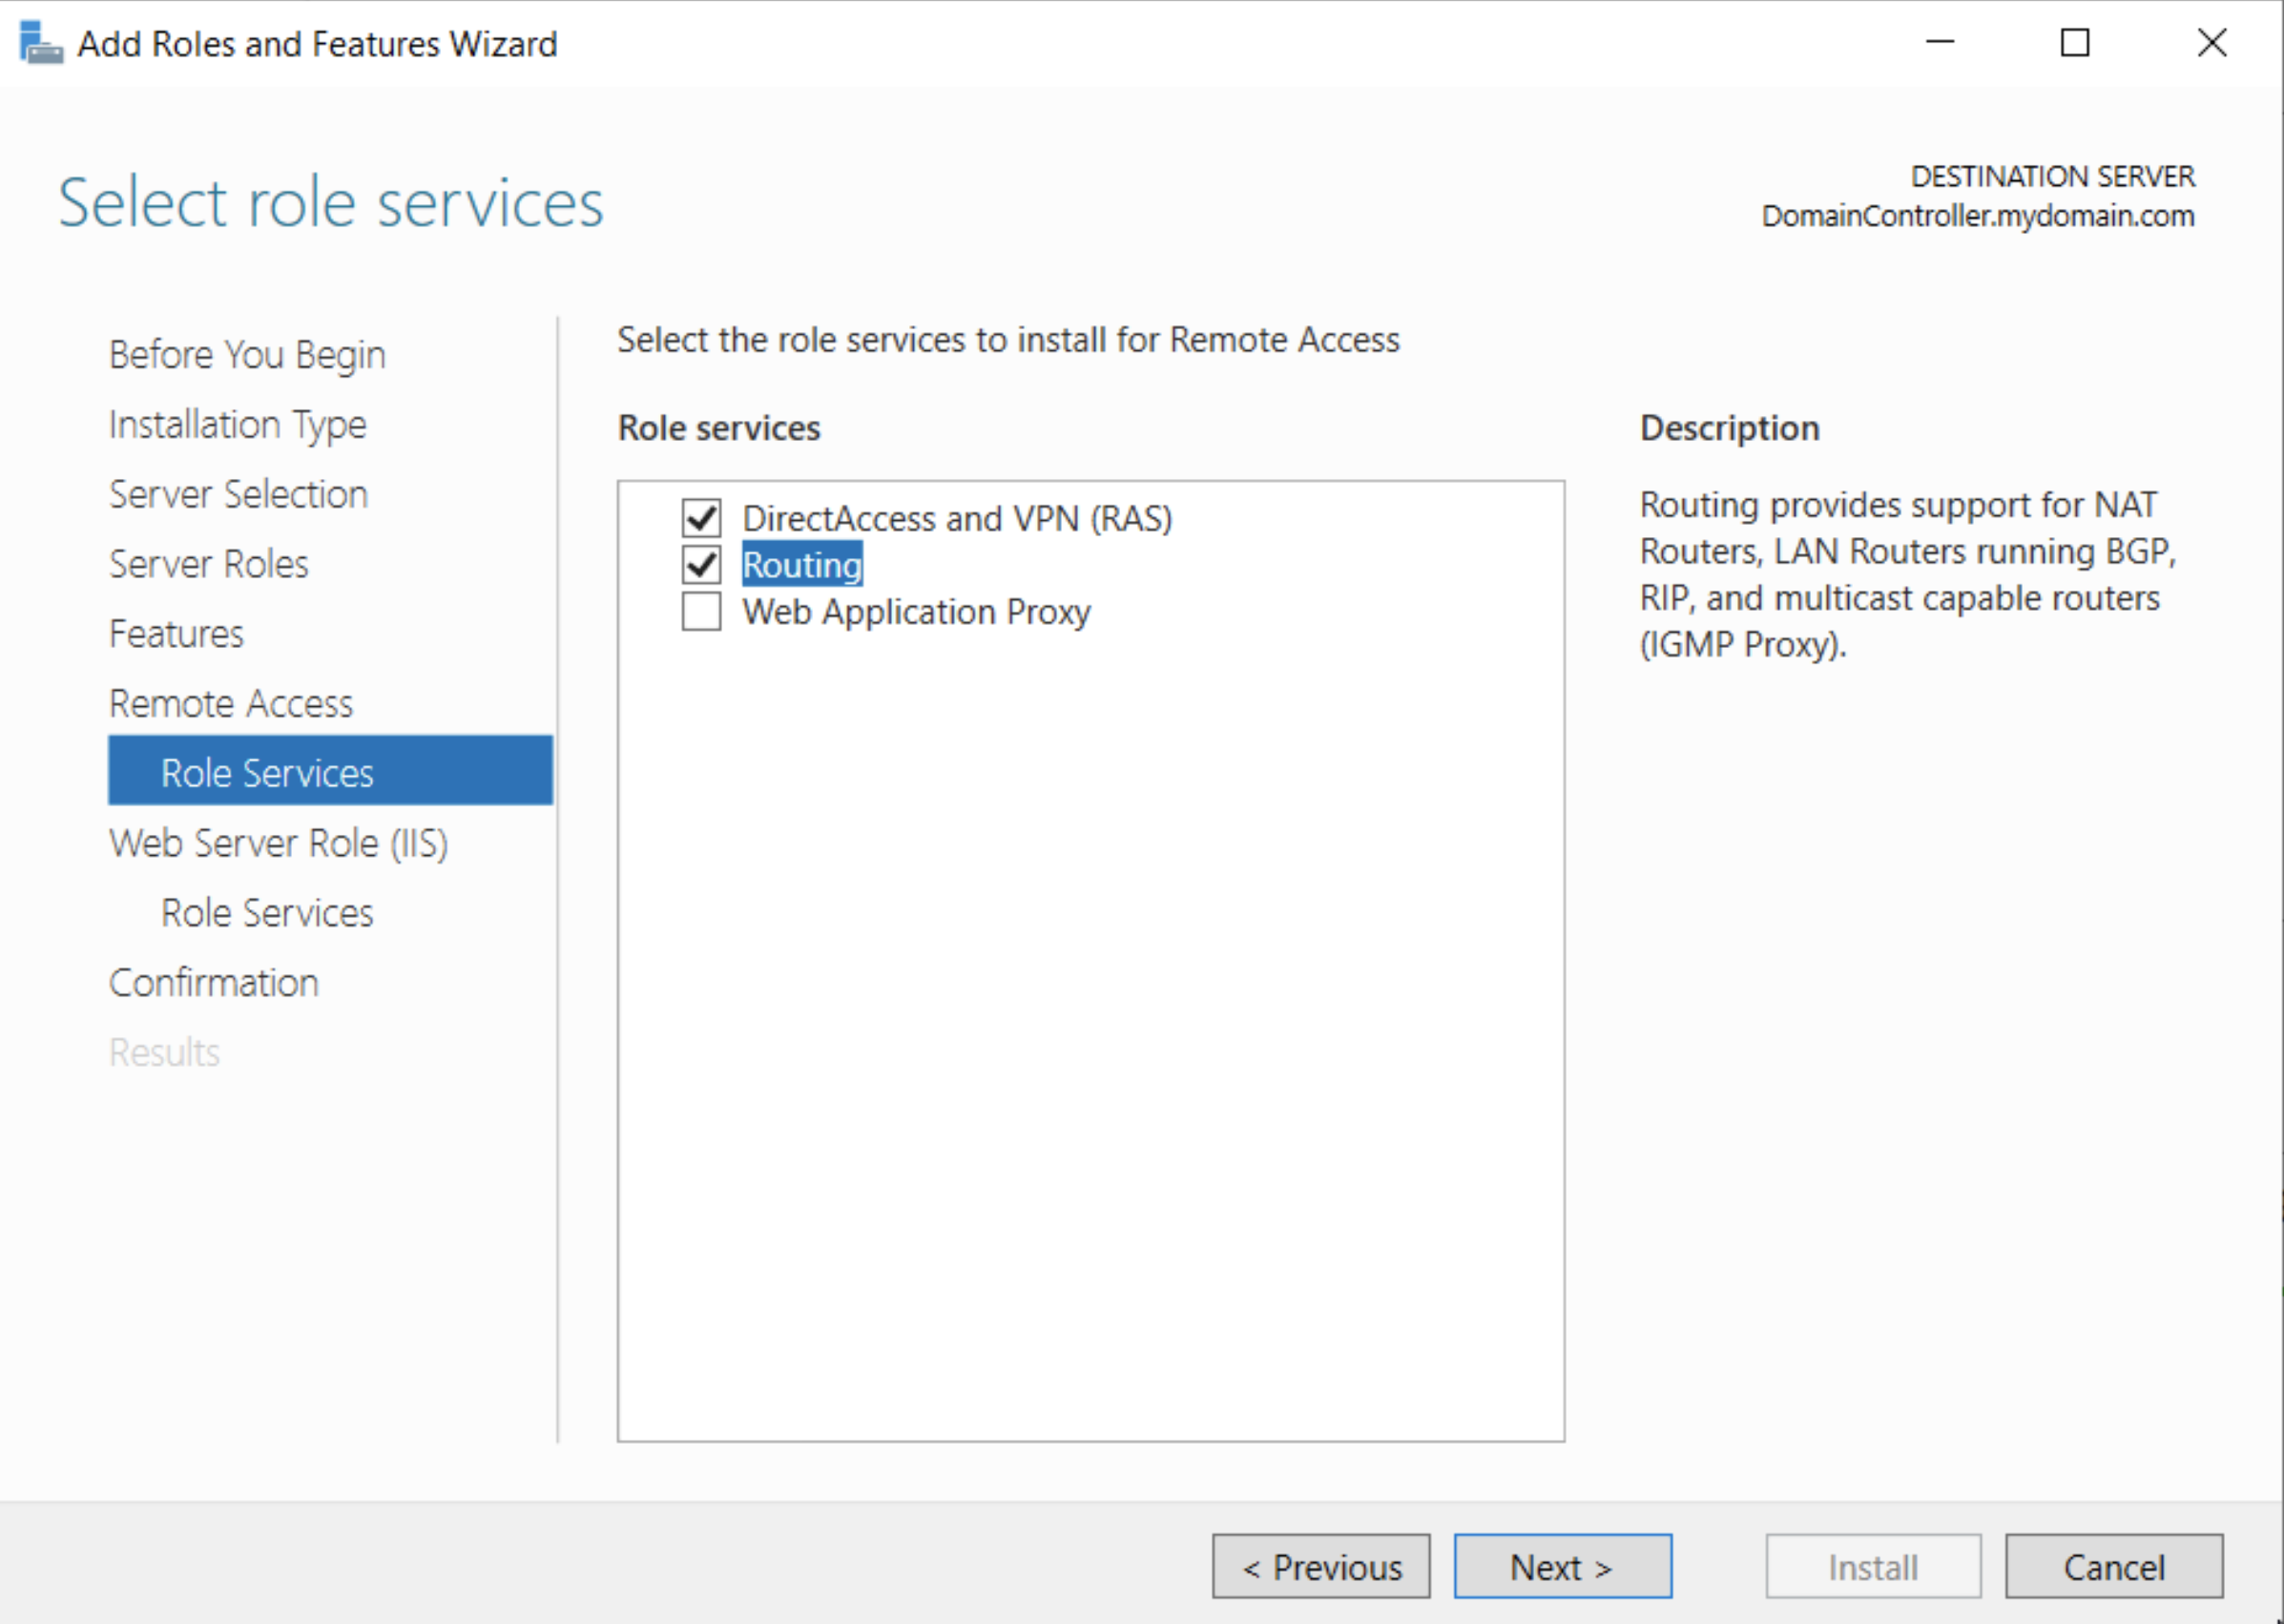
Click Next until you reach the Role Services screen. Here, select DirectAccess and VPN (RAS) and Routing. Click Next:
-
Click Next until you reach the Confirmation screen. Click Install to begin the installation process.
-
Once the installation is complete, click Close to exit the wizard.
Step 2: Configure Remote Access VPN
-
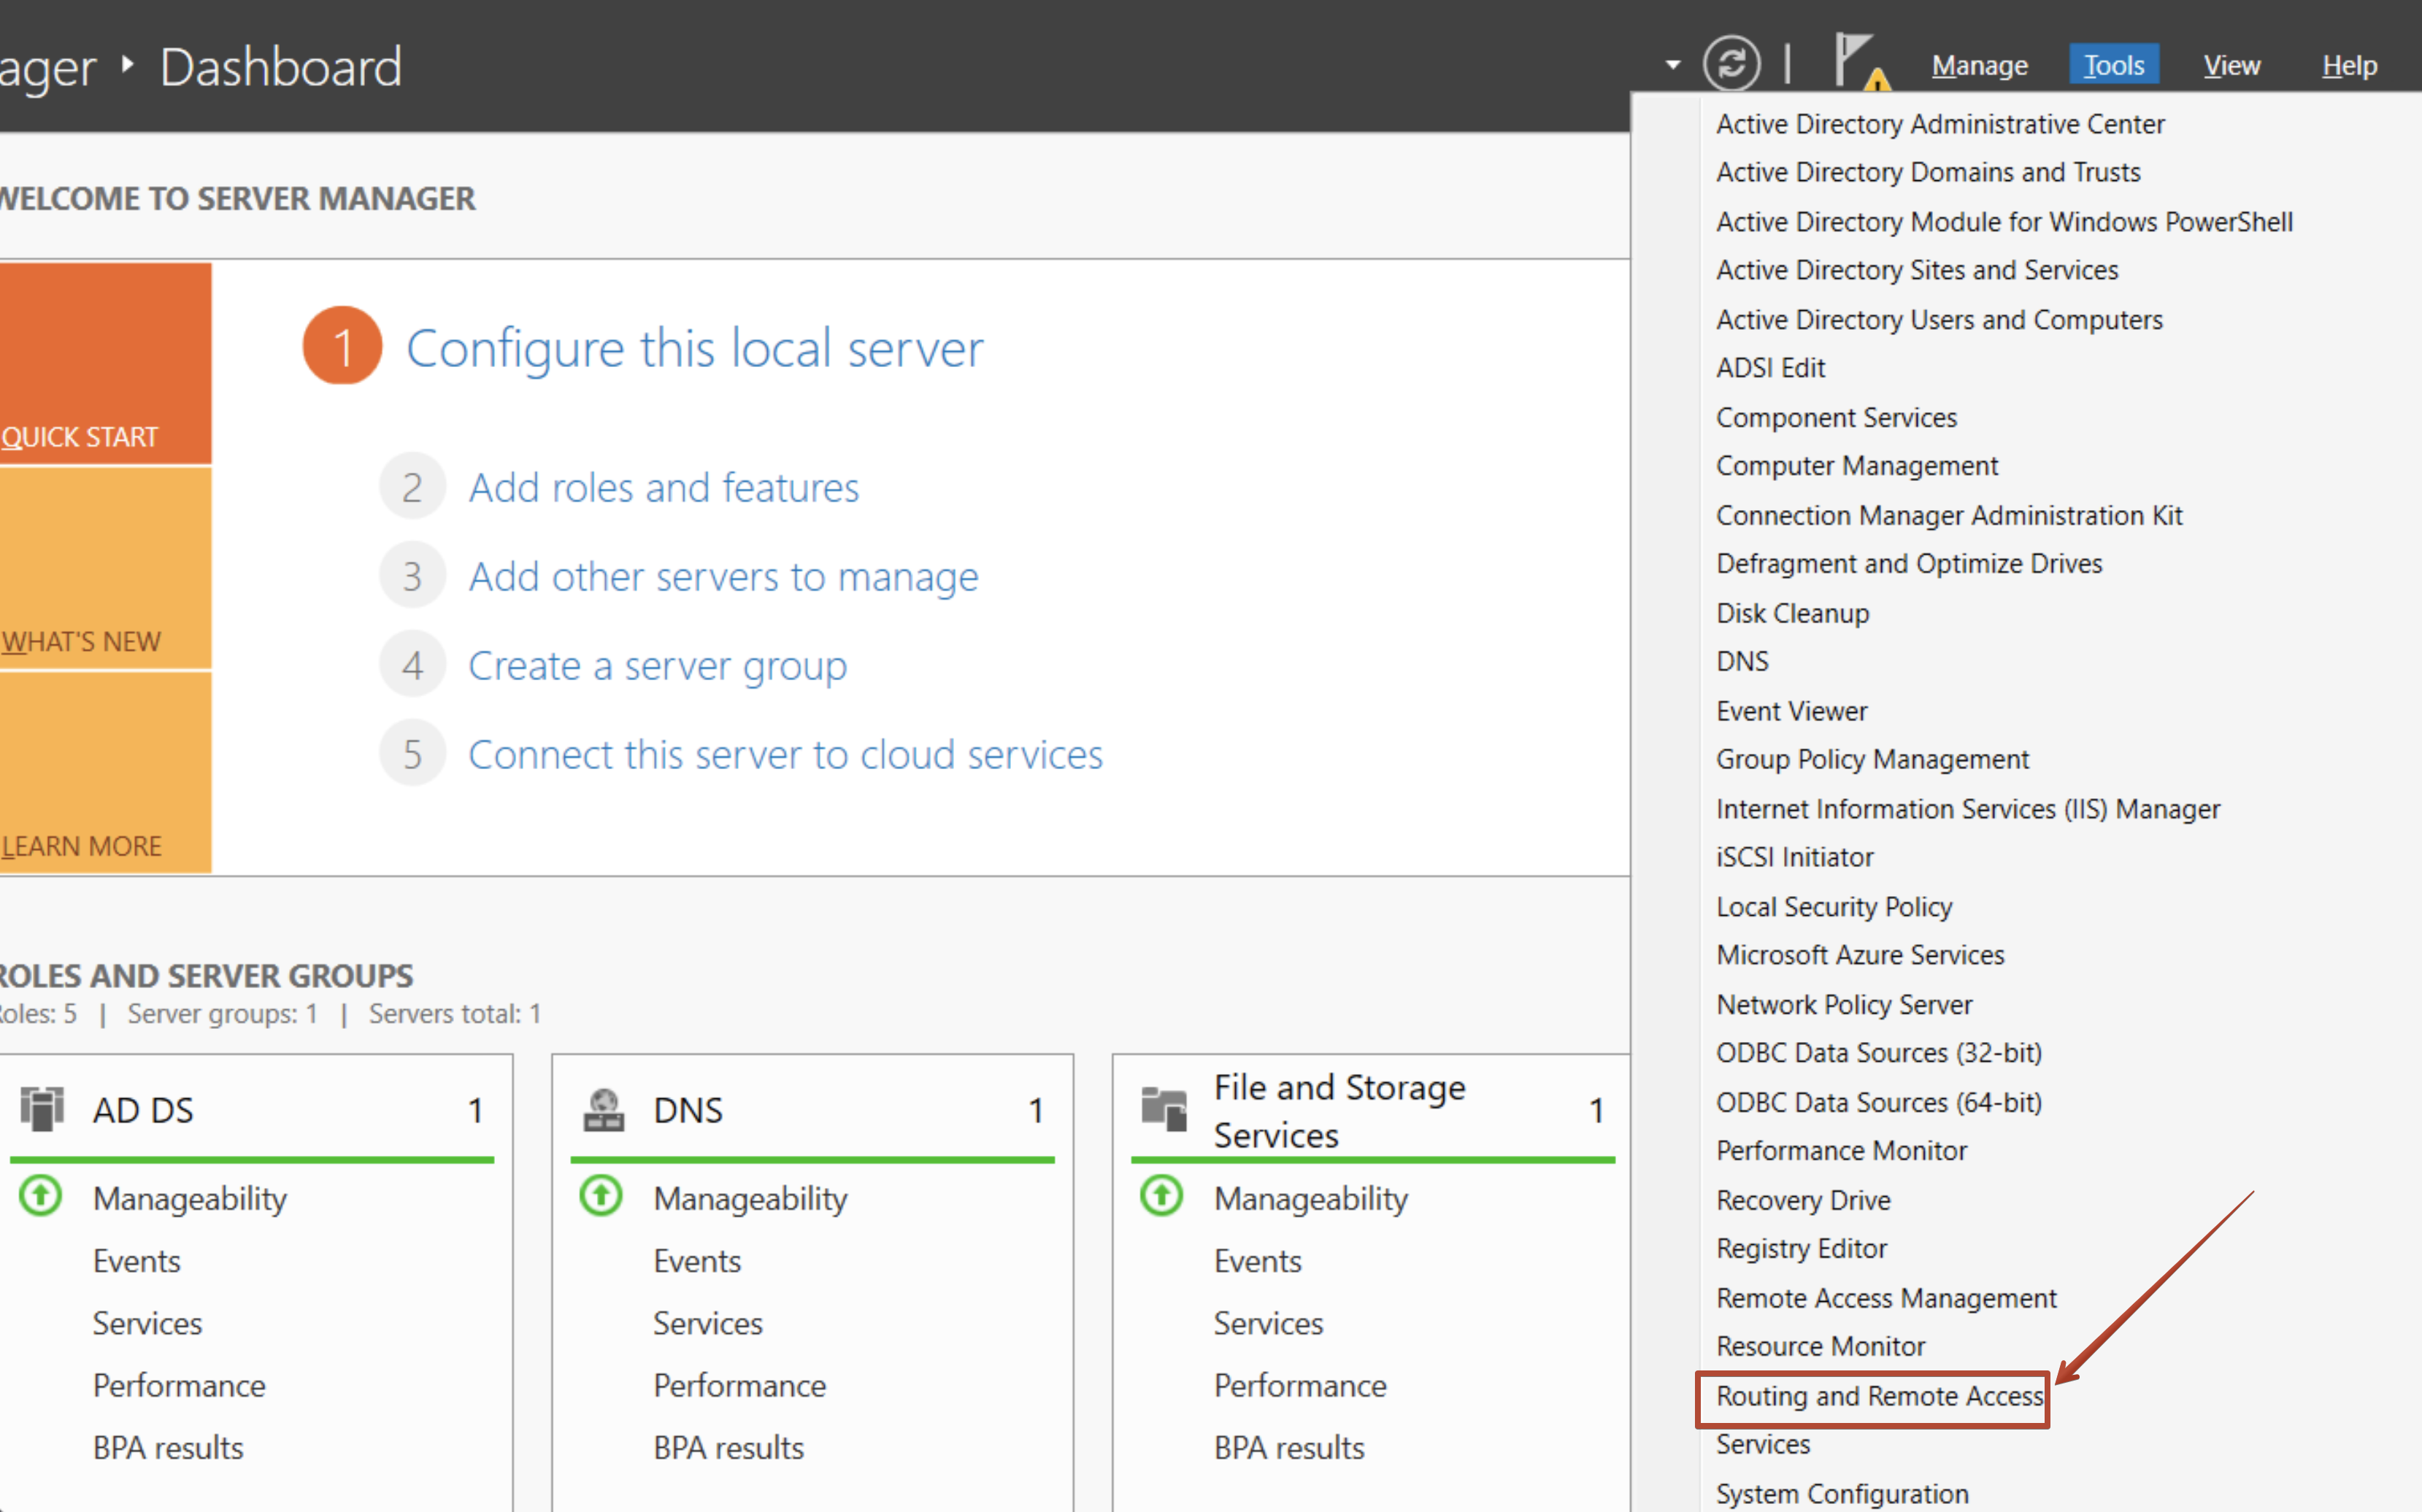
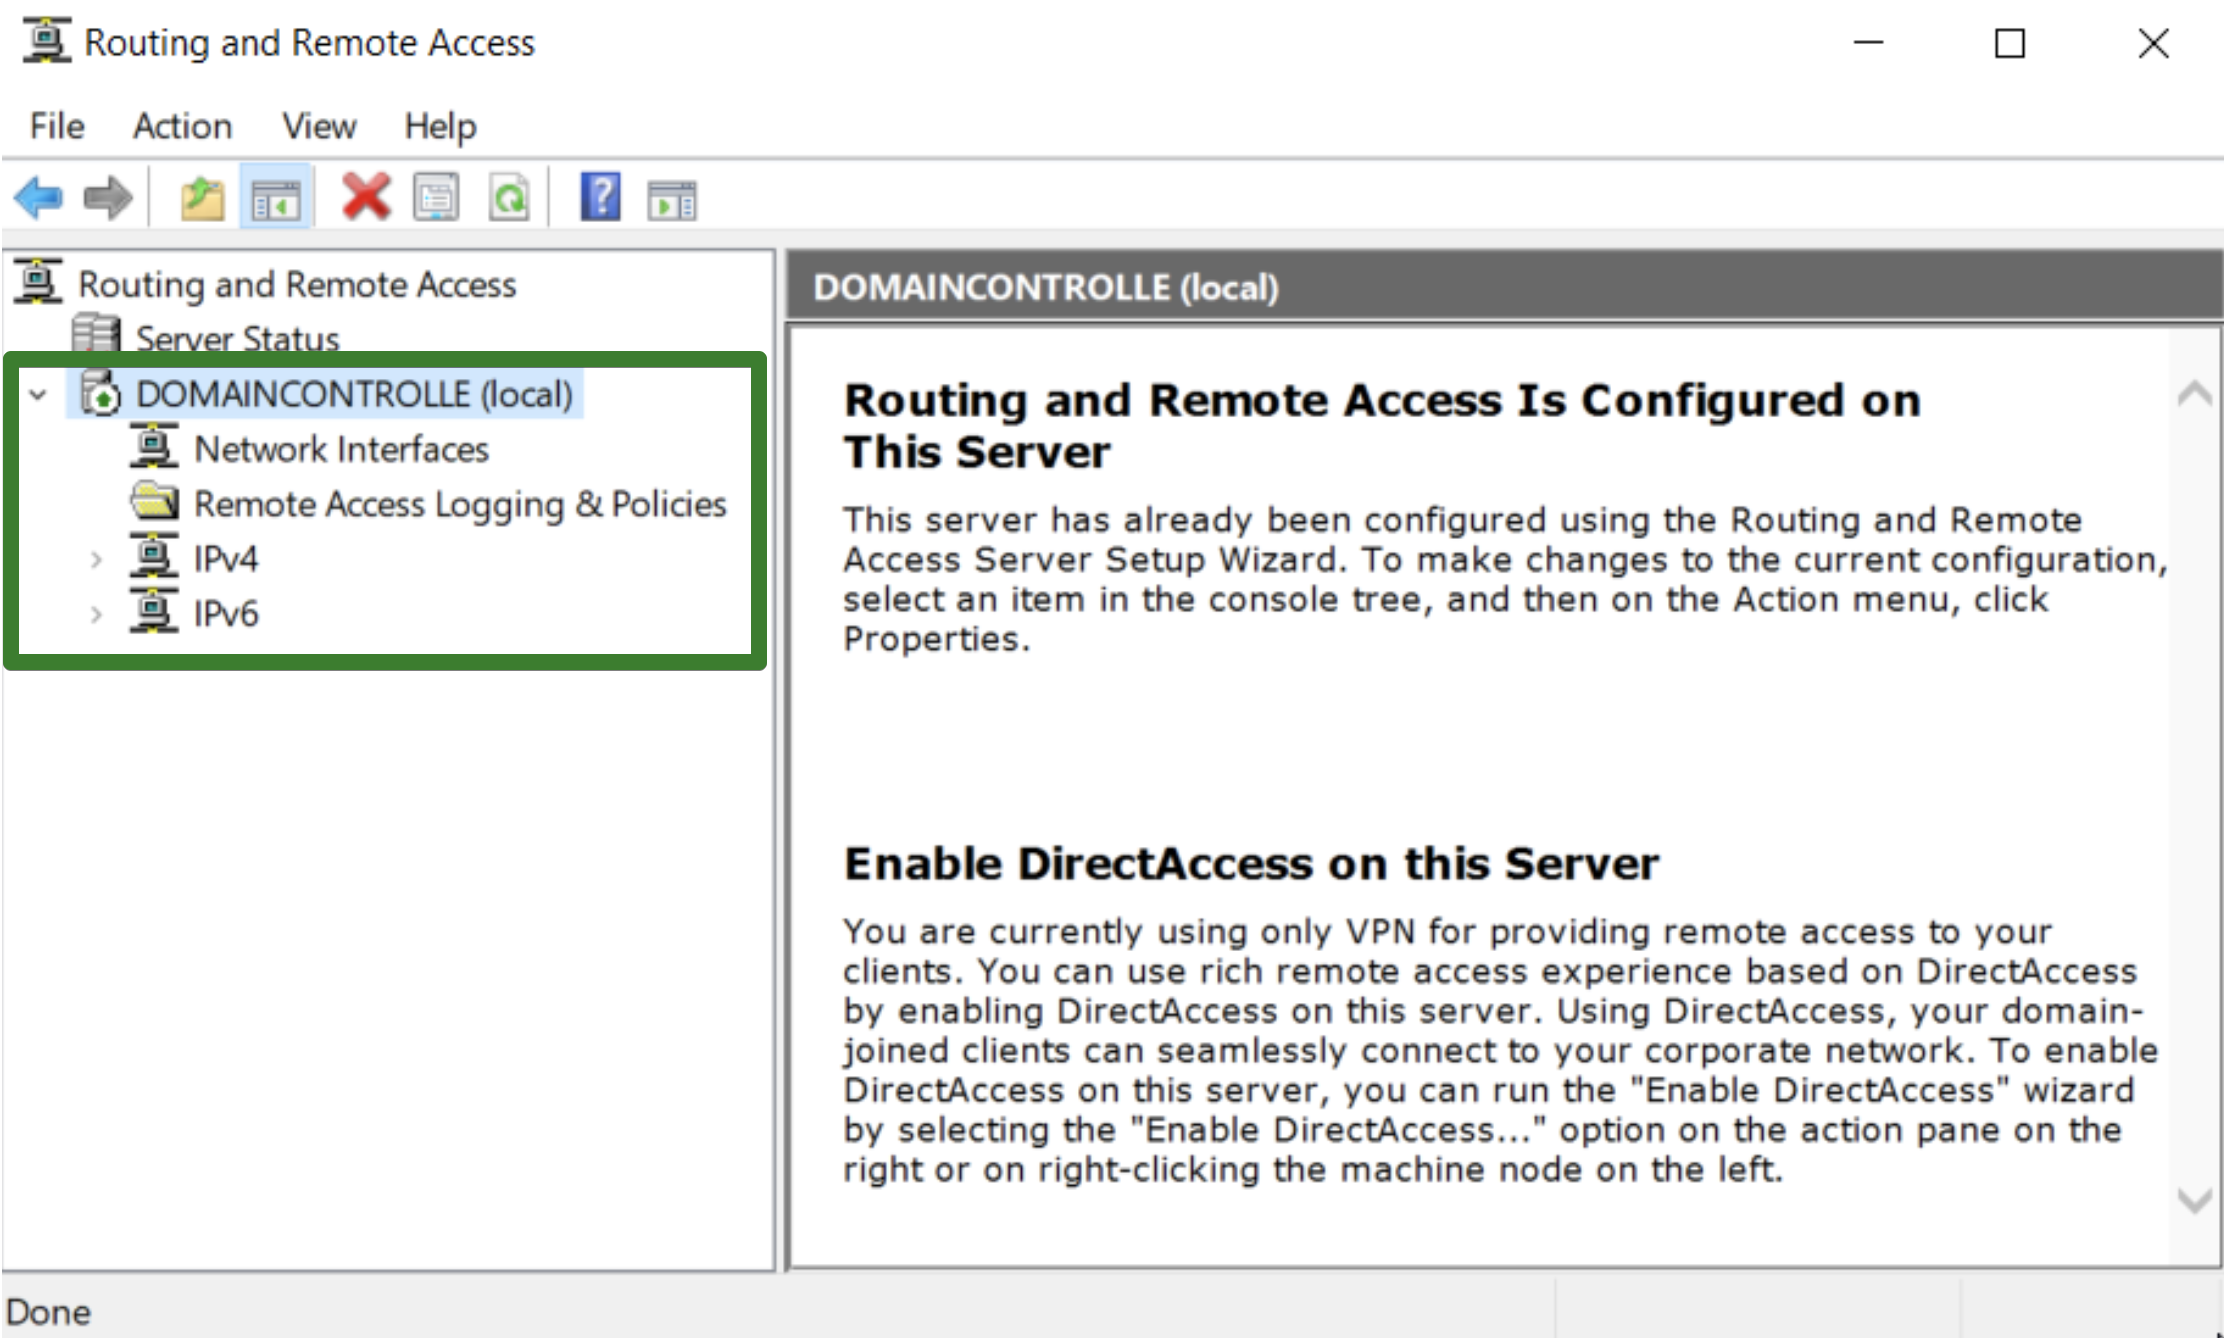
In the Server Manager, click on the Tools menu item in the top right corner and then select Routing and Remote Access.
-
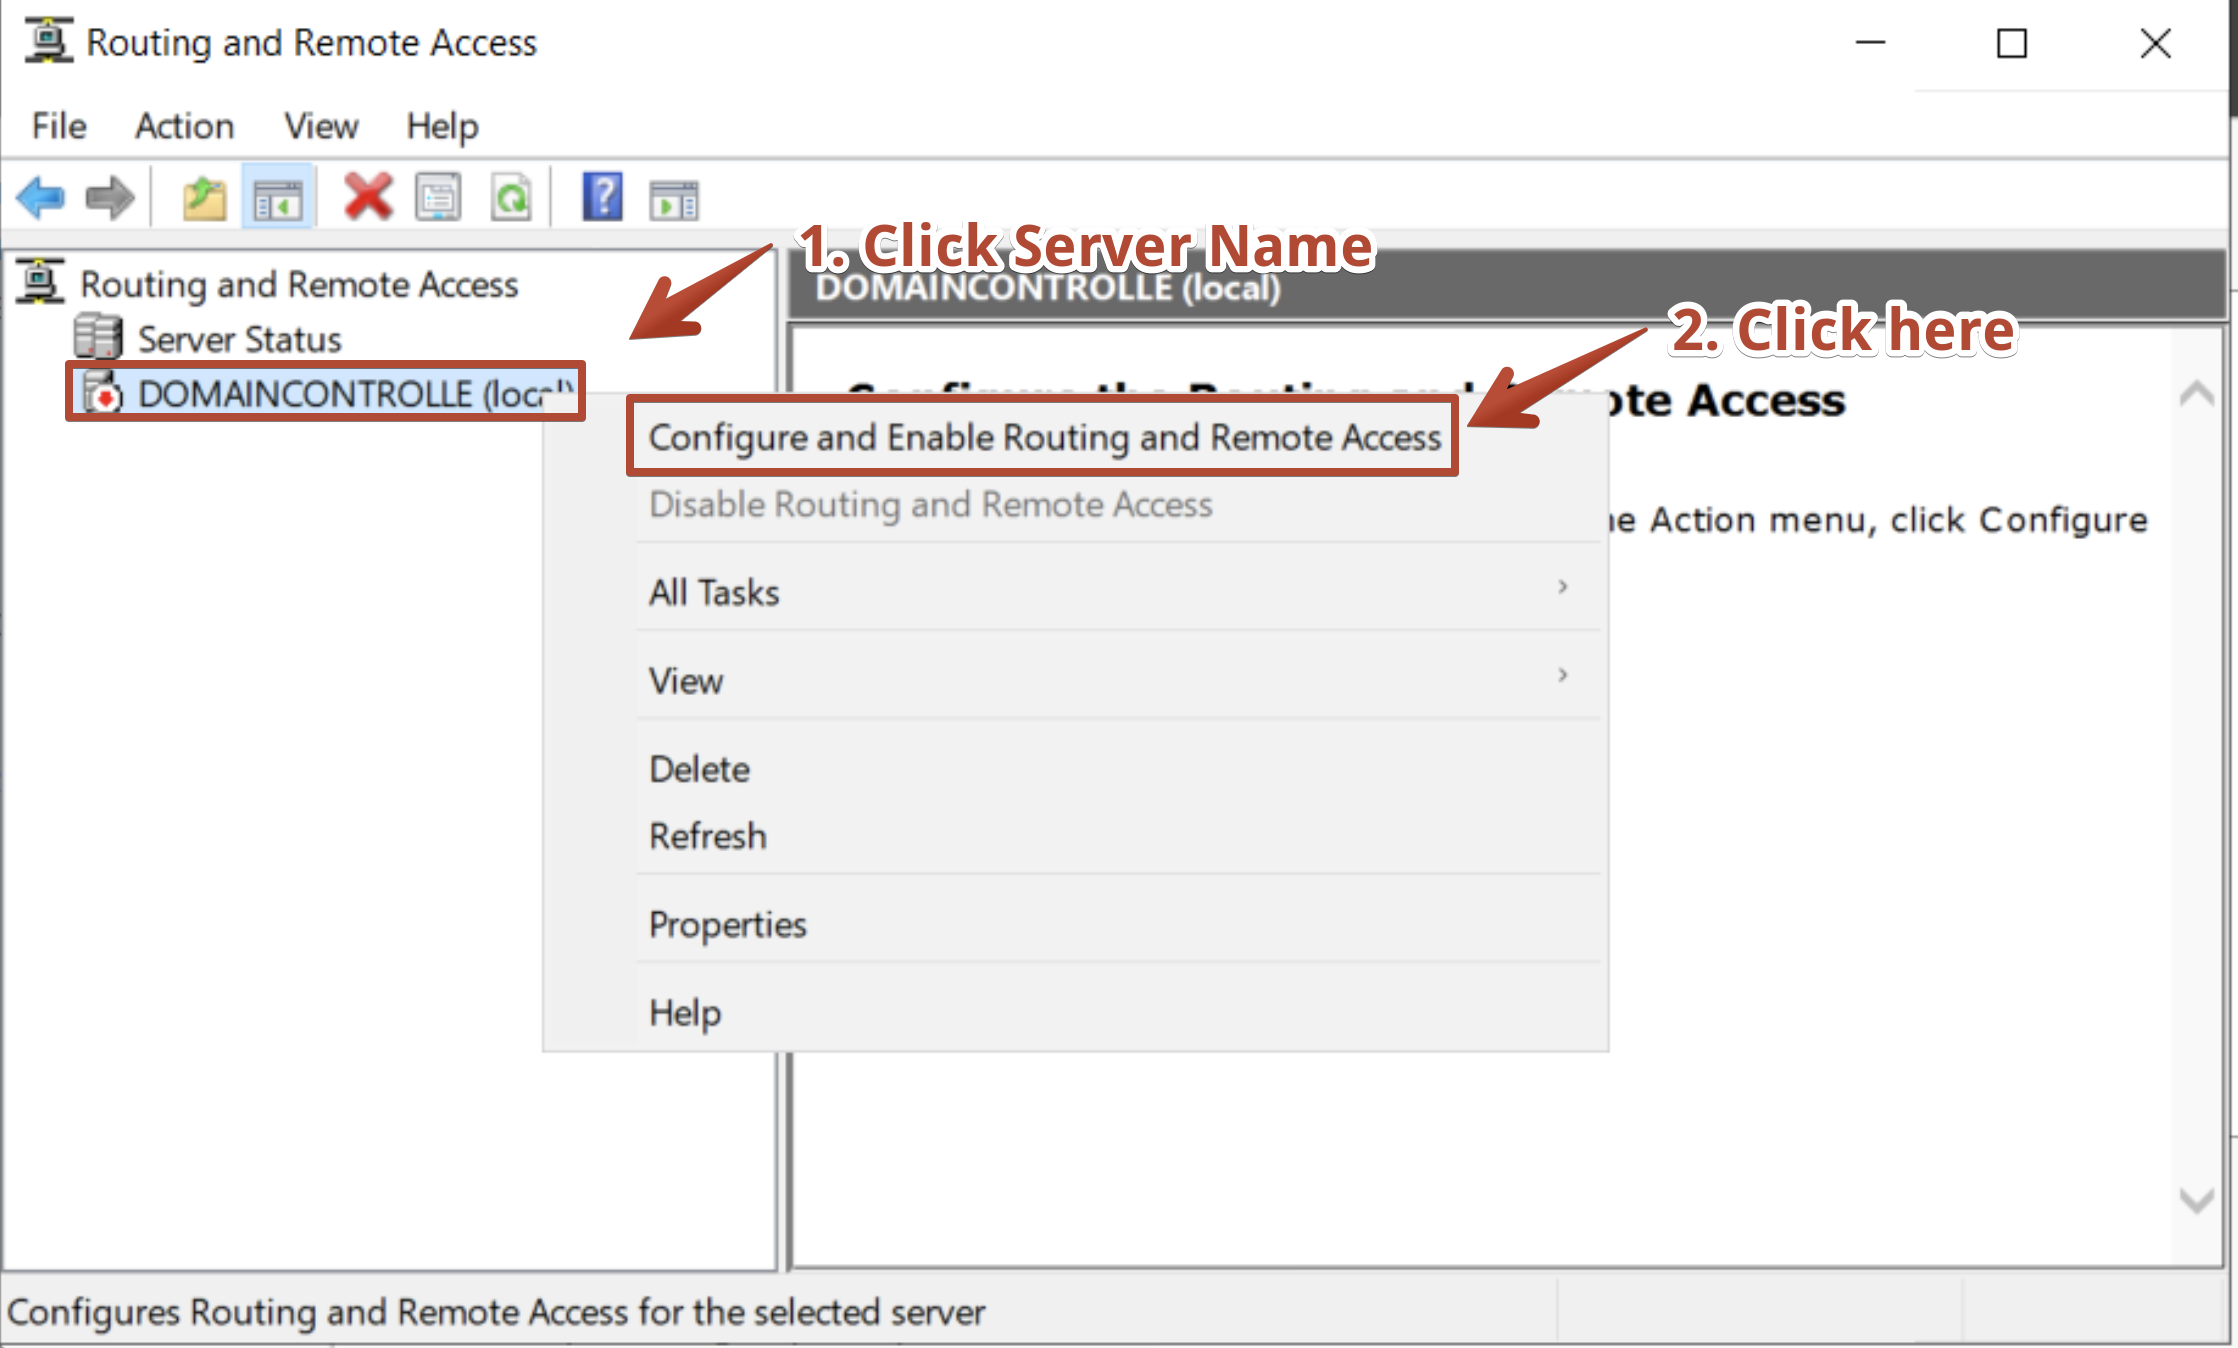
In the Routing and Remote Access console, right-click on the server name and select Configure and Enable Routing and Remote Access. This will start the configuration wizard.
-
Click Next on the Welcome screen.
-
Select the Network Address Translation (NAT) radio button. This will clients to connect to the Internet using the server's IP address.
-
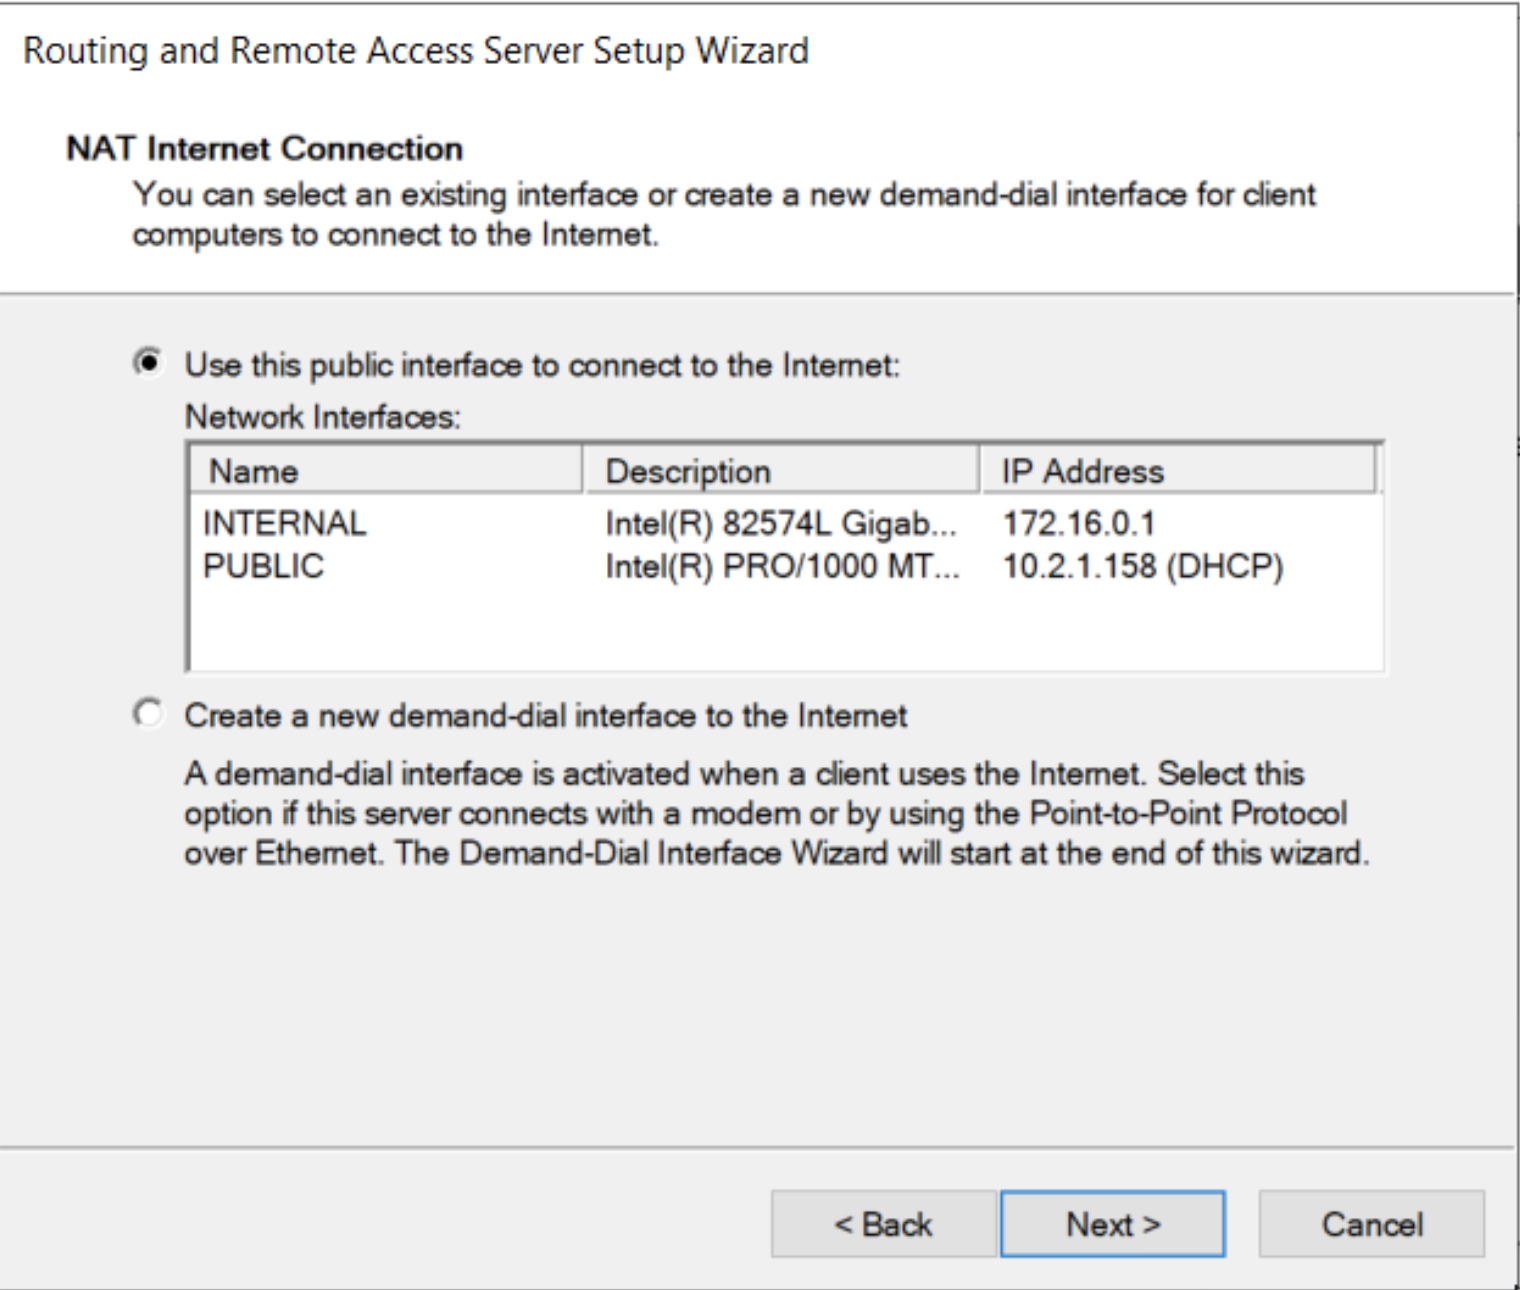
The wizard will pop up a window that allows you to select the network interface that will be used for NAT. Select the interface that is connected to the internet and click Next. We previously configured a public and internal interface in the Active Directory - Domain Services guide.
 danger
There is a bug that may arise wherein you may not see and / or are unable to select either of the interfaces. I have found this can be resolved if you quite the Server Manager and Routing and Remote Access consoles and then reopen them. If you still have issues, you may need to restart the server.
-
We need to select the NIC we set up that will be used to connect to the internet. In our case, this is the
Publicinterface. There is a clue as to which interface to select in that it has DHCP enabled and is connected to the internet. Click Next. -
Click Finish to complete the configuration. You'll see a popup with a clock icon that shows the configuration process stages. Once complete, you'll see the NAT interface listed in the Routing and Remote Access console.
Step 3: Setup DHCP Server on the Domain Controller
We need to ensure that our clients can receive IP addresses when they connect to the network. To do this, we will set up a DHCP server on our domain controller.
-
Open Server Manager and click on Add roles and features if it's not already open.
-
Click Next on the Before you begin screen.
-
Select Role-based or feature-based installation and click Next.
-
Select your server from the server pool and click Next.
-
Select DHCP Server from the list of roles and click Next. A popup windows appears asking you to add features that are required for the DHCP Server. Click Add Features.
-
Click Next until you reach the Install button. Click Install and wait for the process to complete.
-
Once the installation is complete, click Close to exit the wizard.
Step 4: Configure DHCP Server
We will now configure the DHCP server to assign IP within our subnet to clients that connect to the network.
-
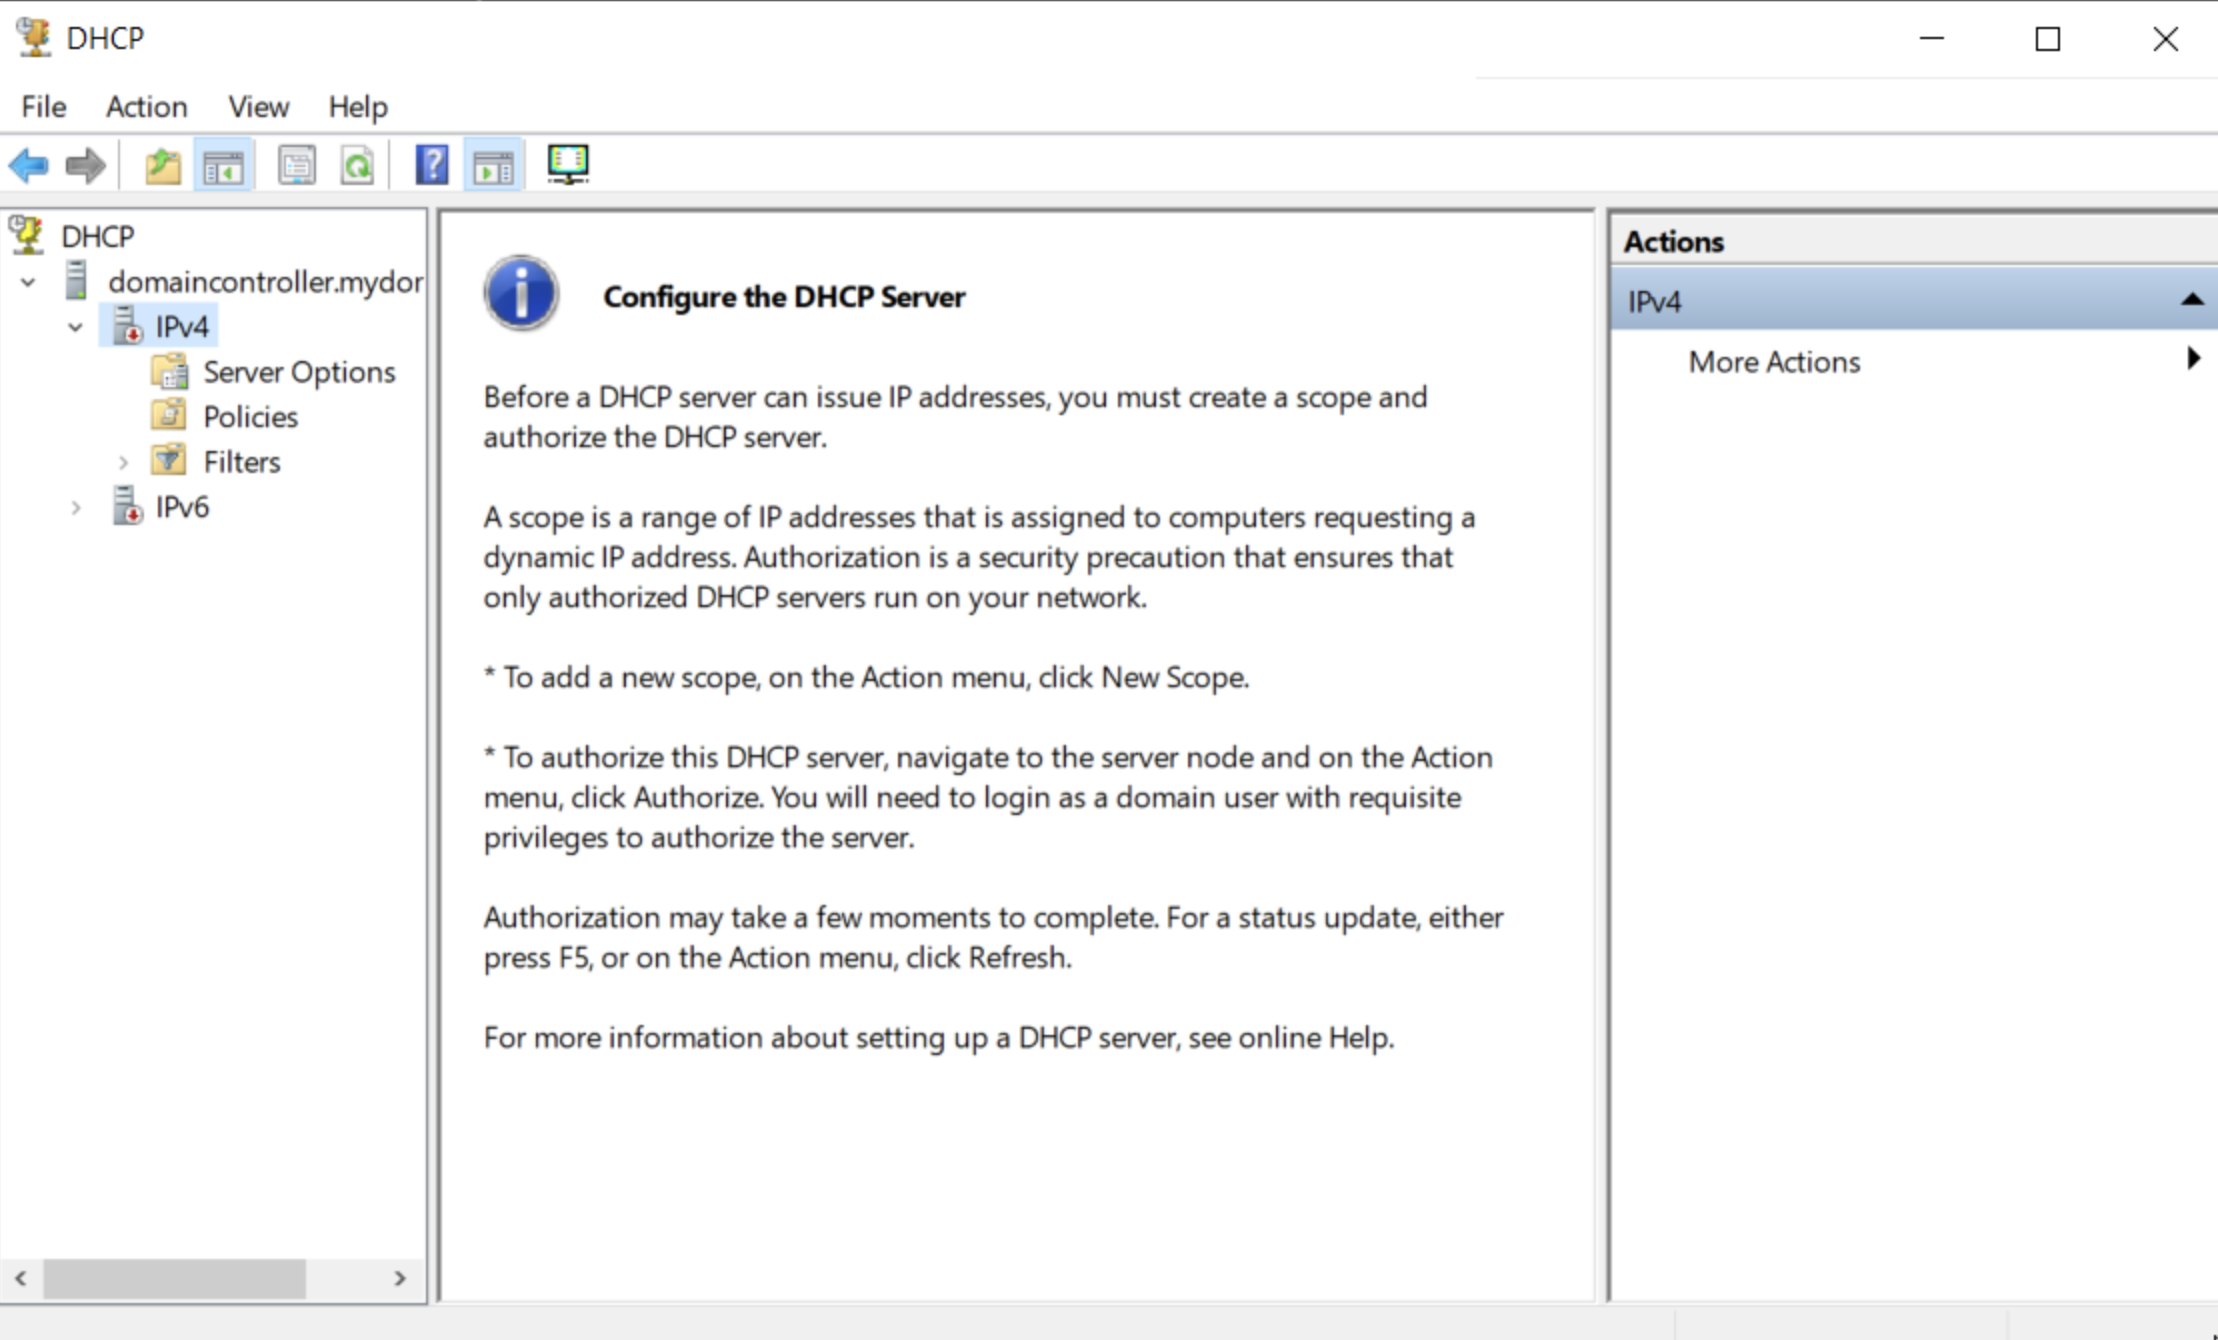
In the Server Manager, click on the Tools menu item in the top right corner and then select DHCP.
-
The DHCP server will open and you'll see your domain controller listed. You'll also see your IPv4 and IPv6 scopes with red down arrows indicating that they are not yet active.
-
Right-click on IPv4 and select New Scope.
-
The New Scope Wizard will open. Click Next on the Welcome screen.
-
Enter a Scope Name and Description. For simplicity, we will name the scope after the IP range it will be assigning. Click Next.
-
Define your IP Address Range. We will use
172.16.0.100 - 172.16.0.200for our scope. Will also change the subnet mask to use a /24 subnet. Click Next.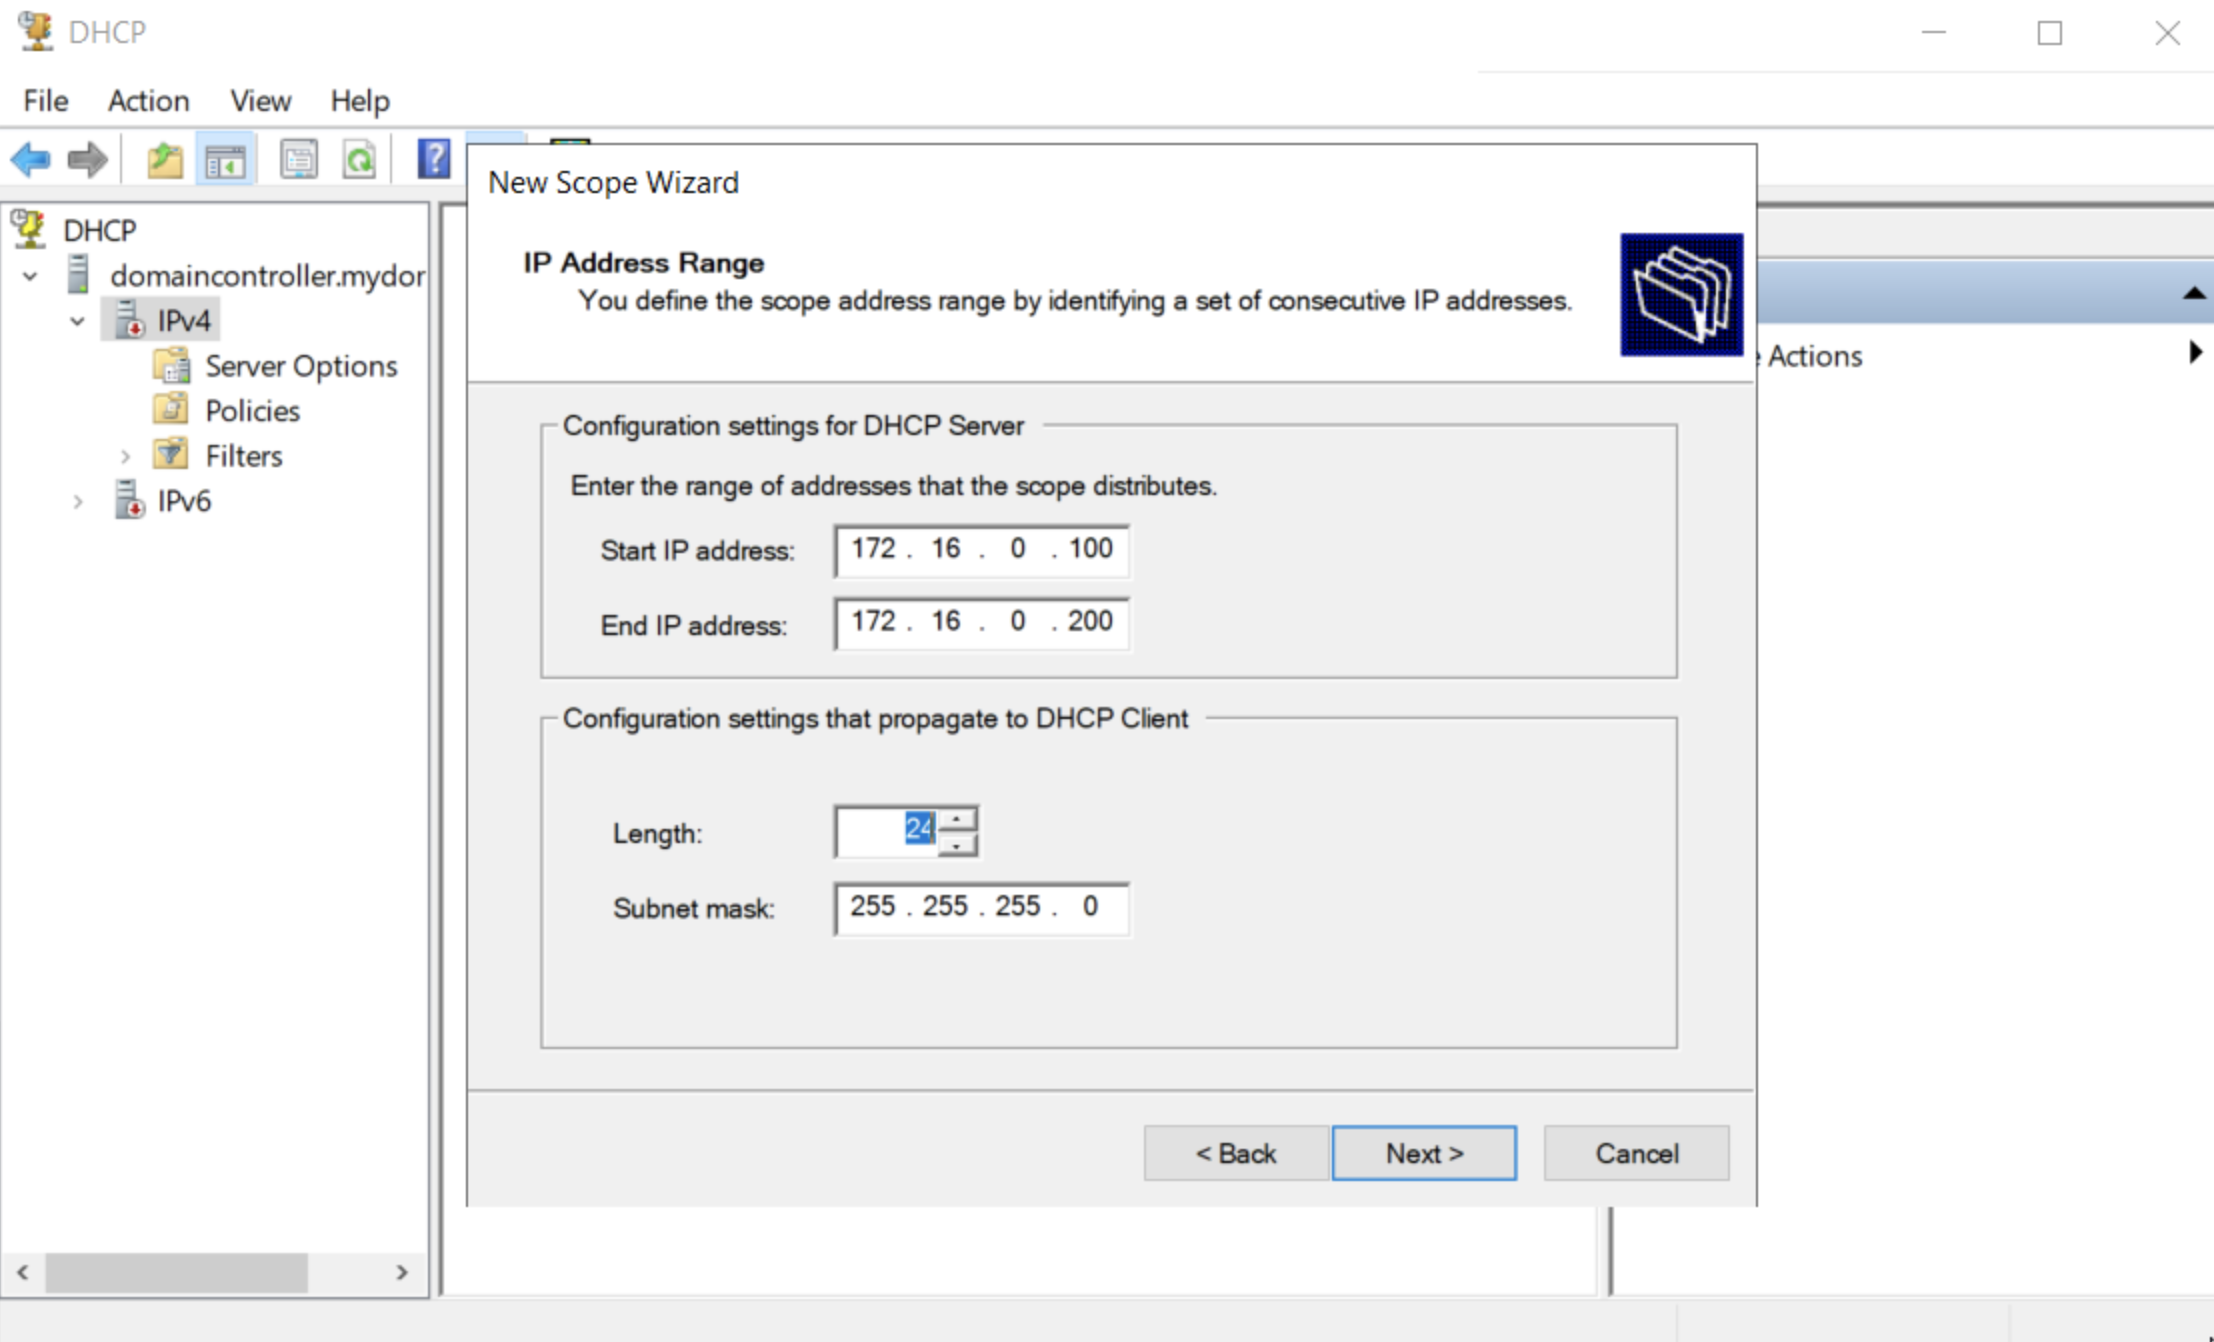
-
Exclude any IP addresses that you do not want to be assigned by the DHCP server. We will leave this blank. Click Next.
-
Define the Lease Duration. We will use the default of 8 days. This is context dependent. In cases where you have devices coming into the network and then leaving frequently, you may want to reduce this time. If you were to have a lease period of 8 days in this context with lots of traffic, you may find that you run out of IP addresses to assign. Click Next.
Step 5: DHCP Options
We can define a few options such as telling clients where to find the DNS server and the default gateway. We will set these options now.
-
Continuing on in the New Scope Wizard, we are asked "Doy you want to configure DHCP options for this scope?" - we do, so click Yes. Click Next.
-
In the Router (Default Gateway) field, enter the IP address of the interface that is connected to the internet. In our case, this is
172.16.0.1which is the IP address of thePublicinterface. Click Add.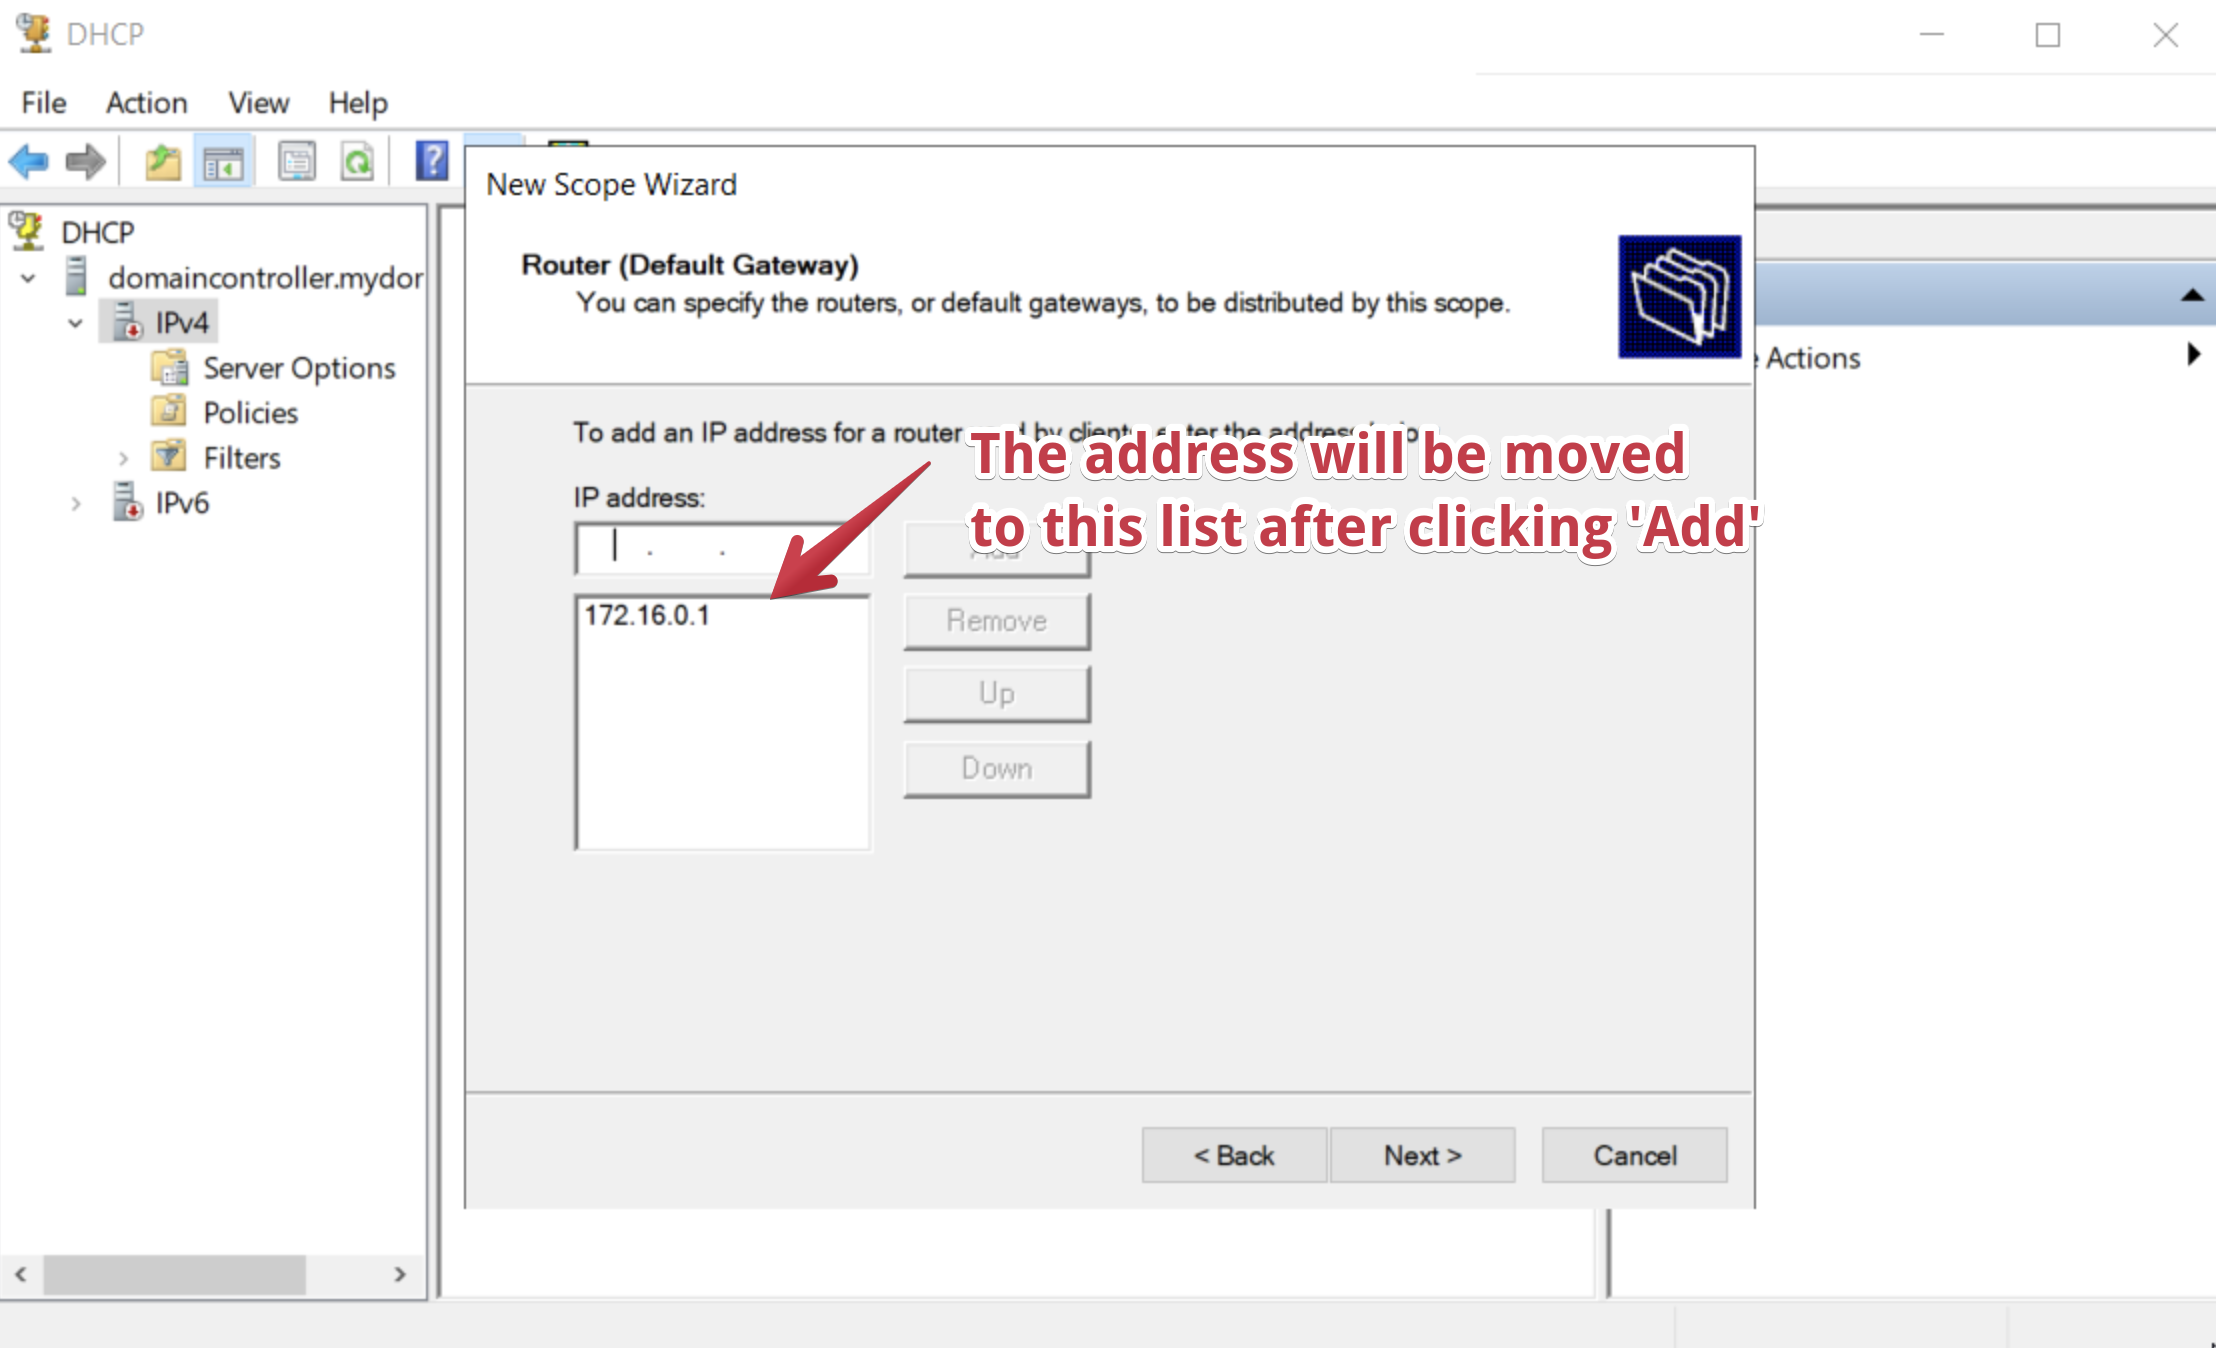
-
Earlier in our setup DNS was already configured. We can simply leave the Parent Domain field at the default
mydomain.com. Click Next.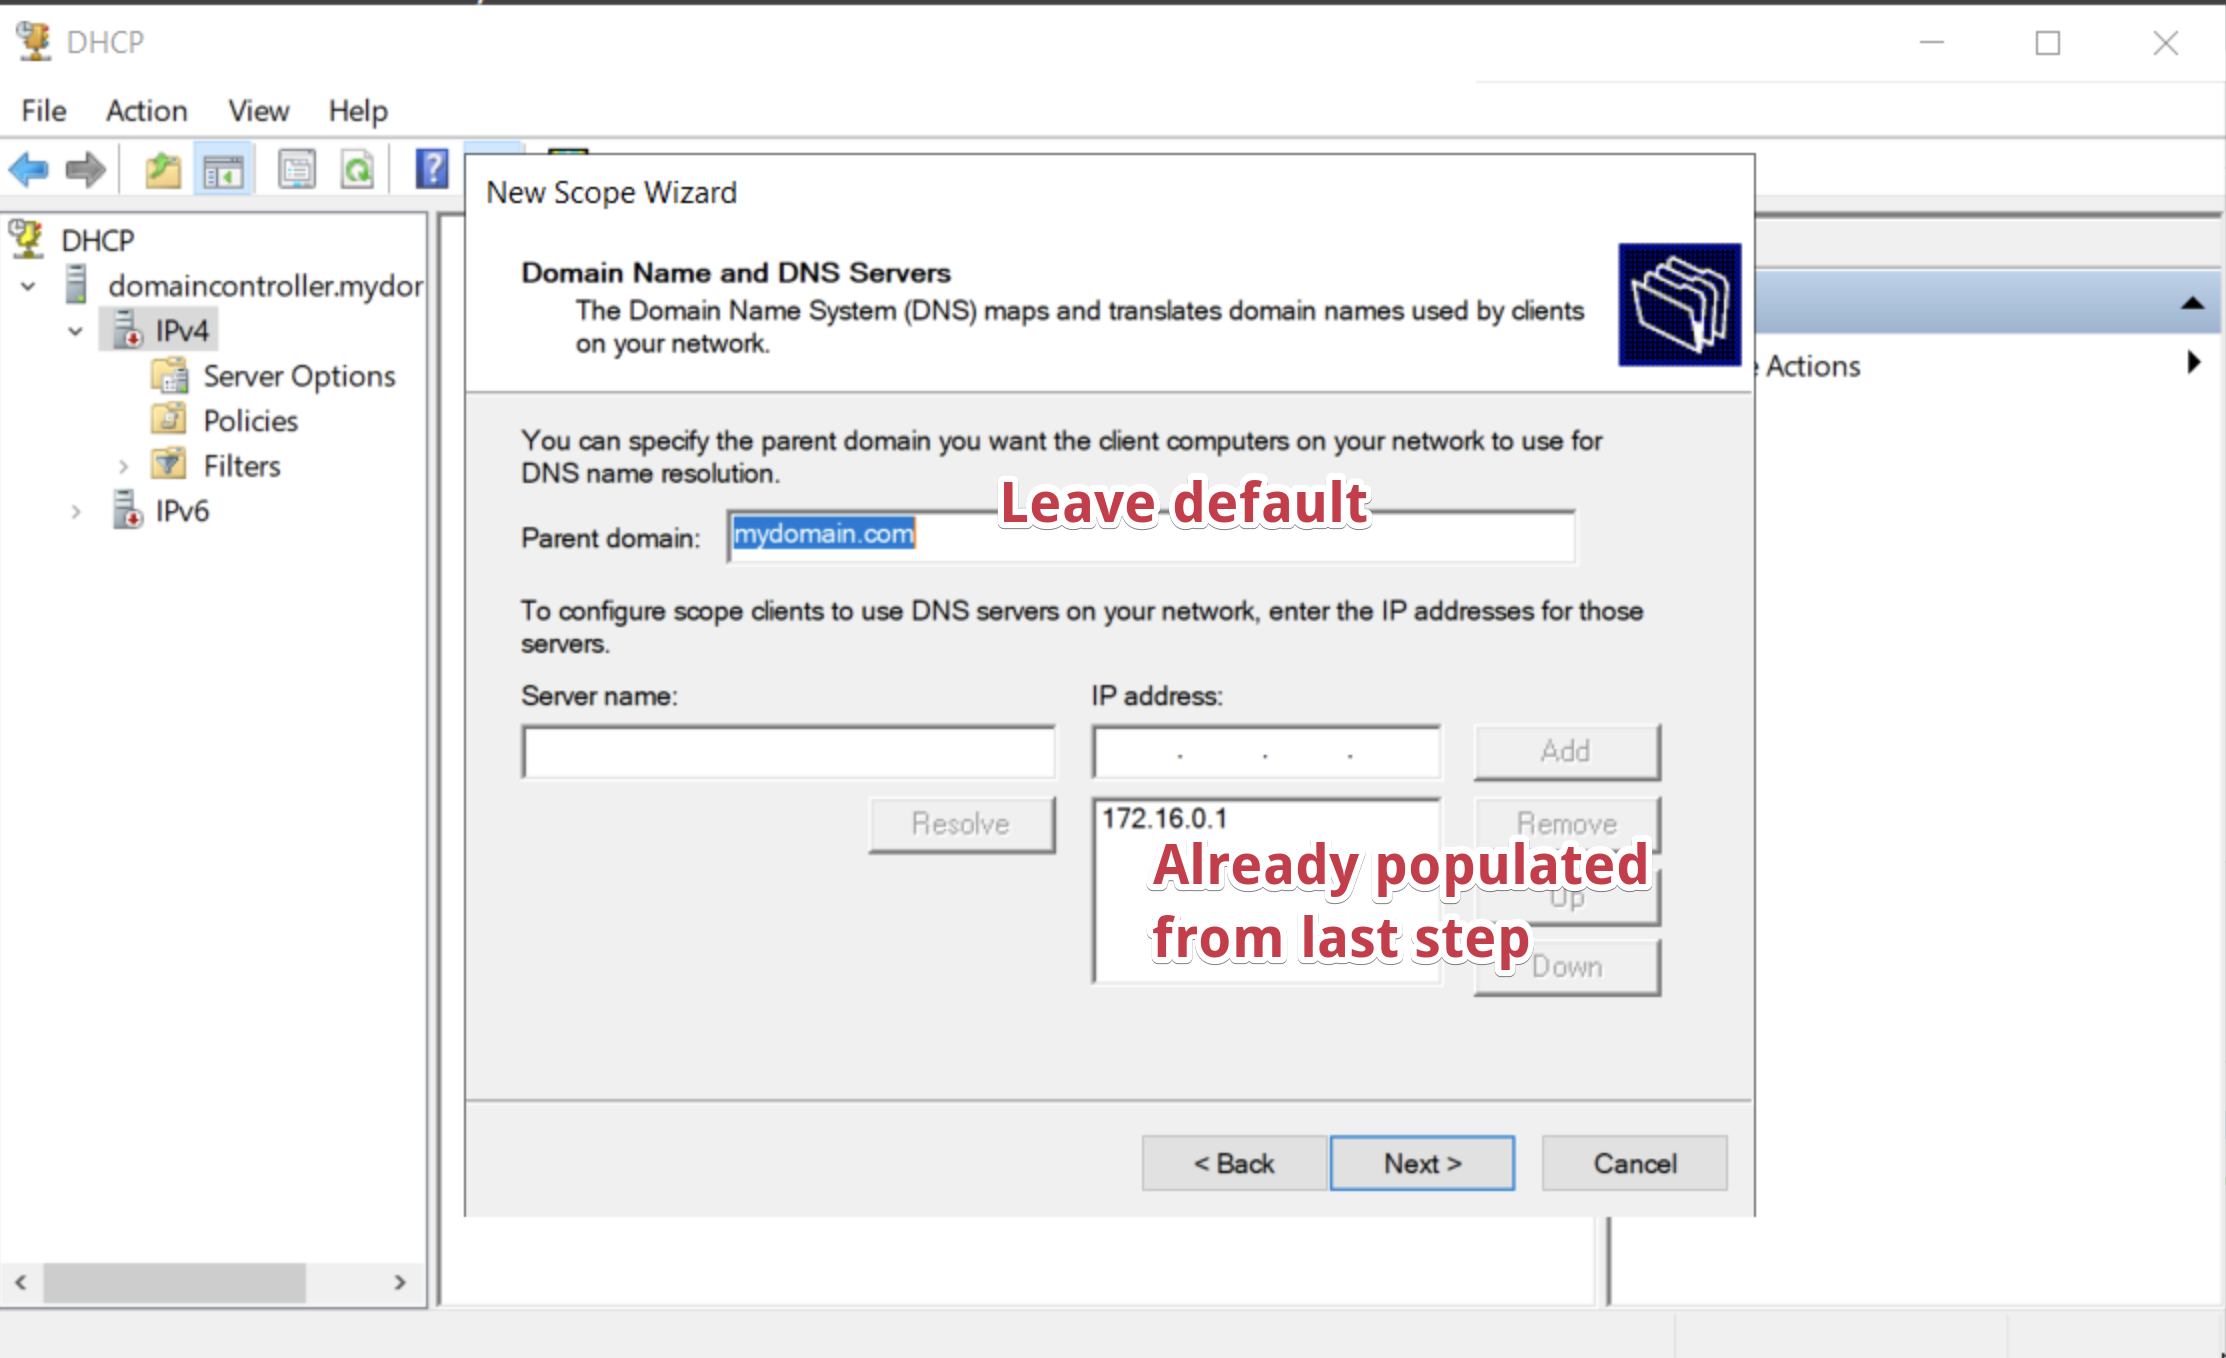
-
Skip the WINS Server configuration by clicking Next.
-
Ensure you've selected "Yes, I want to activate this scope now" and click Next.
-
Click Finish to complete the wizard.
-
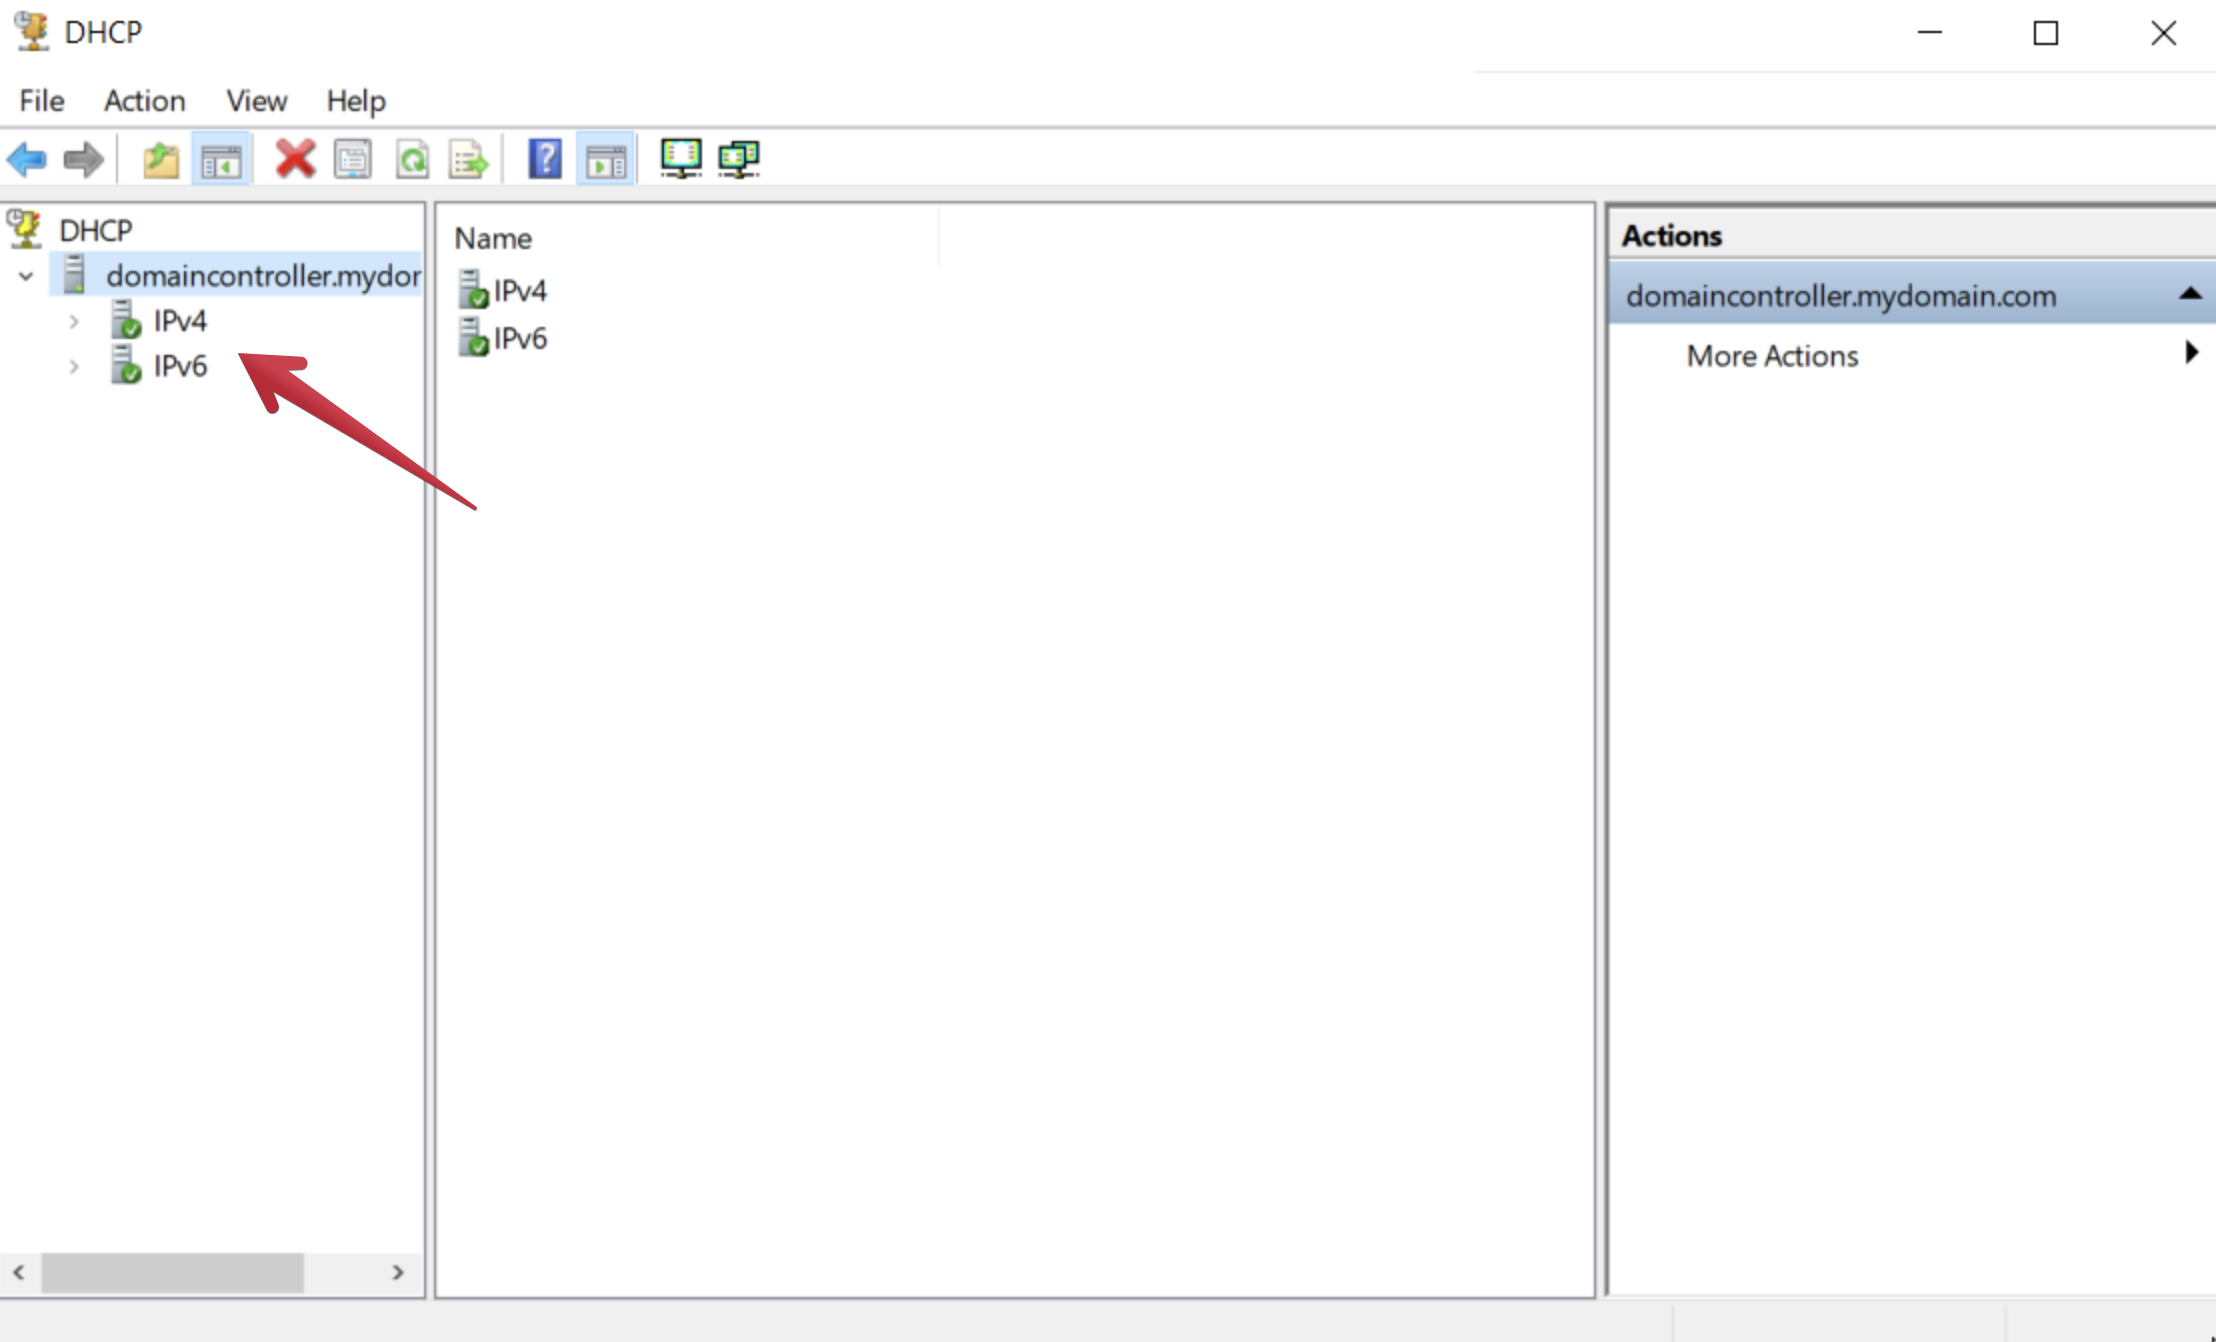
You'll see the scope listed in the DHCP console with a green up arrow indicating that it is active.
warningIf you see a red down arrow, right-click on the scope and select Authorize. This will activate the scope. You may also need to right-click on the server name and select Refresh.
Once all this has been completed, you'll be able to click on the IPv4 scope and get a bunch of handy information such as the number of addresses in use, the number of available addresses, and the lease duration. You can also see the IP address range and the subnet mask. There is not much there yet, as we have not connected any clients to the network, but this will be a valuable resource as you grow your network.
Step 6: Create a Configuration to Browse the Internet (Lab Environment Only)
In a production environment, you would have a firewall in place to protect your network and control traffic flow. In our lab environment, we will create a simple configuration to allow our internal clients to access the internet.
This configuration is not recommended for a production environment. Always use a firewall to protect your network.
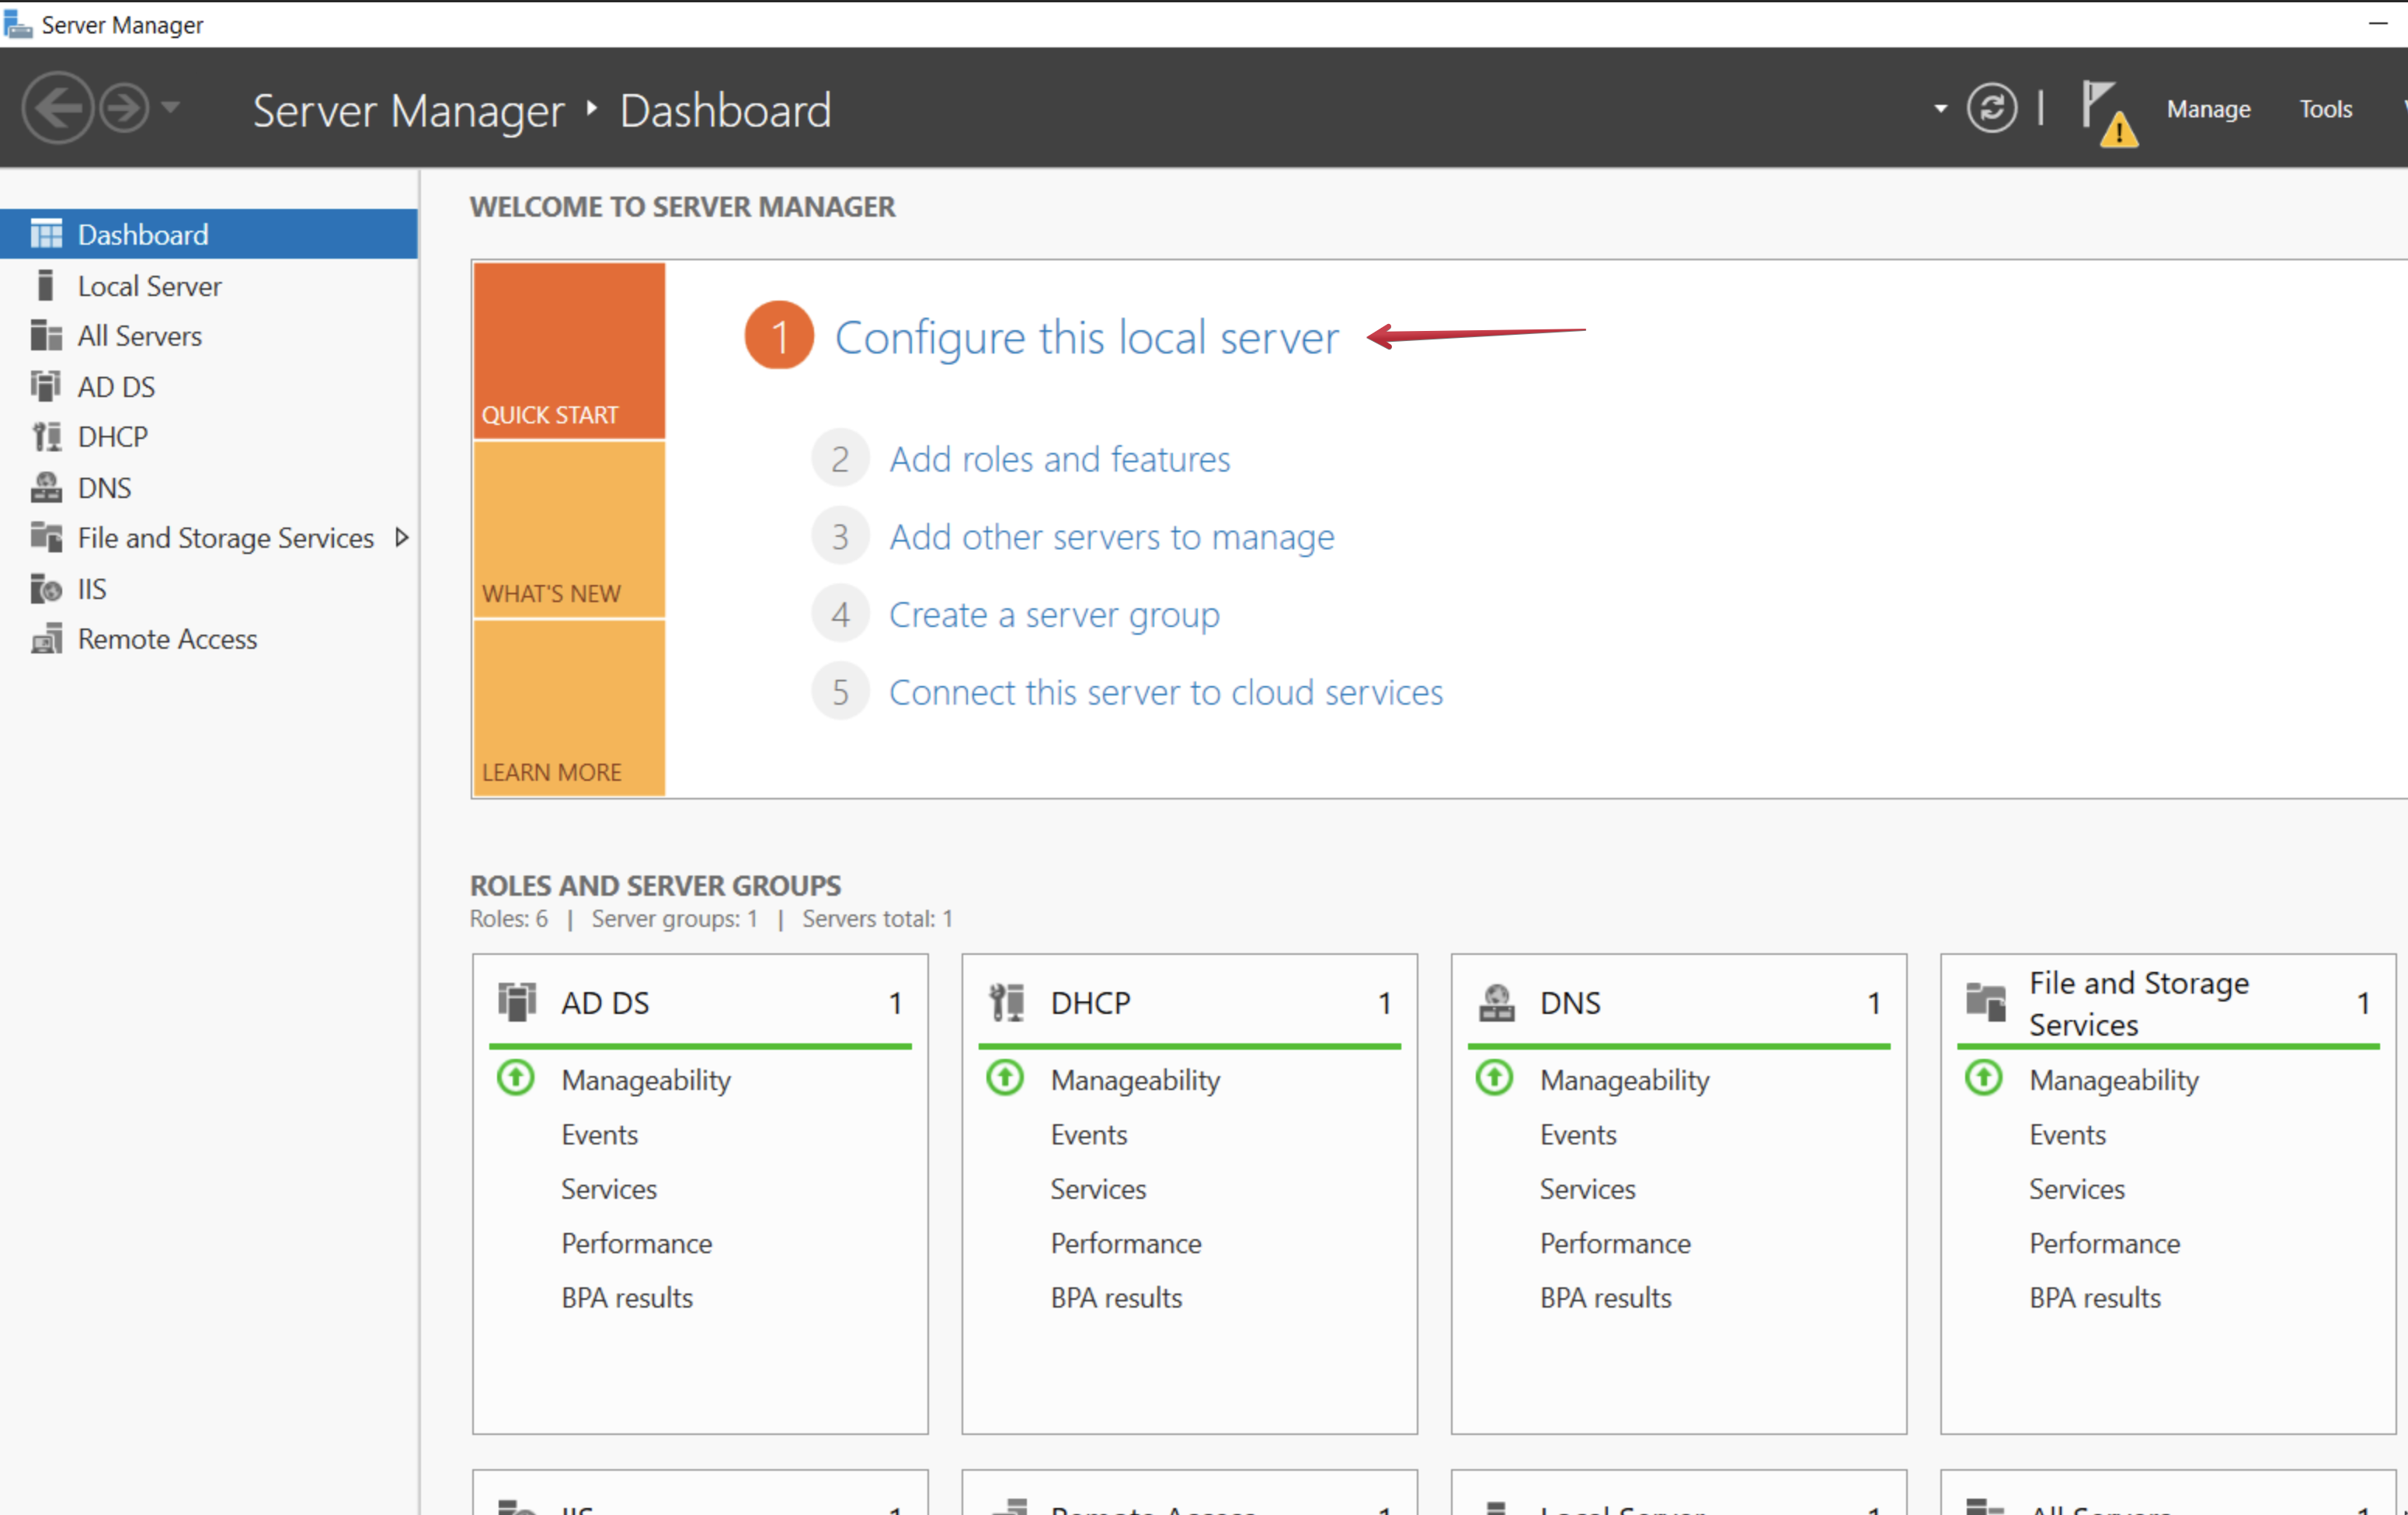
When we load up the Server Manager now, we should see the top item in the Quick Start menu says "Configure this local server".
-
Open Server Manager and click "configure this local server".
-
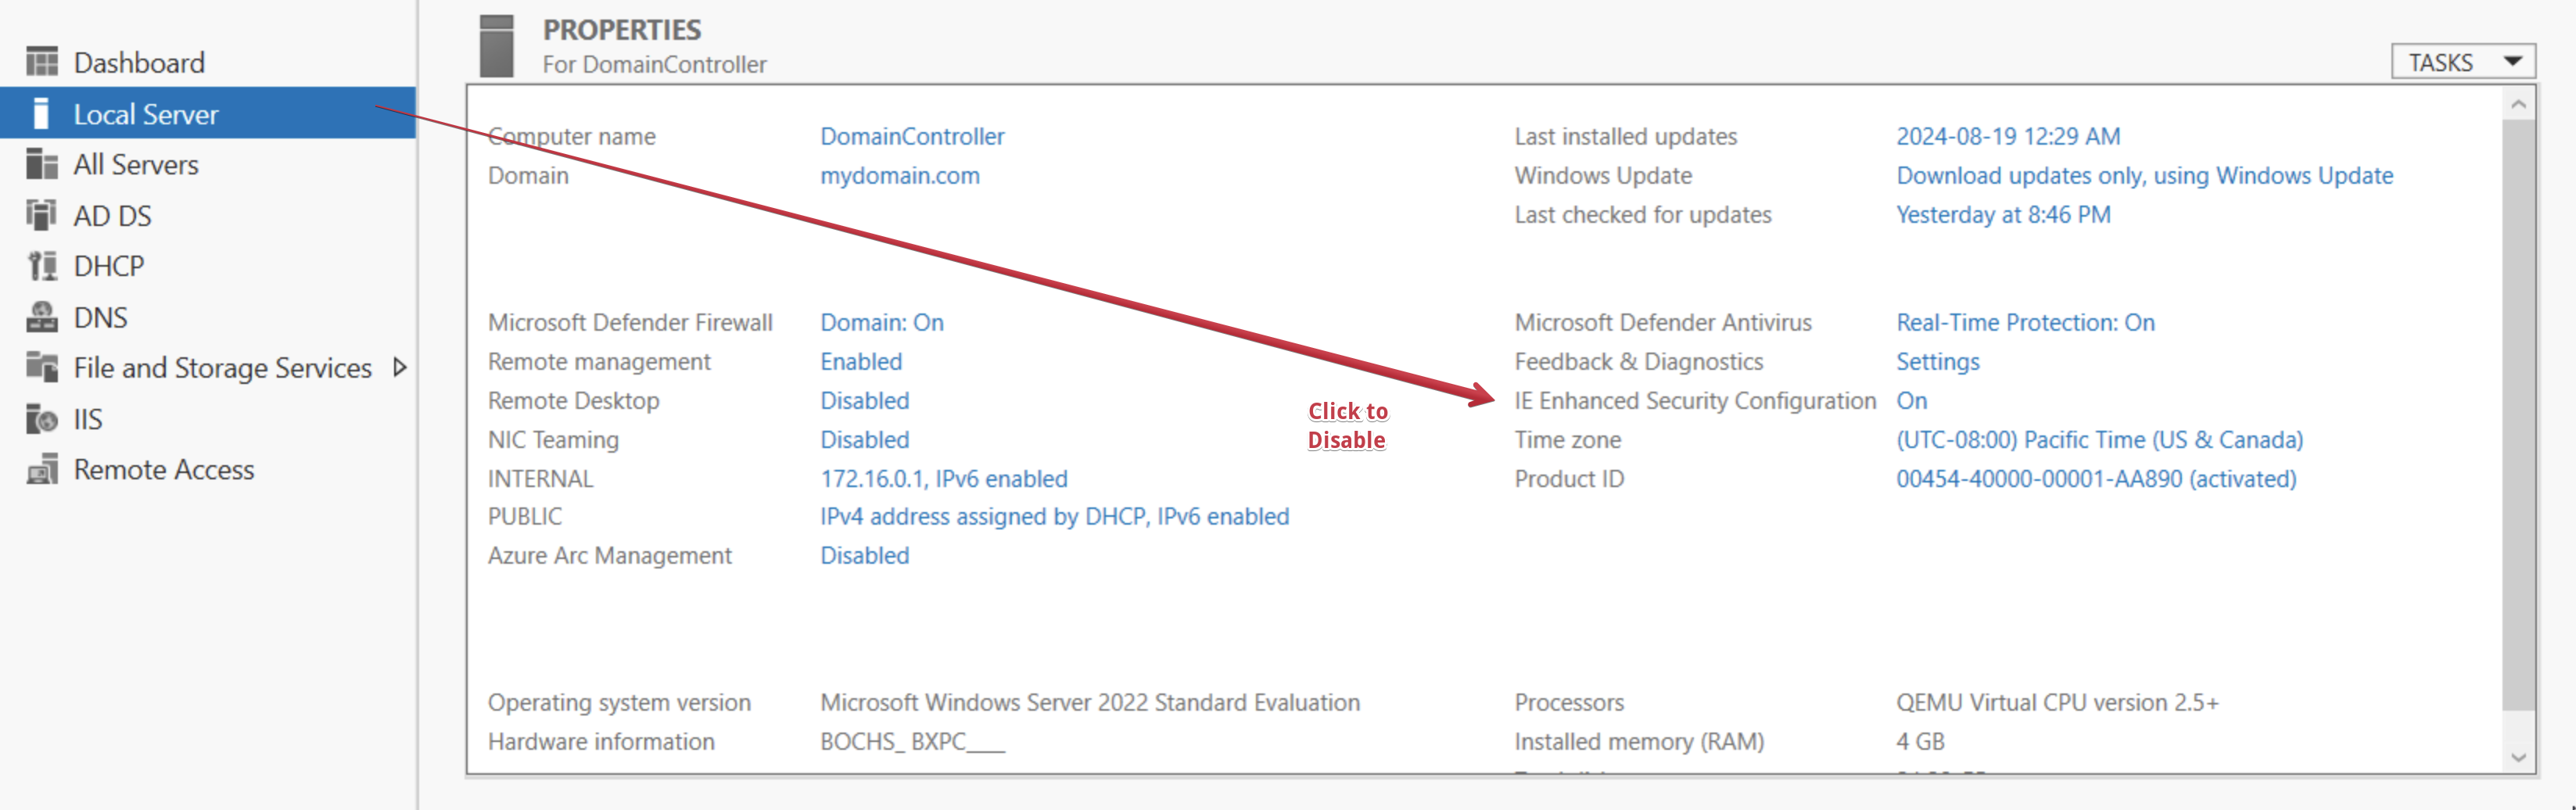
Click on IE Enhanced Security Configuration. This will open a window that allows you to turn off Internet Explorer Enhanced Security Configuration for Administrators and Users. Click Off for both.
-
Open Internet Explorer and you should now be able to browse the internet. Yes, we are using Internet Explorer. It's a lab environment and we are working with Windows Server and you may find you are often working on older systems, so it's the best option for now.
Cool. The primary purpose of this was so that we could dowload our pre-built scripts from GitHub. We will be using these scripts in the next guide to automate the creation of test users in Active Directory.