Last Updated: September 08, 2024
Lab Overview - Goals + Objective + Technologies
-
Learning Goals
- Gain proficiency in deploying and managing static websites on Microsoft Azure.
- Acquire a deep understanding of the services and requirements for Azure-based static websites.
- Master the concepts and application of Role-Based Access Control (RBAC).
- Develop skills to build a CI/CD pipeline for Azure deployments.
-
Objectives
- Successfully deploy a static website using Microsoft Azure.
- Utilize Azure App Service, Azure Storage Account, Azure CDN, and Azure DNS in the deployment process.
- Effectively manage and monitor a static website on Azure.
- Implement Role-Based Access Control (RBAC) on the website.
- Construct a CI/CD pipeline for automated deployment of the static website.
-
Technologies
- Microsoft Azure
- Azure App Service
- Azure Storage Account
- Azure CDN
- Azure DNS
Microsoft Azure
So, what is the purpose of this here guide? Primarily these documents will show how to deploy a static website on Microsoft Azure. The goals are quite simple: learn the various services and requirements for deploying a static website on Azure.
Microsoft Azure is a cloud computing service created by Microsoft for building, testing, deploying, and managing applications and services. It is one of the most popular cloud services available today and is used by many companies to host their websites and applications.
The specific services we will be using are:
- Azure App Service
- Azure Storage Account
- Azure CDN
- Azure DNS
Assumptions and Prerequisites:
- You have an Azure account
- You have a domain name
- You have a static website that you want to deploy
- You have your project pushed to a GitHub repository (or other source control)
- You have a domain name that you want to use for your website
Static Website Via Blob Storage or App Service?
We are going to do both, but because I'm a massive proponent of the long term ease of CI/CD pipelines, we will be focusing on the Azure App Service for the majority of this guide. This being the case, I am going to whip up a quick and dirty little static website and push it to a GitHub repository. It will Essentially look like something your elders (me included) would remember after loading up Netscape Navigator on Windows 95. This is it:
<!DOCTYPE html>
<html>
<head>
    <title>My Static Website</title>
</head>
<body>
    <h1 style='color:Orange; text-decoration:underline;'>Welcome to my static website!</h1>
    <p>This is a simple static website hosted on Azure using Blob Storage. The goal was to become familiar with this hosting method. The correct and complete site can be found hosted using the Azure App Service and its happy, fun, newfangled tools -- CI/CD being one of many.</p>
    <a>Click here to go to the real docs website</a>
</body>
</html>
Steps for Static Deployment via Blob Storage:
Now, invariably, you will log into the Azure Portal and see something that looks rather different than what is written and shown here. This has something to do with these big ol' corporations changing things around more frequently that you or I change our underwear. The fundamentals remain the same and items will likely still be titled similarly - eg. we will be looking for a Storage Accounts or some variation of that.
I. Create a Storage Account if You Don't Already Have One
- Log in to the Azure Portal
- Create a new Storage Account by clicking on the '+' icon in the top that says 'Create a resource'.
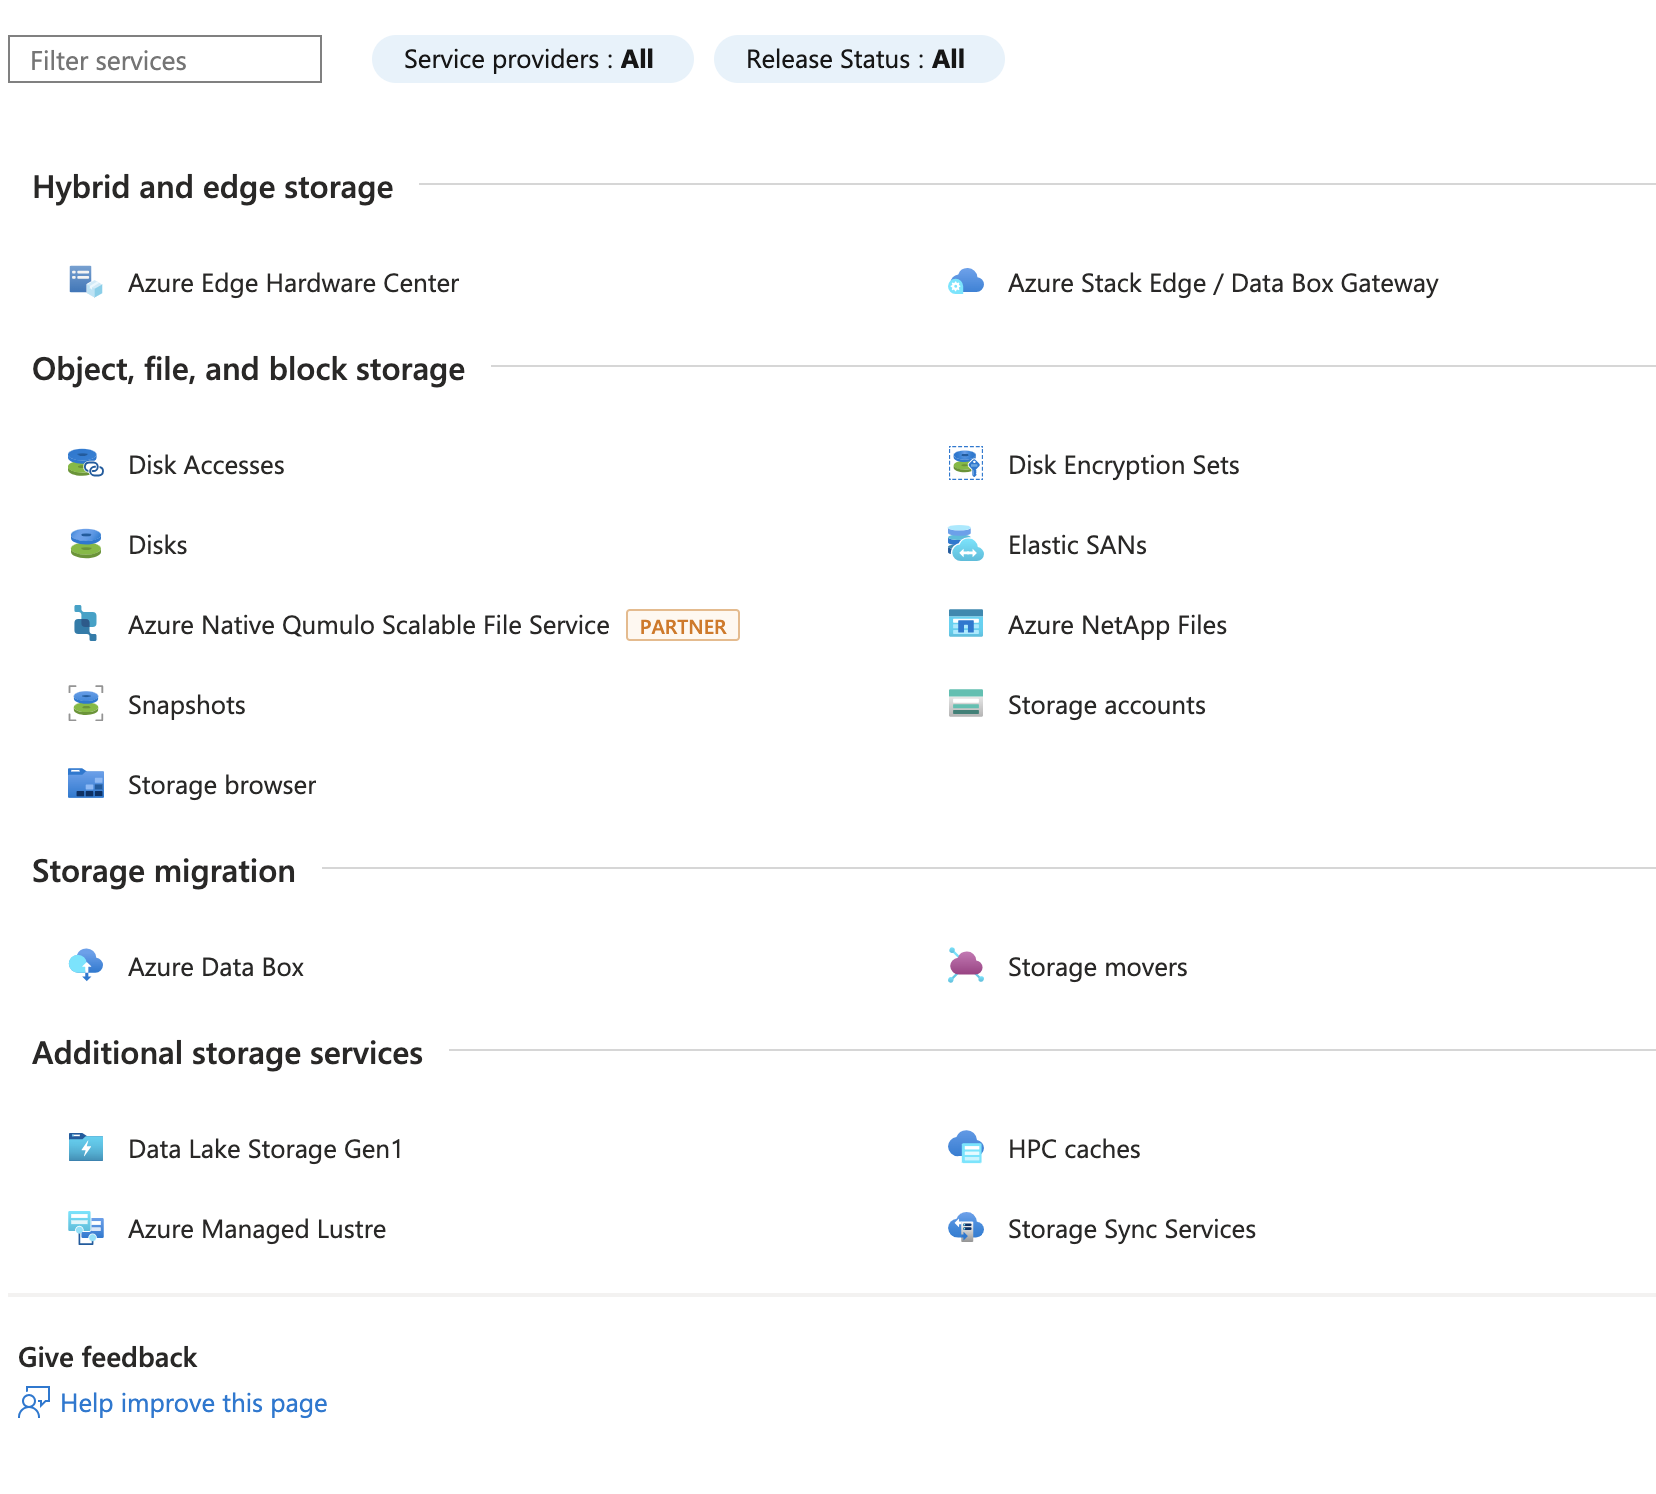
- In the left menu, click on 'Storage' and look for 'Storage Accounts'. Click on it.
- You will see something similar to this:
- Click on the 'Create' button and fill in the required information. Here is what I've done:
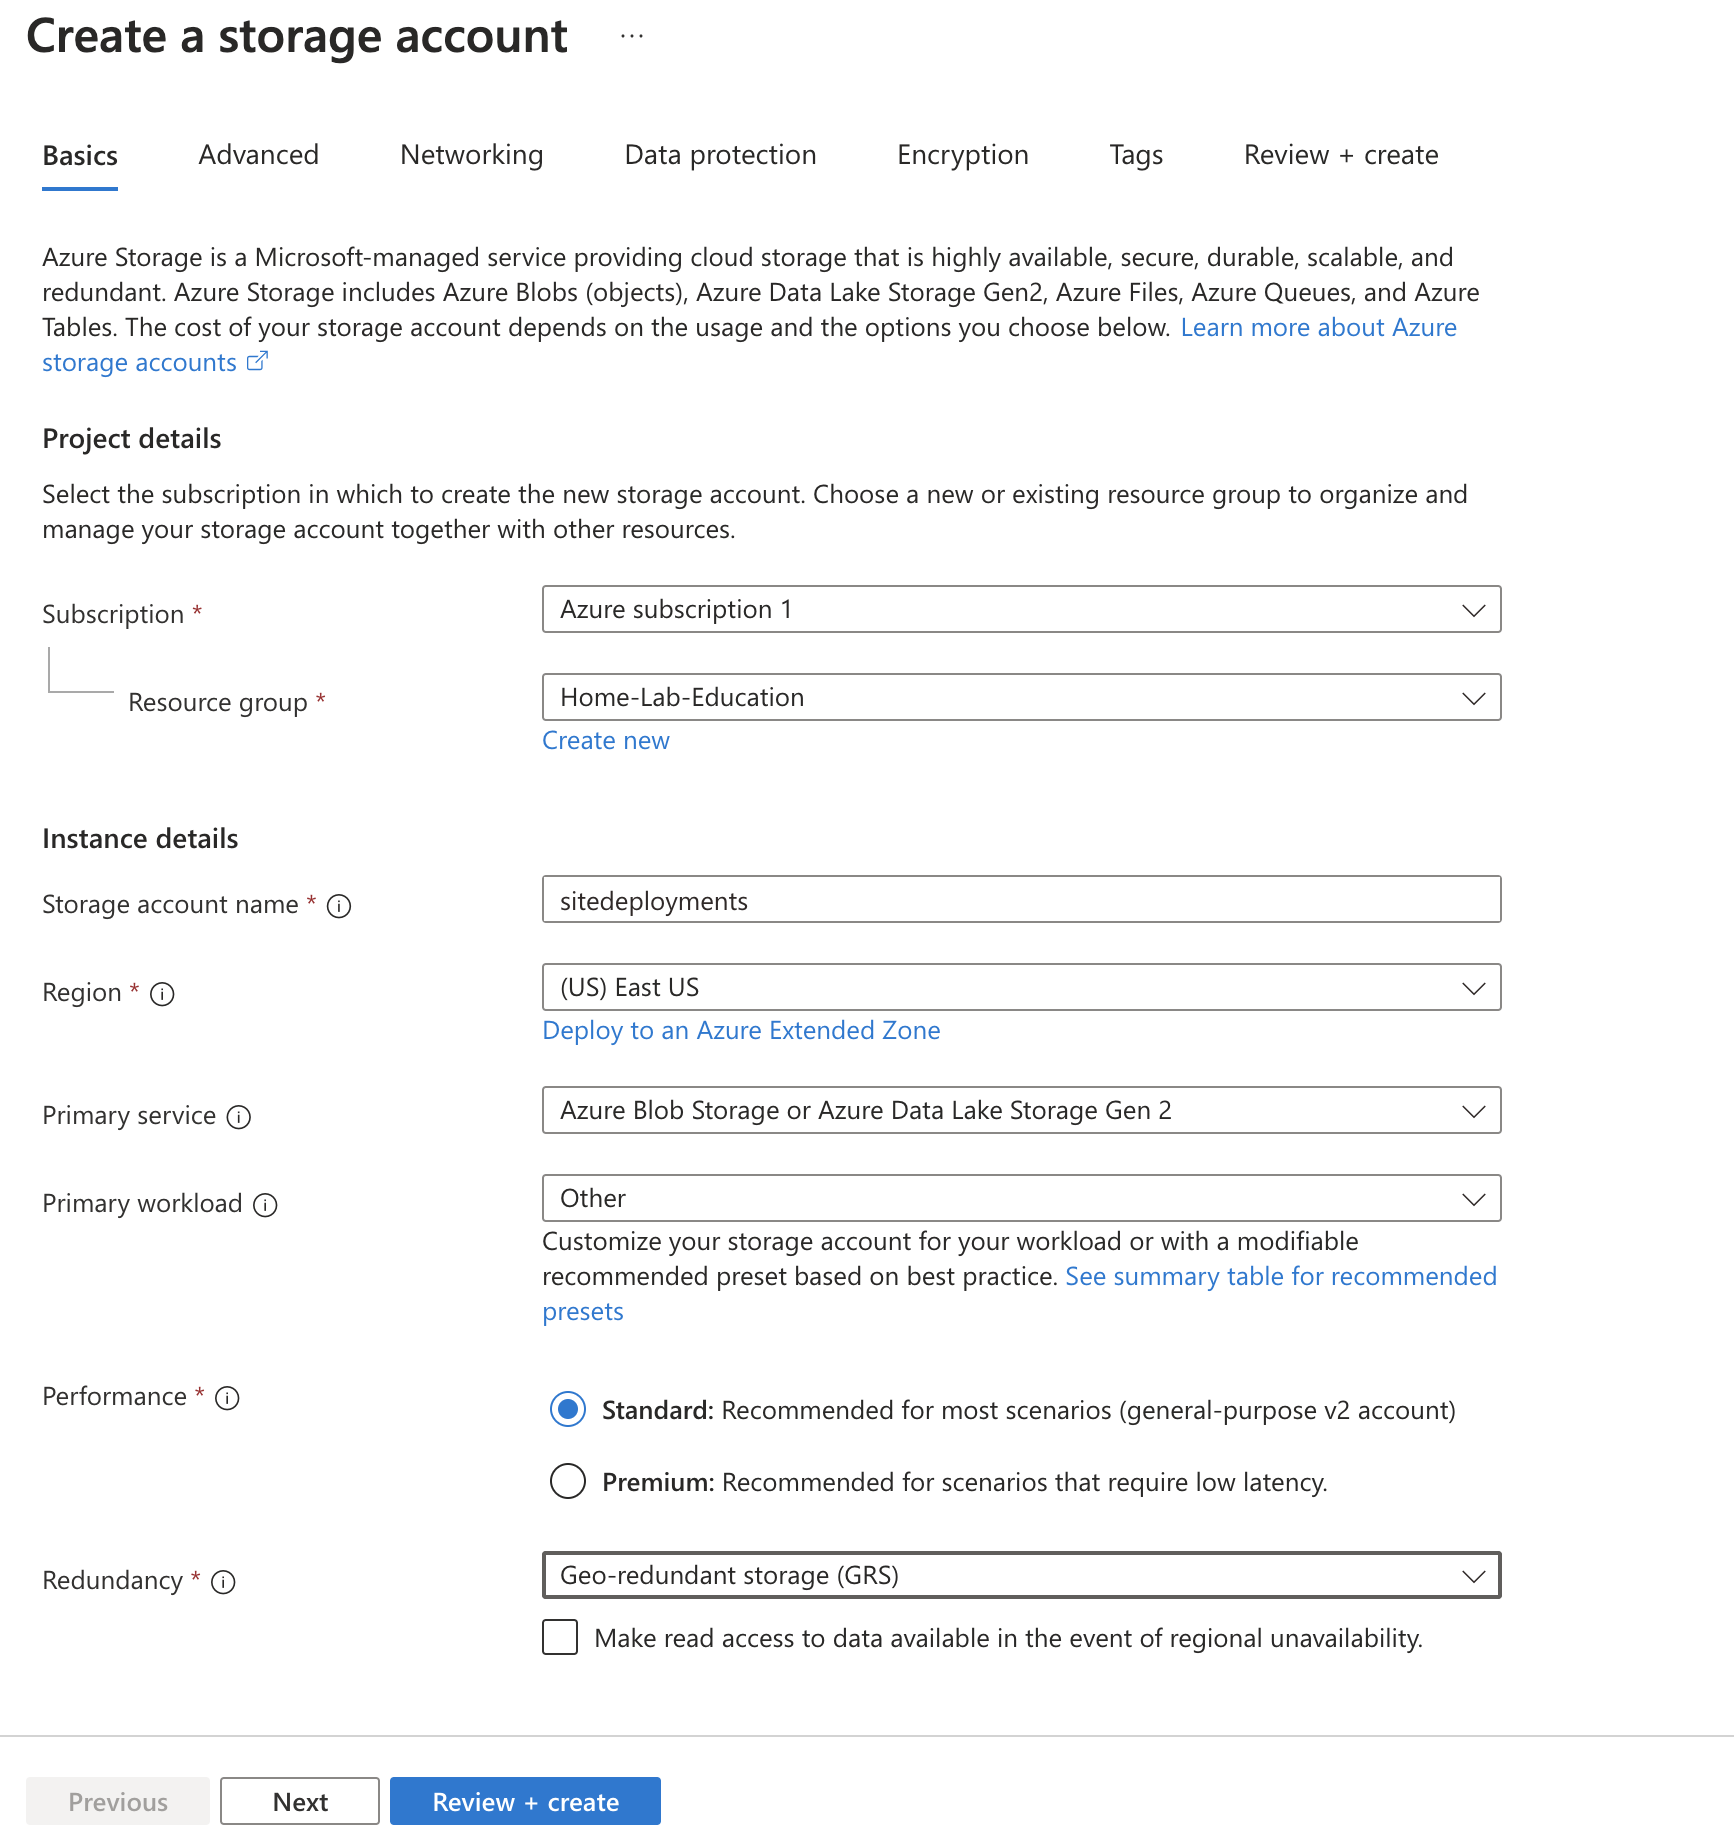
- Click 'Review + Create' and then 'Create' to create the Storage Account. You'll see a 'Deployment in progress' message. With some patience you'll soon see a review of the deployment and a 'Go to resource' button. Click it.
II. Static Website Configuration
Wonderful. We can now proceed with configuring the static website.
- After having clicked 'Go to resource', you'll see some details on the resourde with a tabbed menu. Look for "Capabilities" and click on it. You'll see a menu item called "Static website". Click on it:
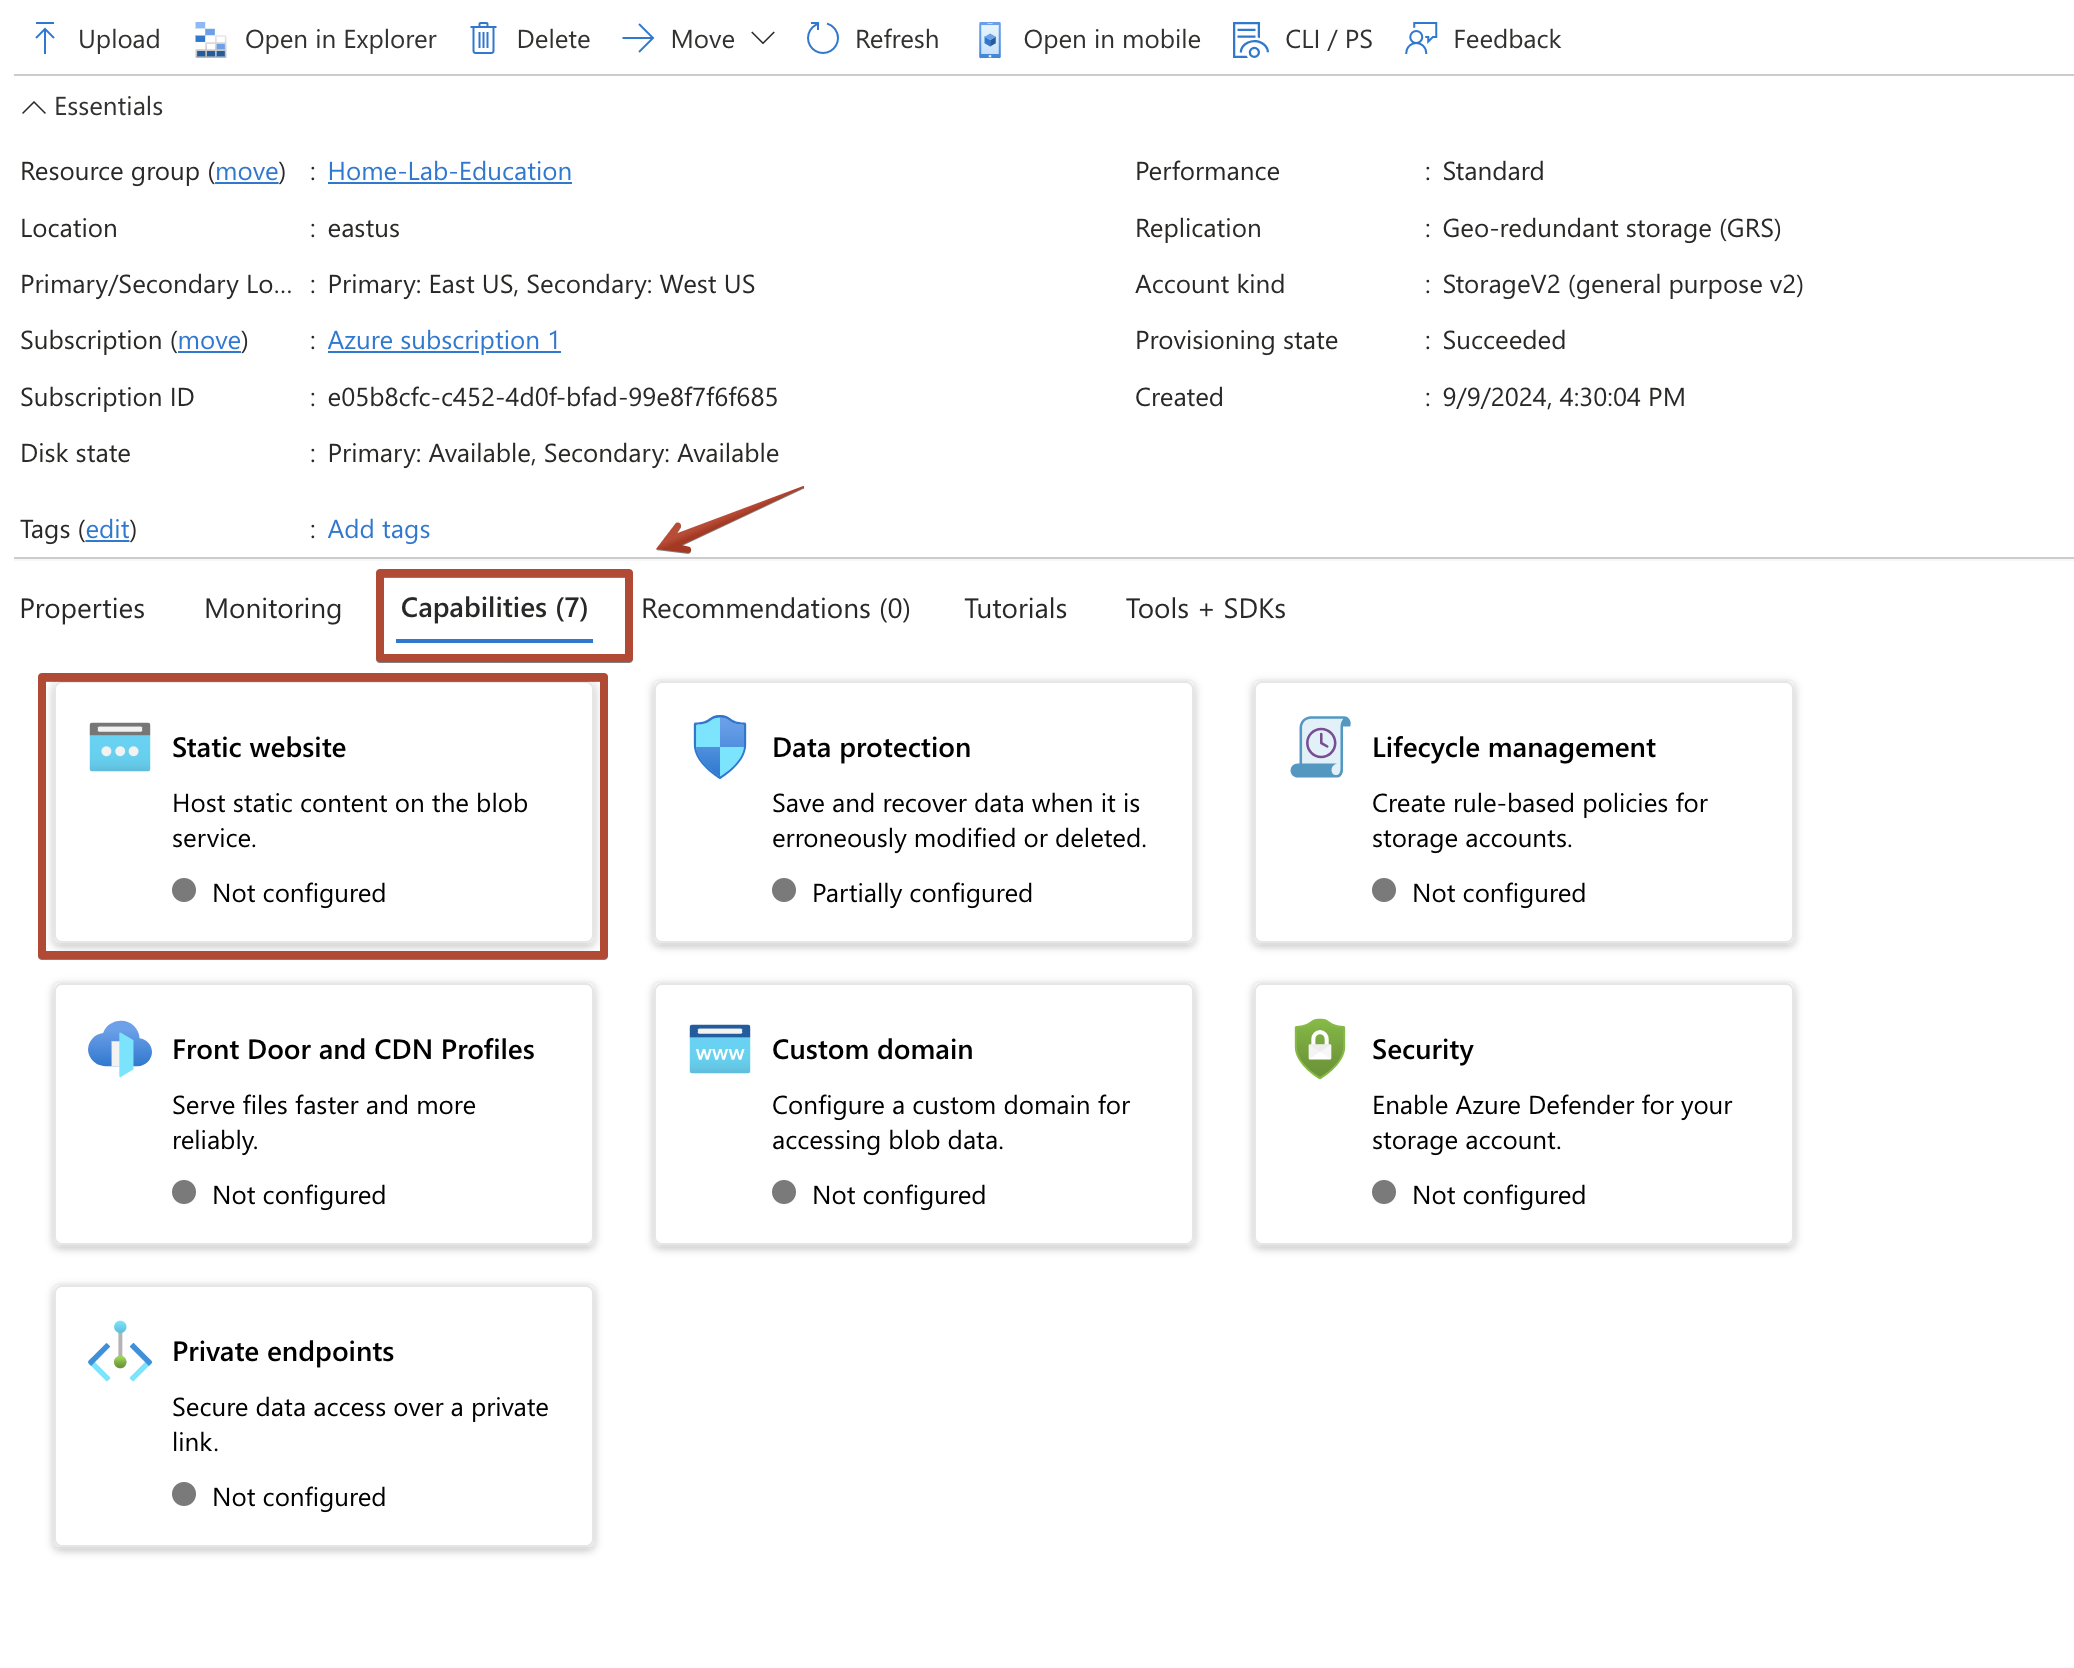
- Go ahead and click on that big beautiful card that says "Static website" and you'll see a screen that that shows a simple 'disable / enable' toggle. Click 'Enable'.
- Once enabled, you'll see two new fields:
Index document nameandError document path. You can assign values to these - I've chosen the standards ofindex.htmlfor the first and404.htmlfor the error page. - Click 'Save'.
IV. Upload Your Static Website Files using Azure CLI
I like bash. I'm a Mac and Linux user primarily and though I am happy to tinker in Windows and use Powershell, I'll save Powershell for a dedicated future tutorial deep dive.
We are going to want easy access to our local files where our website was built. This is most easily done with a local instance of the Azure CLI. If you don't have it installed, you can do so by following the instructions here.
- Open a terminal on your local machine and log in to your Azure account by typing
az login. You'll be prompted to open a browser and enter a code. Do so and you'll be logged in. - Back in the terminal, after you've logged in, you'll see a prompt asking which Tenant and subscription you'd like to use. Choose the one you want to use.
- Once you'lve logged in and selected your subscription, you can run the following command to upload your files to the Storage Account:
az storage blob upload-batch -s <source-path> -d '$web' --account-name <storage-account-name>
- Ensure you replace
<source-path>with the path to your local files, and<storage-account-name>with the name of your Storage Account. For example, my command looked like this:
az storage blob upload-batch -s ~/Sites/Production/Guides/AzureblobStatic/ -d '$web' --account-name sitedeployments
V. Access Your Static Website
After the files have been uploaded, you can access your static website by navigating to the URL provided in the 'Static website' tab of your Storage Account. It will look something like this:
https://<storageaccountname>.z13.web.core.windows.net/
Again, replace <storageaccountname> with the name of your Storage Account.
Voila! 90s style website hosted on Azure Blob Storage.